Quantcast
Channel: Blog – Confluent
Viewing all 175 articles
Browse latest View live

Introducing Confluent Platform 5.3

$
0
0

Delivers the new Confluent Operator for cloud-native automation on Kubernetes, a redesigned Confluent Control Center user interface to simplify how you manage event streams, and a preview of Role-Based Access Control for enterprise-grade security

Over the past year, we’ve been amazed at how fast Confluent Platform has matured within our user base—both in terms of size and criticality of deployments. If you’re like most users, chances are that Confluent Platform is rapidly becoming the new standard for integrating your data and applications to uncover new insights about your business, build real-time customer experiences, and create new business models.

However, deploying and operating a distributed data system at scale can be challenging. As you scale the platform to support additional use cases, you may be facing challenges around lengthy deployment cycles, operational complexity, or difficulties in ensuring enterprise-grade security.

To solve these challenges, Confluent Platform 5.3 delivers enhancements that will help you:

  • Automate Apache Kafka® operations for production environments
    • The new Confluent Operator simplifies running Confluent Platform as a cloud-native system on Kubernetes, on-premises, or in the cloud, by automating deployment tasks and key lifecycle operations. Confluent Operator is based on proven technology, already leveraged to run Confluent Cloud, our fully managed event streaming service, at scale and with mission-critical service levels.
    • Open source, production-ready Ansible playbooks provide a simpler, more automated way of deploying Confluent Platform in non-containerized environments, fully supported by Confluent.
  • Simplify management across user interfaces
    • A redesigned user interface for Confluent Control Center provides a more intuitive user experience, making it easier to understand your deployments and manage them at scale.
    • A new production-ready command line interface (CLI) provides a more idiomatic way of configuring Confluent Platform in production, with an upgraded experience on local installs and support for managing Role-Based Access Control.
  • Secure the platform end to end
    • A preview of Confluent Role-Based Access Control (RBAC) allows you to test out providing secure authorization to resources without having to assign individual privileges to each and every user. RBAC is enforced across Confluent Platform components and user interfaces.
    • New Secret Protection encrypts secrets within the configuration file itself and does not expose the secrets in log files. It enables end-to-end secret protection across all Confluent Platform components.

Automate Kafka operations for production environments

Our goal is to simplify Kafka operations through automation so you can build more applications faster while ensuring a high level of consistency across environments.

Introducing Confluent Operator for Kubernetes

Kubernetes has become the open source standard for orchestrating containerized applications, but running stateful applications such as Kafka can be difficult and requires a specialized skill set. Thus, we decided to automate the process for you.

For the past few months, we have been working closely with a set of customers and partners as part of a preview program to gather their early feedback. We are now ready to release Confluent Operator, our enterprise-ready implementation of the Kubernetes Operator API to automate deployment and key lifecycle operations of Confluent Platform on Kubernetes.

Deploy to production in minutes

The first thing you’ll get with Operator is the ability to programmatically deploy and edit Kafka resources. Using Helm as the package manager, you can specify configurations for security and authentication, storage volumes, and the networking needed between platform components and to clients outside the Kubernetes cluster.

If you are using more components of Confluent Platform than just Kafka, remember that Confluent Operator can deploy Kafka Connect, KSQL, Schema Registry, Auto Data Balancer, Control Center, and Replicator in addition to Kafka and ZooKeeper. This level of automation helps you build a consistent, repeatable, and production-ready platform in a matter of minutes, so you can spend more time building new event streaming applications.

Automate key lifecycle operations

To extend the cloud-native operational model to Kafka, Confluent Operator also automates a couple of key lifecycle operations. The first is automated rolling upgrades, which keeps your platform current with version, configuration, and resource updates without impacting Kafka availability. The second is the ability to scale the environment more elastically by automating the addition and removal of Kafka brokers, Connect workers, KSQL nodes, and other components of the Confluent Platform.

Deploy on any platform, on premises or in the cloud

As you would expect, you can run Confluent Operator on build-your-own, open source Kubernetes. To give you more choice, we are also building an ecosystem of Kubernetes partners. If you are operating your own private cloud environment, on-premises or in the cloud, we support enterprise distributions such as Pivotal Container Service (PKS) via the Pivotal Services Marketplace, VMware Enterprise PKS via the VMware Solution Exchange, Red Hat OpenShift, Mesosphere Konvoy, and Mesosphere Kubernetes Engine.

If you prefer fully managed services in the cloud, Confluent Operator also supports services from all major cloud providers, including Google Kubernetes Engine (GKE), Amazon Elastic Kubernetes Service (Amazon EKS), and Azure Container Service (AKS).

Here’s a word from some of our partners:

“The use of microservices in modern software design has become widespread,” said Cornelia Davis, VP, Technology at Pivotal. “Pivotal fast-tracks adoption by integrating our cloud platform with enabling technologies like Spring Boot and Spring Cloud services to create a DevOps-friendly solution. The remaining challenge is in the data tier, because enterprises have a lot of data locked up in legacy stores. This is where event streaming architectures, now made easier with Confluent Platform on Pivotal Container Service (PKS), can help enterprises unlock even more value.

“A successful platform ecosystem designed to ensure customers avoid vendor lock-in is key to customer success when it comes to digital transformation,” said Jennifer Lin, Director of Product Management for Anthos at Google Cloud. “By offering Confluent Platform deployed via Confluent Operator on Anthos with seamless Google Kubernetes Engine integration, we have given customers an easy way to build and manage modern hybrid applications, and leverage Google Cloud’s differentiated infrastructure.”

Run at scale with confidence

Confluent Operator operationalizes years of experience running Kafka on Kubernetes at massive scale as part of our managed service, Confluent Cloud. This means you will experience a proven, battle-tested solution that you can deploy without deep Kubernetes expertise.

If we had you excited about adding automation to your Kafka deployments on Kubernetes, but you are running a non-containerized environment, we still have good news.

Production-ready Ansible Playbooks for Confluent Platform

Confluent has offered open source Ansible playbooks for some time, but they were not officially supported. Confluent Platform 5.3 includes enhancements to offer open source, fully supported, production-ready Ansible Playbooks that provide a simple and automated way to deploy the platform. Here’s what you can look forward to:

  • Improved documentation with detailed information about configuring Confluent Platform
  • Support for CA-based TLS certificates with two-way TLS mutual authentication
  • Support for SASL GSSAPI (Kerberos) for authentication
  • Added backward compatibility: deploy two major versions backwards from the latest major release

With Confluent Operator and Ansible, we are simplifying how you deploy production-ready environments. Now, let’s discuss how to simplify your management experience.

Simplify management across user interfaces

Users of Apache Kafka vary widely in their roles and needs. This is why we are actively investing in providing a complete set of user interfaces that fit you and your way of working.

Redesigned Confluent Control Center user interface

Control Center has rapidly improved ever since Confluent Platform 5.0, introducing features like consumer lag, a message browser, Schema Registry integration, the KSQL UI, dynamic broker configuration, and several more. This time, we decided to rethink what a great GUI to Kafka would look like and how it could make working with Kafka far easier.

Informed by dozens of customer interviews and user research sessions, Confluent Platform 5.3 delivers a completely redesigned user interface for Confluent Control Center that caters to your specific needs, whether your primary focus is operating a Kafka cluster or developing applications on it. If you’re focused on operations, you’re probably thinking about the hard work of making sure performance and availability SLAs are met. If you’re building applications, you’re more likely to want to inspect messages, create topics, change schemas, deploy connectors, and develop KSQL queries. If you live the DevOps life, you might be doing all of these.

Regardless, the redesigned UI offers a more cohesive and logical experience that will help you build the right mental model about the state of the platform and the data flowing through it. The end result is that it’s easier to understand, manage, and troubleshoot Kafka at scale.

If you are running a hybrid environment, you will also be excited to learn that the new UI offers a consistent user experience, whether you are running Confluent Platform on-premises or using our fully managed service, Confluent Cloud.

Although this is a complete redesign, here are just a few highlights:

  • New homepage: provides a global view of the health of all your clusters and connected services
    Confluent Control Center Homepage
  • Brokers overview: provides an at-a-glance view of key Kafka metrics
    Confluent Control Center Brokers Overview
  • Topics index and overview: shows all topics in the cluster and provides a topic overview that includes a health rollup
    Confluent Control Center Topics Index and Overview
  • Improved message browser: eliminates throttling and message loss, enables search by offset or timestamp from head to tail per partition, and allows you to download messages
    Confluent Control Center Message Browser
  • Connect and KSQL indexes and overviews: provides an overview of all Connect and KSQL clusters with search capabilitiesConfluent Control Center: Kafka Connect and KSQL Indexes and Overviews
  • Improved KSQL UI: introduces a data discovery side panel with click-to-SELECT and a resizable editorConfluent Control Center: KSQL User Interface

We aim to provide a complete set of software interfaces, and this also includes a well-designed CLI.

New Command Line Interface

The previous version of the Confluent Platform Command Line Interface (CLI) was strictly for development use. We know from our own experience that you need a single, unified piece of command line tooling to handle common tasks across the development and deployment of an enterprise-grade system. This is why Confluent Platform 5.3 introduces a new production-ready CLI, fully supported by Confluent.

If you’ve gotten used to the previous CLI, don’t worry! The new CLI will allow you to perform all the same operations and more, all with very similar syntax.

Now that we have covered how Confluent Platform 5.3 provides automated deployments and simplified management, it’s time to look at how it makes your platform fundamentally more secure.

Secure the platform end to end

A comprehensive security strategy involves ensuring access to resources in a way that is simple enough to reason about, yet flexible enough to implement your organization’s security policies with precision. As your usage of event streaming increases, you may need to grant access to tens or even hundreds of users. This includes not just Kafka, but also Connect, KSQL, Schema Registry, and so on, and it requires a new way of thinking about authorization

Introducing the preview of Confluent Role-Based Access Control

We are very excited to deliver a preview of Role-Based Access Control (RBAC) for development environments. To provide secure authorization not just by user but by group as well, RBAC uses a set of seven predefined roles that help reassign the responsibility of managing permissions and access to the true resource owners, such as departments and business units.

RBAC authorization is comprehensive, enforced via all user interfaces (Control Center, new CLI, and APIs) across all Confluent Platform components (Connect, KSQL, Schema Registry, REST Proxy, and MQTT Proxy). On Kafka Connect clusters, we went one step further to provide connector-level access control. This will let you run secure Connect clusters shared across departments, while optimizing your resource utilization through multi-tenancy. RBAC provides tight integration with Active Directory and LDAP, so you can have a centralized way of configuring authentication and authorization for the entire platform.

RBAC will simplify large scale user/group authorization management across all Confluent Platform resources. We are introducing RBAC in preview right now, so please try it out in your development environment and feel free to provide feedback.

Introducing Confluent Secret Protection

Security compliance often requires that services do not store secrets as cleartext in files. These secrets may include passwords, or any other sensitive data in configuration files or log files. The best approach to this problem is to encrypt secrets directly, so that they are never stored in cleartext. Confluent Platform 5.3 introduces a Secret Protection feature that encrypts secrets within the configuration file itself and does not expose the secrets in log files. It extends the security capabilities introduced in KIP-226 for brokers and KIP-297 for Connect to enable end-to-end secret protection across all Confluent Platform components: Kafka brokers, Connect, KSQL, Schema Registry, Control Center, REST Proxy, etc.

New Confluent Server software package

To use Confluent Operator, the RBAC preview, or the LDAP Authorizer introduced with Confluent Platform 5.2, you need to deploy the Confluent Server software package. Confluent Server is a new, optional component of Confluent Platform that includes Kafka and additional software to enable these new features. You have the option of deploying Confluent Platform with the Confluent Server if you want to leverage RBAC, LDAP or Operator, or you can deploy with Apache Kafka if you don’t have a need for these features. If you are already a Confluent Platform user, you can easily migrate from Apache Kafka to Confluent Server and migrate back if required. For more information on how to migrate to the Confluent Server, see the documentation.

Built on Apache Kafka 2.3

As is standard for all of our releases, Confluent Platform 5.3 is built on the most recent version of Apache Kafka, which in this case is version 2.3. If you want to learn what’s included in 2.3, we have several resources available for you:

Get started

With Confluent Platform 5.3, you can automate deployments, whether they are on-premises or in the cloud, using Confluent Operator and the production-ready Ansible Playbooks. You can more easily understand and manage your event streams with the redesigned Control Center interface and the new CLI. You can secure access to your entire platform without losing your mind using the Role-Based Access Control preview.

There are many more features in Confluent Platform 5.3 than what we cover here, which you can read about in the release notes. If you simply want to try them, download Confluent Platform 5.3.

Download Confluent Platform 5.3

You can also find a summary of what’s new in Confluent Platform 5.3 by checking out the podcast or video with Tim Berglund.

As always, we are happy to hear your feedback. Please post your questions and suggestions to the public Confluent Platform mailing list, join our community Slack channel, or contact us directly! We can’t make this the world’s best event streaming platform without you.

As usual, I want to thank everyone who contributed to this blog post: Mauricio Barra, Tim Berglund, Neha Narkhede, Praveen Rangnath, Justin Dorff, Raj Jain, Michael Ng, Vahid Fereydouny, Cheryle Custer, Angela Burke, and Victoria Yu.

Gaetan Castelein is VP of product marketing at Confluent, where he leads messaging for Confluent products and services. Before joining Confluent, Gaetan served as head of product marketing at Cohesity and senior director of product marketing and product management at VMware for hyperconverged and software-defined infrastructure products. He holds an MBA from the Stanford Graduate School of Business.


Building Shared State Microservices for Distributed Systems Using Kafka Streams

$
0
0

The Kafka Streams API boasts a number of capabilities that make it well suited for maintaining the global state of a distributed system. At Imperva, we took advantage of Kafka Streams to build shared state microservices that serve as fault-tolerant, highly available single sources of truth about the state of objects in our system.

Why we chose Kafka Streams

At Imperva, a recognized cybersecurity leader, one type of service that we offer is distributed denial-of-service (DDoS) protection for websites, networks, IPs, and other assets. The agents in our system—WAF proxies, Behemoth scrubbing appliances, etc.—observe these assets and their traffic. Based on their observations, we construct a formal state for each object or asset. For example, for a website, its state can be under DDoS attack or not under DDoS attack, and for a protected network, its connectivity state can be up or down.

Prior to introducing Kafka Streams, we relied in many cases on one single central database (plus a service API) for state management. This approach came with downsides: in data-intensive scenarios, maintaining consistency and synchronization becomes a challenge, and the database can become a bottleneck or be prone to race conditions and unpredictability.

Figure 1. Typical shared state scenario before we started using Apache Kafka® and Kafka Streams

Figure 1. Typical shared state scenario before we started using Apache Kafka® and Kafka Streams: agents
report their views via an API, which works with a single central database to calculate updated state.

About a year ago, we decided to give our shared state scenarios an overhaul that would address these and other concerns. We defined the following requirements for the new shared state microservices that would be built:

  • A uniform way to consume events, construct shared state (using varying algorithms), and generate shared state events
  • An API for checking state and performing maintenance
  • Scalability, high availability, and fault tolerance
  • A built-in scheduling mechanism

Kafka Streams made it possible to meet all these requirements, and the following sections provide more details on how.

A unified approach to shared state

At the core of each shared state microservice we built was a Kafka Streams instance with a rather simple processing topology. It consisted of (1) a source, (2) a processor with a persistent key-value store, and (3) a sink:

protected Topology getStreamsTopology() {
  Topology topologyBuilder = new Topology();
  topologyBuilder.addSource(SOURCE_NAME, getSourceTopicName());
  topologyBuilder.addProcessor(PROCESSOR_NAME, getProcessor(), SOURCE_NAME);
  topologyBuilder.addStateStore(Stores.keyValueStoreBuilder(Stores.persistentKeyValueStore(
    getStoreName(), getKeySerdeForInputTopic(), getValueSerdeForInputTopic()), PROCESSOR_NAME);
  topologyBuilder.addStateStore(Stores.keyValueStoreBuilder(Stores.persistentKeyValueStore(
    getSchedulingStoreName()), Serdes.String(), Serdes.String(), PROCESSOR_NAME);
  return topologyBuilder;
}

In this new approach, agents produce messages (representing state change events) to the source topic, and consumers—such as a mail notification service or an external database—consume the calculated shared state via the sink topic.

Agents ➝ Kafka Cluster ➝ State Server Cluster ➝ Notification Service ➝ Database

In a simple scenario where the formal state of an object is always equal to the latest state reported for this object by an agent, persisting the state as is in the key-value store during processing (more on why later) and then forwarding it to the sink suffices. The following snippets depict such a case:

public abstract class BaseSharedStateProcessor<SourceValueT, ResultValueT> extends 
  AbstractProcessor<String, SourceValueT> {

  private KeyValueStore kvStore;

  @Override 
  public void init(ProcessorContext context) {
    super.init(context);
    setKVStore((KeyValueStore<String, ResultValueT>) context.getStateStore(getStoreName()));
  }

  private void setKVStore(KeyValueStore kv) {
    kvStore = kv;
  }

  @Override
  public void process(String key, SourceValueT value) {
    doProcess(key, value, kvStore);
  }
}

public class ExampleDataProcessor extends BaseSharedStateDataProcessor<String, String> {
  @Override public void doProcess(String key, String value, KeyValueStore<String, String> keyValueStore) {
    keyValueStore.put(key, value); // here we could consult the keyValueStore and calculate a 
                                   // value based on it
    context().forward(key, value); // forward to next processor (in our case sink topic)
    context().commit(); // flush it
  }
}

However, having a key-value store makes it possible to also support more complex state calculation algorithms, such as majority vote or at-least-one. For example, in the case of a majority vote, the value in the store for each object can consist of a mapping between each agent and its latest report on the object. Then, when a new state report is received for some object from an agent, we can persist it, re-run the majority vote calculation, and forward the result to the sink.

Building a CRUD API on top of Kafka Streams

Another requirement for our shared state microservices was to provide a RESTful CRUD API. We wanted to make it possible to retrieve the state of some or all objects on demand, as well as set or purge the state of an object manually, which is useful for backend maintenance.

To support the state retrieval APIs, whenever we calculate a state during processing, we persist it to the built-in key-value store. The API then becomes quite easy to implement using the Kafka Streams instance, as seen in the snippet below:

private ReadOnlyKeyValueStore<String, SharedStateWriteModel> getStateStore() {
  return Main.getStreams().store(getStoreName(), QueryableStoreTypes.<~>keyValueStore());
}

private SharedStateWriteModel getValueFromStore(String key) {
  return getStateStore().get(key);
}

Updating the state of an object via the API was also easy. It involved creating a Kafka producer and producing a record consisting of the new state. This ensured that messages generated by the API were treated in exactly the same way as those coming from other producers (i.e., agents):

protected void updateKafkaRecord(String id, SharedStateWriteModel state) {
  Producer<String, SharedStateWriteModel> producer = buildProducer();
  ProducerRecord<String, SharedStateWriteModel> data = buildProducerRecord(id, state);
  producer.send(data);
  producer.close();
}

Benefits and challenges of moving from one microservice to a cluster

Next, we wanted to distribute the processing load and improve availability by having a cluster of shared state microservices per scenario. Setup was a breeze—after configuring all instances to use the same application ID and the same bootstrap servers, everything pretty much happened automatically. We also defined that each source topic would consist of several partitions, with the aim that each instance would be assigned a subset of these.

With regard to preserving the state store (in case of failover to another instance, for example), Kafka Streams creates a replicated changelog Kafka topic for each state store in which it tracks local updates. This means that the state store is constantly backed up in Kafka. So if some Kafka Streams instance goes down, its state store can quickly be made available to the instance that takes over its partitions. Our tests showed that this happens in a matter of seconds, even for a store with millions of entries.

Moving from one shared state microservice to a cluster of microservices made implementing the state retrieval API more complex. Now, each microservice’s state store held only part of the world: the objects whose key was mapped to a specific partition. We had to determine which instance held the specified object’s state using the Streams metadata:

public Response getState(String key, HttpServletRequest request) throws Exception {
  int partition = getPartition(key); // get the id of the partition that the given key maps to
  KafkaStreams streams = getStreams();
  StreamsMetadata partitionStreamsMetadata = getPartitionStreamsMetadata(partition, 
    streams.allMetadata());
  if (isFoundInLocal(partitionStreamsMetadata)) { // check if pod name and port in streams
                                                  // metadata are equal to local
    SharedStateReadModel state = sharedStateService.get(key);
    return Response.status(Response.Status.OK).entity(state).build();
  } else {
    String url = getRedirectUrl(partitionStreamsMetadata, request); // redirect using the
                                                                    // host name in streams meta
    return redirect(url);
  }
}

Task scheduling made easy

One more requirement for our shared state microservice was the ability to schedule both a one-time and periodic task in response to an incoming message. For example, when an agent reports some state for an object, we want to wait five minutes, check if the state stayed the same, and only then forward it to the sink.

Fortunately, the processor context, which is passed on to the processor during init, provides a schedule method that does just that. We used it with the WALL_CLOCK_TIME type. For achieving one-time tasks, we used the cancellation handle returned by it. Additionally, our processing topology includes a second key-value store for scheduling. We used it to persist metadata about each scheduled task (interval, task fully-qualified class name, key, etc.), so that in the event of failover, the tasks could be rescheduled during init by the instance that takes over the partition.

Here’s an example of how we schedule a task from within the processor using the scheduler we implemented:

  DemoRecurringTask demoRecurringTask = new DemoRecurringTask(key,
    (KeyValueStore) context().getStateStore(getStoreName()));
  scheduler.scheduleTask(demoRecurringTask, 5000);

Below is what our scheduler looks like. The scheduling data access object is responsible for updating the scheduling metadata key-value store, and BaseSharedStateTask is an abstract class implementing Kafka Streams’ Punctuator interface.

public class SharedStateScheduler {
  private static final Logger logger = LoggerFactory.getLogger(SharedStateSchduler.class);
  private ProcessorContext processorContext;
  private SharedStateSchedulingDao schedulingDao;

  public SharedStateScheduler(ProcessorContet processorContext, SharedStateSchedulingDao dao) {
    this.processorContext = processorContext;
    this.schedulingDao = dao;
  }

  public void scheduleTask(BaseSharedStateTask task, long interval) {
    Cancellable cancellationHandle = processorContext.schedule(interval, 
      PunctuationType.WALL_CLOCK_TIME, task);
    task.setCancellationHandle(cancellationHandle);
    task.setSchedulingDao(schedulingDao);
    if (task.getId() == null) {
      task.setId(UUID.randomUUID().toString());
      schedulingDao.addScheduledTask(task.getKey(), task.getId(), interval, 
        task.getClass().getName());
    }
  }

  public void resumeTasks() {
    KeyValueIterator schedulingStoreIterator = getSchedulingStore().all();
    while (schedulingStoreIterator.hasNext()) {
      String key = (String) ((KeyValue) schedulingStoreIterator.next()).key;
      Map<String, String> scheduledTasksMeta = schedulingDao.getScheduledTasksMeta(key);
      for (String taskId : scheduledTasksMeta.keySet()) {
        String taskMeta = scheduledTasksMeta.get(taskId);
        String taskFQCN = SharedStateSchedulingDao.getFQCNFromMeta(taskMeta);
        Long interval = SharedStateSchedulingDao.getIntervalFromMeta(taskMeta);
        if (taskFQCN != null && interval != null) {
          try {
            Constructor constructor = Class.forName(taskFQCN).getConstructor(String.class,
              KeyValueStore.class);
            BaseSharedStateTask task = (BaseSharedStateTask) constructor.newInstance(key, 
              getStateStore());
             task.setId(taskId);
             scheduleTask(task, interval);
          } catch (Exception e) {
            logger.error(“Failed to resume task for key “ + key, e);
          }
        }
      }
    } 
  }

  private KeyValueStore getSchedulingStore() {
    return (KeyValueStore) processorContext.getStateStore(getSchedulingStoreName());
  }

  private KeyValueStore getStateStore() {
    Return (KeyValueStore) processorContext.getStateStore(getStoreName());
  }
}

Lessons learned

Overall, Kafka Streams has proven to be very robust in our production environment. We did initially encounter a few cases where Kafka Streams shut itself down in production and identified two causes for these shutdowns, as outlined below:

  1. Sometimes, due to problems in our agent machines which produce the messages to Kafka, the messages are sent with a negative timestamp. Kafka Streams’ default behavior in such cases is to shut down, in order to protect against silent data loss. However, this behavior can be changed in cases where dropped messages with bad timestamps are acceptable, such as ours. This is done by using a different timestamp extractor class (configured via the StreamsConfig.DEFAULT_TIMESTAMP_EXTRACTOR_CLASS_CONFIG property). For our shared state microservices, we chose to extend the LogAndSkipOnInvalidTimestamp extractor class in order to be able to both log the problem and update some metrics accordingly.
  2. We also noticed that when Kafka Streams experienced prolonged connection timeouts to Kafka, it eventually shut itself down. To reach stability, we increased the value of a few streams configuration properties:
    • ProducerConfig.RETRIES_CONFIG
    • ProducerConfig.REQUEST_TIMEOUT_MS_CONFIG (producer only)
    • ProducerConfig.MAX_BLOCK_MS_CONFIG (this was needed in order to overcome metadata update timeouts)

Kafka Streams ticks all the boxes

As this blog post has shown, Kafka Streams ticks all the boxes required for building shared state microservices, as far we’re concerned.

  • Its key-value stores allow persisting the shared state and can serve as a de facto distributed database, constantly replicated to Kafka
  • Auxiliary data can also be stored in the key-value stores, enabling complex shared state construction algorithms
  • Generated shared state events can be consumed via the processing topology’s sink topic
  • High-availability and fault tolerance are provided out of the box, using Kafka’s built-in coordination mechanism
  • A scheduling service can easily be implemented using Kafka Streams’ built-in scheduling abilities
  • A CRUD API for shared states is also not hard to implement: writing can be done using a local Kafka producer, while reading is possible using the Streams instances.

Using Kafka Streams, we’ve been able to shorten development times and bring uniformity to our code. We look forward to further expanding on its potential!

Interested in more?

If you’re interested in learning more about Kafka Streams and all things Kafka, this is a good opportunity to mention that Kafka Summit San Francisco is just around the corner. You can register and get 30% off with the code blog19.

Nitzan Gilkis is a senior software engineer at Imperva, where he works on the DDoS Protection for Networks product. He has over 14 years of experience in Java development and previously held roles at HPE Software and the Israeli Air Force (IAF). Nitzan has a B.S. in computer science from the University of Tel Aviv and an M.A. in information science from Bar-Ilan University. In his spare time, he enjoys writing and recording music and spending time with his wife and daughter.

KSQL UDFs and UDAFs Made Easy

$
0
0

One of KSQL’s most powerful features is allowing users to build their own KSQL functions for processing real-time streams of data. These functions can be invoked on individual messages (user-defined functions or UDFs) or used to perform aggregations on groups of messages (user-defined aggregate functions or UDAFs).

The previous blog post How to Build a UDF and/or UDAF in KSQL 5.0 discussed some key steps for building and deploying a custom KSQL UDF/UDAF. Now with Confluent Platform 5.3.0, creating custom KSQL functions is even easier when you leverage Maven, a tool for building and managing dependencies in Java projects.

Confluent Platform 5.3.0 adds a new Maven archetype called the KSQL UDF / UDAF Quickstart that will allow you to quickly bootstrap your own UDF/UDAF without having to copy and paste example code, add the boilerplate for building an uber JAR, or perform other tedious tasks that would otherwise be required for setting up a new project. Maven archetypes are used to create project templates, so we found them to be a great vehicle for getting developers up and running quickly with custom KSQL functions.

In addition to discussing how the KSQL UDF / UDAF Quickstart can be used, we will also demonstrate how to convert the generated Maven project to a Gradle project with a simple command. Gradle is another automated build system that many developers prefer over Maven. These developers will learn how to bootstrap new UDF projects using the Maven archetype, and then convert to the build system of their choice for further development.

So, without further ado, let’s get started.

Using the Maven archetype

In order to use the KSQL UDF / UDAF Quickstart for bootstrapping a custom KSQL function, we need to have Maven installed. You can check to see if Maven is installed by running the following command:

$ mvn --version

If Maven is not installed, follow the official installation instructions. Next, add the Maven repositories from Confluent to your ~/.m2/settings.xml file:

<repositories>
        <!-- Confluent releases -->
        <repository>
            <id>confluent</id>
            <url>https://packages.confluent.io/maven/</url>
        </repository>

       <!-- further repository entries here -->
</repositories>

Once Maven is installed and the repositories have been added, generating a new UDF/UDAF project is simple. First, run the following command:

$ mvn archetype:generate -X \
    -DarchetypeGroupId=io.confluent.ksql \
    -DarchetypeArtifactId=ksql-udf-quickstart \
    -DarchetypeVersion=5.3.0

You will be asked to provide some information about your project. An example configuration is shown below (feel free to update the following with values that are appropriate for your own project):

Define value for property 'groupId':  com.example.ksql.functions 
Define value for property 'artifactId':  my-udf
Define value for property 'version':  0.1.0
Define value for property 'package':  com.example.ksql.functions
Define value for property 'author':  Mitch Seymour

Once you’ve confirmed the configuration (e.g., by simply hitting <ENTER> when prompted to do so), the above command will create a new project with the following directory structure. (Note: The actual directory structure may vary depending on the groupId and artifactId parameters that you specified earlier).

my-udf/
├── dependency-reduced-pom.xml
├── pom.xml
└── src
    ├── main
    │   ├── java
    │   │   └── com
    │   │       └── example
    │   │           └── ksql
    │   │               └── functions
    │   │                   ├── ReverseUdf.java
    │   │                   └── SummaryStatsUdaf.java
    │   └── resources
    └── test
        └── java
            └── com
                └── example
                    └── ksql
                        └── functions
                            ├── ReverseUdfTests.java
                            └── SummaryStatsUdafTests.java

In the next section, we will explore the example KSQL functions generated by the archetype and learn how to deploy these functions to our KSQL server.

Example KSQL UDF and UDAF

The archetype includes one example UDF (REVERSE) and one example UDAF (SUMMARY_STATS), which are defined in the following files, respectively: ReverseUdf.java and SummaryStatsUdaf.java. Let’s start by taking a look at ReverseUdf.java.

ReverseUdf.java

package com.example.ksql.functions;

import io.confluent.ksql.function.udf.Udf;
import io.confluent.ksql.function.udf.UdfDescription;
import io.confluent.ksql.function.udf.UdfParameter;

@UdfDescription(
    name = "reverse",
    description = "Example UDF that reverses an object",
    version = "0.1.0",
    author = ""
)
public class ReverseUdf {
  @Udf(description = "Reverse a string")
  public String reverseString(
      @UdfParameter(value = "source", description = "the value to reverse")
      final String source
  ) {
    return new StringBuilder(source).reverse().toString();
  }

  @Udf(description = "Reverse an integer")
  public String reverseInt(
      @UdfParameter(value = "source", description = "the value to reverse")
      final Integer source
  ) {
    return new StringBuilder(source.toString()).reverse().toString();
  }

  @Udf(description = "Reverse a long")
  public String reverseLong(
      @UdfParameter(value = "source", description = "the value to reverse")
      final Long source
  ) {
    return new StringBuilder(source.toString()).reverse().toString();
  }

  @Udf(description = "Reverse a double")
  public String reverseDouble(
      @UdfParameter(value = "source", description = "the value to reverse")
      final Double source
  ) {
    return new StringBuilder(source.toString()).reverse().toString();
  }
}

This example UDF can be used for reversing strings and numerics, and it is already fully functional and ready to deploy. One key item this particular UDF showcases is the ability for a KSQL function to support multiple method signatures. Our REVERSE function (defined above) can reverse a String, Long, Integer, or Double since we provided methods for each of these operations. This example UDF is somewhat trivial, but the point of this archetype is to allow you to easily replace the code here with your own code, and then simply follow the build and deployment steps described later in this article to start using your own UDF.

As mentioned earlier, the archetype also includes an example UDAF. Unlike UDFs, which operate on a single row at a time, UDAFs can be used for computing aggregates against multiple rows of data. Let’s take a look at the example UDAF (called SUMMARY_STATS) and see how it works.

SummaryStatsUdaf.java

package com.example.ksql.functions;

import io.confluent.ksql.function.udaf.Udaf;
import io.confluent.ksql.function.udaf.UdafDescription;
import io.confluent.ksql.function.udaf.UdafFactory;
import java.util.HashMap;
import java.util.Map;

@UdafDescription(
    name = "summary_stats",
    description = "Example UDAF that computes some summary stats for a stream of doubles",
    version = "0.1.0",
    author = ""
)
public final class SummaryStatsUdaf {

  private SummaryStatsUdaf() {
  }

  @UdafFactory(description = "compute summary stats for doubles")
  // Can be used with stream aggregations. The input of our aggregation will be doubles,
  // and the output will be a map
  public static Udaf<Double, Map<String, Double>> createUdaf() {

    return new Udaf<Double, Map<String, Double>>() {

      /**
       * Specify an initial value for our aggregation
       *
       * @return the initial state of the aggregate.
       */
      @Override
      public Map<String, Double> initialize() {
        final Map<String, Double> stats = new HashMap<>();
        stats.put("mean", 0.0);
        stats.put("sample_size", 0.0);
        stats.put("sum", 0.0);
        return stats;
      }

      /**
       * Perform the aggregation whenever a new record appears in our stream.
       *
       * @param newValue the new value to add to the {@code aggregateValue}.
       * @param aggregateValue the current aggregate.
       * @return the new aggregate value.
       */
      @Override
      public Map<String, Double> aggregate(
          final Double newValue,
          final Map<String, Double> aggregateValue
      ) {
        final Double sampleSize = 1.0 + aggregateValue
            .getOrDefault("sample_size", 0.0);

        final Double sum = newValue + aggregateValue
            .getOrDefault("sum", 0.0);
  
        // calculate the new aggregate
        aggregateValue.put("mean", sum / sampleSize);
        aggregateValue.put("sample_size", sampleSize);
        aggregateValue.put("sum", sum);
        return aggregateValue;
      }

      /**
       * Called to merge two aggregates together.
       *
       * @param aggOne the first aggregate
       * @param aggTwo the second aggregate
       * @return the merged result
       */
      @Override
      public Map<String, Double> merge(
          final Map<String, Double> aggOne,
          final Map<String, Double> aggTwo
      ) {
        final Double sampleSize =
            aggOne.getOrDefault("sample_size", 0.0) + aggTwo.getOrDefault("sample_size", 0.0);
        final Double sum =
            aggOne.getOrDefault("sum", 0.0) + aggTwo.getOrDefault("sum", 0.0);

        // calculate the new aggregate
        final Map<String, Double> newAggregate = new HashMap<>();
        newAggregate.put("mean", sum / sampleSize);
        newAggregate.put("sample_size", sampleSize);
        newAggregate.put("sum", sum);
        return newAggregate;
      }
    };
  }
}

This UDAF may seem complicated at first, but it’s really just performing some basic math and adding the computations to a Map object. Returning a Map is one method for returning multiple values from a KSQL function. Using the example above for your own UDAF, take note of the following methods:

  • initialize: used to specify the initial value of your aggregation
  • aggregate: performs the actual aggregation by looking at the current row’s value (i.e., the currentValue argument), as well as the current aggregation value (i.e., aggregateValue argument), and generates a new aggregate
  • merge: describes how to merge two aggregations into one (e.g., when using session windows)

Building and Deploying KSQL functions

Once you’ve replaced the example UDF/UDAF logic with your own (or, if you’d like, just use the example UDF/UDAF for the rest of this tutorial), then it’s time to deploy your KSQL functions to a KSQL server. To begin, build the project by running the following command in the project root directory:

$ mvn clean package

Note: the archetype includes some default unit tests, so if you changed the example code by this point, then add the -DskipTests flag to the command above (we’ll cover tests in the next section, so we can skip them for now).

The above command will drop a JAR in the target/ directory. For example, if your artifactId is my-udf, then the command will have created a file named target/my-udf-0.1.0.jar.

Now, simply copy this JAR file to the KSQL extension directory (see the ksql.extension.dir property in the ksql-server.properties file) and restart your KSQL server so that it can pick up the new JAR containing your custom KSQL function.

# stop KSQL server cleanly using the following command
$ /bin/ksql-server-stop

# restart the KSQL server so that we can use our newly deploy KSQL functions
$ /bin/ksql-server-start config/ksql-server.properties

Restarting is not only required for KSQL to recognize new functions, but also to recognize any updates you have made to existing functions. Once KSQL has finished restarting and has connected to a running Apache Kafka® cluster, you can verify that the new functions exist by running the DESCRIBE FUNCTION command from the CLI:

ksql> DESCRIBE FUNCTION REVERSE ;

Name        : REVERSE
Author      : 
Version     : 0.1.0
Overview    : Example UDF that reverses an object
Type        : scalar
Jar         : /tmp/ext/my-udf-0.1.0.jar
Variations  :

	Variation   : REVERSE(source INT)
	Returns     : VARCHAR
	Description : Reverse an integer
	source      : the value to reverse

	Variation   : REVERSE(source VARCHAR)
	Returns     : VARCHAR
	Description : Reverse a string
	source      : the value to reverse

	Variation   : REVERSE(source DOUBLE)
	Returns     : VARCHAR
	Description : Reverse a double
	source      : the value to reverse

	Variation   : REVERSE(source BIGINT)
	Returns     : VARCHAR
	Description : Reverse a long
	source      : the value to reverse


ksql> DESCRIBE FUNCTION SUMMARY_STATS ;

Name        : SUMMARY_STATS
Author      : mitch
Version     : 0.1.0
Overview    : Example UDAF that computes some summary stats for a stream of doubles
Type        : aggregate
Jar         : /tmp/ext/my-udf-0.1.0.jar
Variations  :

	Variation   : SUMMARY_STATS(DOUBLE)
	Returns     : MAP<VARCHAR,DOUBLE>
	Description : compute summary stats for doubles

Finally, let’s invoke our new UDF/UDAF. For this example, we’ll assume there’s a topic named api_logs in our Kafka cluster. You can create this dummy topic by using the kafka-topics console script:

# assumes the `kafka-topics` script is on your $PATH
$ kafka-topics --create \
    --zookeeper localhost:2181 \
    --topic api_logs \
    --replication-factor 1 \
    --partitions 4

Created topic "api_logs".

With the api_logs topic created, we can now create a KSQL STREAM using the following command:

ksql> CREATE STREAM api_logs (username VARCHAR, endpoint VARCHAR, response_code INT, response_time DOUBLE) \
WITH (kafka_topic='api_logs', value_format='JSON');

 Message
----------------
 Stream created
----------------

At this point, invoking our UDF/UDAF is simply a matter of adding it to our KSQL query:

ksql> SELECT username, REVERSE(username), endpoint, SUMMARY_STATS(response_time) \
FROM api_logs \
GROUP BY username, REVERSE(username), endpoint ;

The above command will execute a continuous query in the KSQL CLI. In another tab, we can produce some dummy records to the api_logs topics using the kafkacat utility.

$ echo '{"username": "mseymour", "endpoint": "index.html", "response_code": 200, "response_time": 400}' | kafkacat -q -b localhost:9092 -t api_logs -P
$ echo '{"username": "mseymour", "endpoint": "index.html", "response_code": 200, "response_time": 900}' | kafkacat -q -b localhost:9092 -t api_logs -P

Back inside the KSQL CLI, you should see the following output:

mseymour | ruomyesm | index.html | {sample_size=1.0, mean=400.0, sum=400.0}
mseymour | ruomyesm | index.html | {sample_size=2.0, mean=650.0, sum=1300.0}

Automated testing of KSQL functions

In addition to including an example UDF and UDAF implementation, the KSQL UDF / UDAF Quickstart includes unit tests that demonstrate how to test your custom KSQL functions. These tests live in the src/test/java/ directory and rely on the JUnit 5 testing platform, which is automatically included when you create a project from the quick start. Whenever you update the example KSQL functions with your own code, it is necessary to also update the included unit tests.

Before we learn how to execute the tests, let’s first see what they look like. The first unit test we’ll review ensures the REVERSE UDF returns the expected results.

ReverseUdfTests.java

package com.example.ksql.functions;

import static org.junit.jupiter.api.Assertions.assertEquals;

import org.junit.jupiter.params.ParameterizedTest;
import org.junit.jupiter.params.provider.CsvSource;

/**
 * Example class that demonstrates how to unit test UDFs.
 */
public class ReverseUdfTests {

  @ParameterizedTest(name = "reverse({0})= {1}")
  @CsvSource({
    "hello, olleh",
    "world, dlrow",
  })
  void reverseString(final String source, final String expectedResult) {
    final ReverseUdf reverse = new ReverseUdf();
    final String actualResult = reverse.reverseString(source);
    assertEquals(expectedResult, actualResult, source + " reversed should equal " + expectedResult);
  }
}

As you can see in the code above, our testing methodology is relatively straightforward. First, we use a parameter provider called @CsvSource (included in the JUnit 5 testing library) to specify multiple test cases with their corresponding parameters and expected result values. The first value in each CSV string (hello and world) represents the parameter that we want to pass to our UDF (ReverseUdf). The second value in each CSV string represents the expected result of the test (since ReverseUdf is responsible for reversing objects, the expected result in this test case is a reversed string).

Now that we’ve defined our parameters, we simply instantiate a ReverseUdf instance, invoke the appropriate method for reversing a string (reverseString) with our test parameters, and check the result with assertEquals. This method of instantiating a KSQL function and invoking the appropriate methods directly in a test is a good way to prevent accidental regression as you iterate of your code in the future.

A keen eye may have noticed that our ReverseUdf is capable of reversing many types of objects, yet the included unit tests only cover the reversal of strings. We will leave the additional test implementations as an exercise for the reader.

Let’s move on to the unit tests for SummaryStats.

SummaryStatsUdafTests.java

package com.example.ksql.functions;

import static org.junit.jupiter.api.Assertions.assertEquals;
import static org.junit.jupiter.params.provider.Arguments.arguments;

import io.confluent.ksql.function.udaf.Udaf;
import org.junit.jupiter.api.Test;
import org.junit.jupiter.params.ParameterizedTest;
import org.junit.jupiter.params.provider.Arguments;
import org.junit.jupiter.params.provider.MethodSource;

import java.util.HashMap;
import java.util.Map;
import java.util.stream.Stream;

/**
 * Example class that demonstrates how to unit test UDAFs.
 */
public class SummaryStatsUdafTests {

  @Test
  void mergeAggregates() {
    final Udaf<Double, Map<String, Double>> udaf = SummaryStatsUdaf.createUdaf();
    final Map<String, Double> mergedAggregate = udaf.merge(
      // (sample_size, sum, mean)
      aggregate(3.0, 3300.0, 1100.0),
      aggregate(7.0, 6700.0, 957.143)
    );

    final Map<String, Double> expectedResult = aggregate(10.0, 10000.0, 1000.0);
    assertEquals(expectedResult, mergedAggregate);
  }

 @ParameterizedTest
 @MethodSource("aggSources")
  void calculateSummaryStats(
      final Double newValue,
      final Map<String, Double> currentAggregate,
      final Map<String, Double> expectedResult
    ) {
    final Udaf<Double, Map<String, Double>> udaf = SummaryStatsUdaf.createUdaf();
    assertEquals(expectedResult, udaf.aggregate(newValue, currentAggregate));
  }

  // the rest of this file is omitted for brevity
  Stream<Arguments> aggSources() {}
  
}

The testing methodology for UDAFs is similar to UDFs. We instantiate our UDAF instance and call the appropriate methods (in this case, aggregate and merge) with a set of predefined parameters. We then check the output against the expected results. One minor difference between the ReverseUdf test we saw earlier and the SummaryStatsUdaf above, is that the latter uses a different mechanism for generating test parameters and outputs. Instead of using @CsvSource, we use the @MethodSource provider instead. This is a minor implementation detail and I encourage you to look at the example code yourself to see exactly how this works. The important takeaway here is that testing both UDFs and UDAFs is simple using the methods discussed above.

Running the tests

Finally, we’re ready to execute the unit tests. Simply run the following command to execute the test cases:

$ mvn test

If all goes well, you should see the following output:

[INFO] ------------------------------------------------------------------------
[INFO]
[INFO] Results:
[INFO]
[INFO] Tests run: 5, Failures: 0, Errors: 0, Skipped: 0
[INFO]
[INFO] ------------------------------------------------------------------------
[INFO] BUILD SUCCESS
[INFO] ------------------------------------------------------------------------

Converting From Maven to a Gradle project

Bootstrapping your custom KSQL functions from Confluent’s Maven archetype doesn’t mean you also have to use Maven as your build tool. In fact, Gradle is often preferred, and converting your Maven project to a Gradle project is easy. Simply run the following command in the root project directory to generate a build.gradle file for your project:

$ gradle init --type pom

Now, feel free to delete the pom.xml and make all future build modifications to build.gradle instead.

What’s next?

Now that you know how to quickly bootstrap your next KSQL UDF/UDAF project, you can start building your own custom KSQL functions with minimal effort. A couple of next steps you may want to pursue include adding unit tests for your new code and, if your function might be useful to others, sharing it with the community.

For an in-depth look at custom KSQL functions, including UDFs that leverage embedded machine learning models, remote APIs, and more, you can check out my presentation from Kafka Summit London: The Exciting Frontier of Custom KSQL Functions.

If you haven’t already, you can also register for Kafka Summit to learn more about KSQL, where Hojjat Jafarpour will be giving a talk titled UDF/UDAF: The Extensibility Framework for KSQL, and you can get 30% off when you use the code blog19.

Mitch Seymour is a senior data systems engineer at Mailchimp. Using Kafka Streams and KSQL, his team builds stream processing applications to support data science and business intelligence initiatives across the company. Outside of work, he contributes to open source software, plays retro video games, and runs a non-profit called Puplift to help animal welfare organizations with their technological needs.

Announcing Tutorials for Apache Kafka

$
0
0

We’re excited to announce Tutorials for Apache Kafka®, a new area of our website for learning event streaming. Kafka Tutorials is a collection of common event streaming use cases, with each tutorial featuring an example scenario and several complete code solutions. It’s the fastest way to learn how to use Kafka with confidence.

We’re building this because we know that event streaming is a radically different way of thinking. It causes us to rethink the way we architect our programs and systems. Although it has heaps of benefits (immutability, information sharing, and fault tolerance, to name a few), it can be surprisingly difficult for newcomers to learn.

It doesn’t need to be that way.

For beginners, Kafka Tutorials reveals the “shape” of the problems that event streaming can solve. It makes it easier to recognize the domain of things that you might use event streaming for. Moreover, each tutorial reliably takes you from zero to working code by following each of the steps.

For the experienced, it’s a crucial reference guide that makes your work easier. Easily look up how to join a stream and a table together when you’re rusty, or quickly recall how to merge discrete streams together. Over time, we’ll introduce more advanced material that makes use of the entire stack.

Although it’s early, we’re building Kafka Tutorials for the long term. That’s why we’ve intelligently engineered the site to use a unique flavor of literate programming. Each tutorial that you see on a page is backed by a single data structure. We’ve built programs that understand this shared structure—namely one to render the page, and another to test the content of the page. That means that when we make changes to each tutorial, they are automatically validated on a continuous integration system to ensure that we’re giving you actual code that works.

Data Structure

Lastly, Kafka Tutorials is a community-driven site. Its source code is available on GitHub. If you have a great idea for a new tutorial or can make an existing open better, we’d love your contributions.

Happy learning!

Apache, Apache Kafka, Kafka and the Kafka logo are trademarks of the Apache Software Foundation. The Apache Software Foundation has no affiliation with and does not endorse the materials provided.

Michael Drogalis is Confluent’s stream processing product lead, where he works on the direction and strategy behind all things compute related. Before joining Confluent, Michael served as the CEO of Distributed Masonry, a software startup that built a streaming-native data warehouse. He is also the author of several popular open source projects, most notably the Onyx Platform.

Top 10 Reasons to Attend Kafka Summit

$
0
0

Yes, the other definition of event sourcing.

1. Keynotes from leading technologists

At Kafka Summit SF, you’ll get to hear incredible keynotes from leading technologists, including Jay Kreps and Neha Narkhede, original co-creators of Apache Kafka®. In the past, we’ve featured Chris D’Agostino, James Watters, Martin Kleppmann, and Martin Fowler. This time around, we’re delighted to have Devendra Tagare, Engineering Manager of Streaming Platforms from Lyft and Chris Kasten, VP of Walmart Cloud – Strati Application Foundation from Walmart.

Neha Narkhede at Confluent

Martin Kleppmann at Kafka Summit

2. Amazing talks 💥

And then there are the sessions: 56 of them across four tracks covering Core Kafka, Event-Driven Development, Stream Processing, and Use Cases. Because choosing is hard, you can check out Gwen Shapira’s previous blog post to catch which talks she’s looking forward to the most.

56 sessions, four tracks

Gwen Shapira headed to Kafka Summit like

3. Networking opportunities

Nowhere else in the world will you find a larger concentration of Kafka community genius than here. This is your chance to network with Kafka experts, meet your peers, and learn about the most interesting up-and-coming Kafka projects. I attend a lot of conferences, and I know firsthand how the relationships you develop can impact your future in a big way.

Life does not happen in "batch mode"

Stefan Bauer, Head of Development Data Analytics, AUDI Electronics Venture, AUDI

4. Use cases!

We need theory and first principles, but it also helps to know what real engineering teams are doing. We’ll have real-life Kafka use cases from companies like JPMorgan Chase, Uber, Ticketmaster, Stitch Fix, and Tesla. I highly recommend taking a look at the full agenda when you get the chance. We made a whole track just for these, because we know they matter to you.

Clear eyes, full rooms, can't lose

5. Hands-on training

Whether you’re new to Kafka or an experienced user, there will be a hands-on training likely to match your needs. We’re offering more options this year too, including Introductory Tutorial, Developer Learning, KSQL & Kafka Streams, Operations Training, and Advanced Kafka Optimization. Reach a PR in your your Kafka knowledge so you can contribute more PRs! (Get it, PR? And PR? Okay, just workshopping here.)

Training

Note: I am still working on the zero-handed technique.

6. Get certified!

Wholly unbiased studies (which nevertheless probably still yield some true insights) show that Apache Kafka is one of the hottest and most sought-after technology skills. Make yourself easy to find with a three-hour certification bootcamp, which will prepare you for the exam to become a Confluent Certified Developer or Confluent Certified Operator for Apache Kafka. Once you’ve gone through the process, you can even do a brown bag session for your colleagues sharing what you learned.

Apache Kafka | Tim Berglund

7. Learn about the broader Kafka ecosystem

This is the Kafka Summit, but it’s about more than just Kafka. It’s also about the broader ecosystem of supporting and complementary technologies. The Expo Hall will be filled with 36 sponsors and is the perfect place to discover new ideas, consider important adjacencies, and discuss solutions that are specific to your needs.
Count me in!

8. Meet the first class of Confluent Community Catalysts

New this year, we will inaugurate our very first cohort of Confluent Community Catalysts. These are people who have made outstanding contributions to the Kafka and Confluent communities through code, education, or advocacy. Join us in congratulating them in person!

Mood

9. Recruiting

Are you trying to hire Kafka developers? You are not likely to find a higher density of the best in the world than at Kafka Summit. Come, meet, talk, and let your open job reqs be known!

Kafka Summit SF 2019: September 30 - October 1 | San Francisco

10. Fun, fun, fun

As always, there will be a party in addition to great food, great company, and fun giveaways. Pick out your favorite real-time t-shirt design (we are actually screen printing these on-site) and enjoy some fresh donuts, because without carbs, is it even a conference? We think not.

Did I hear donut?

Happily for you, Kafka Summit San Francisco is in a few short weeks, so if you want in—and I hope you do—you don’t have to wait long. When all is said and done, you will very likely feel just like Viktor felt at the end of last year’s Summit. And that’s a worthy goal.

Post Kafka Summit feels

Oh, and as the man famously said, there’s one more thing: register with the code blog19 to get 30% off. With that, I’ll see you on September 30 to get this Summit started.

Tim is a teacher, author and technology leader with Confluent, where he serves as the senior director of developer experience. He can frequently be found at speaking at conferences in the U.S. and all over the world. He is the co-presenter of various O’Reilly training videos on topics ranging from Git to distributed systems, and is the author of “Gradle Beyond the Basics.” He tweets as @tlberglund and lives in Littleton, CO, U.S., with the wife of his youth and their youngest child, the other two having mostly grown up.

Shoulder Surfers Beware: Confluent Now Provides Cross-Platform Secret Protection

$
0
0

Compliance requirements often dictate that services should not store secrets as cleartext in files. These secrets may include passwords, such as the values for ssl.key.password, ssl.keystore.password, and ssl.truststore.password configuration parameters (as shown below), or any other sensitive data in the configuration files or log files. Here is a snippet from a properties file with standard SSL configurations that users often don’t want in cleartext:

security.inter.broker.protocol=SSL
ssl.keystore.location=/var/private/ssl/kafka.server.keystore.jks
ssl.keystore.password=test1234
ssl.key.password=test1234
ssl.truststore.location=/var/private/ssl/kafka.server.truststore.jks
ssl.truststore.password=test1234

For Apache Kafka®, in which services read configuration files on startup, the question arises: how should you protect these secrets? Before Confluent Platform 5.3, you would have considered:

  • Restricting network access to the hosts running the services
  • Setting permissions on the configuration files using standard Linux ugo/rwx settings
  • Adding OS-level ACLs for more user granularity

However, there was still a risk that a bad actor—a rogue employee, shoulder surfer, or hacker—could gain access to those configuration files or log files, which contain the cleartext secrets. Taking on a bit more complexity, you could encrypt data at the storage layer with encrypted volumes using specialized kernel modules that support process-based ACLs, but still someone who gained access could potentially see the values in cleartext.

A safer approach is to encrypt secrets so that even if someone were to gain access to the files, the secrets would not even be in cleartext. Confluent Platform 5.3 introduces a simple solution for secret encryption. Secret Protection, a commercial feature, encrypts secrets within the configuration file itself and does not expose the secrets in log files. It extends the security capabilities originally introduced in KIP-226 for brokers and KIP-297 for Kafka Connect, and provides additional functionality for encrypting the secrets across all of Confluent Platform. Now you can deploy end-to-end Secret Protection in your production event pipeline, including the brokers, Connect, KSQL, Confluent Schema Registry, Confluent Control Center, Confluent REST Proxy, etc.

How Secret Protection works

Secret Protection uses envelope encryption, an industry standard for protecting encrypted secrets through a highly secure method. First, a user specifies a master passphrase that is used, along with a cryptographic salt value, to derive a master encryption key. A separate data encryption key is generated, and the master encryption key is used to encrypt the data encryption key before storing it in a secure file.

Both the master key and data encryption key are then used to encrypt the secrets in the configuration files. The service can decrypt these secrets because KIP-421 provides automatic resolution of indirect variables. The end result is that even if someone gains access to a configuration file, all they would be able to see are encrypted secrets, and they have no way to decrypt them without knowing the master encryption key.

Secret Protection

To get started with this feature, we will step through a few examples. For a list of all relevant commands, please review the Confluent command line interface (CLI) reference.

Setup

Before you start:

  1. Download Confluent Platform 5.3
  2. Get the CLI (v0.128.0 or above)
  3. Clone the Secret Protection tutorial from GitHub and follow along

Encryption workflow

In the most common use case, you would want to encrypt passwords. The security tutorial provides an example of how to enable security features on Confluent Platform, but that takes extra steps to generate the keys and certificates and to add the TLS configurations. Therefore, instead of encrypting a password, we will encrypt a basic configuration parameter, but the steps are exactly the same.

Generate the master encryption key based on a passphrase

First, choose your master encryption key passphrase, a phrase that is much longer than a typical password and is easily remembered as a string of words. Enter this passphrase into a file (e.g., /path/to/passphrase.txt), to be passed into the CLI, to avoid logging history showing the passphrase. Then choose the location of where the secrets file will reside on your local host (not where the Confluent Platform services run—e.g., /path/to/secrets.txt). The secrets file will contain encrypted secrets for the master encryption key, data encryption key, and configuration parameters along with their metadata, such as which cipher was used for encryption. Now, you are ready to generate the master encryption key:

$ confluent secret master-key generate --local-secrets-file /path/to/secrets.txt --passphrase @/path/to/passphrase.txt

Save the master key. It cannot be retrieved later.
+------------+----------------------------------------------+
| Master Key | Nf1IL2bmqRdEz2DO//gX2C+4PjF5j8hGXYSu9Na9bao= |
+------------+----------------------------------------------+

As the output indicates, the master encryption key cannot be retrieved later so make sure to save it somewhere. Export this key into the environment on the local host as well as every host that will have a configuration file with secret protection:

$ export CONFLUENT_SECURITY_MASTER_KEY=Nf1IL2bmqRdEz2DO//gX2C+4PjF5j8hGXYSu9Na9bao=

To protect this environment variable in a production host, you can set the master encryption key at the process level instead of at the global machine level. For example, you could set it in the systemd overrides for executed processes, restricting the environment directives file to root-only access.

Encrypt the value of a configuration parameter

Let’s use a configuration parameter available in a configuration file example that ships with Confluent Platform. We will encrypt the parameter config.storage.topic in $CONFLUENT_HOME/etc/schema-registry/connect-avro-distributed.properties.

First, make a backup of this file, because the CLI currently does in-place modification on the original file. Then choose the exact path for where the secrets file will reside on the remote hosts where the Confluent Platform services run. Now, you are ready to encrypt this field:

# Value before encryption
$ grep "config\.storage\.topic" connect-avro-distributed.properties
config.storage.topic=connect-configs

# Encrypt it
# remote-secrets-file: /path/to/secrets-remote.txt
confluent secret file encrypt --local-secrets-file /path/to/secrets.txt --remote-secrets-file /path/to/secrets-remote.txt --config-file connect-avro-distributed.properties --config config.storage.topic

# Value after encryption
$ grep "config\.storage\.topic" connect-avro-distributed.properties
config.storage.topic = ${securepass:/path/to/secrets-remote.txt:connect-avro-distributed.properties/config.storage.topic}

As you can see, the configuration parameter config.storage.topic setting was changed from connect-configs to ${securepass:/path/to/secrets-remote.txt:connect-avro-distributed.properties/config.storage.topic}. This is a tuple that directs the service to look up the encrypted value of the file/parameter pair connect-avro-distributed.properties/config.storage.topic from the /path/to/secrets-remote.txt secrets file.
View the contents of the local secrets file /path/to/secrets.txt. It now contains the encrypted secret for this file/parameter pair along with the metadata such as which cipher was used for encryption:

$ cat /path/to/secrets.txt
...
connect-avro-distributed.properties/config.storage.topic = ENC[AES/CBC/PKCS5Padding,data:CUpHh5lRDfIfqaL49V3iGw==,iv:vPBmPkctA+yYGVQuOFmQJw==,type:str]

You can also decrypt the value into a file:

$ confluent secret file decrypt --local-secrets-file /path/to/secrets.txt --config-file connect-avro-distributed.properties --output-file decrypted.txt
$ cat decrypted.txt
config.storage.topic = connect-configs

Update the value of the configuration parameter

You may have a requirement to update secrets on a regular basis, to help them from getting stale. The configuration parameter config.storage.topic was originally set to connect-configs. If you need to change the value in the future, you can update it directly using the CLI. In the CLI below, pass in a file /path/to/updated-config-and-value that has written config.storage.topic=newTopicName to avoid logging history that shows the new value:

$ confluent secret file update --local-secrets-file /path/to/secrets.txt --remote-secrets-file /path/to/secrets-remote.txt --config-file connect-avro-distributed.properties --config @/path/to/updated-config-and-value

The configuration file connect-avro-distributed.properties does not change, because it’s just a pointer to the secrets file. However, the secrets file has a new encrypted value for this file/parameter pair. With the dynamic broker configuration of KIP-226, some configuration parameters can be updated without a broker restart. For other parameters and services, it will need to be restarted:

$ cat /path/to/secrets.txt
...
connect-avro-distributed.properties/config.storage.topic = ENC[AES/CBC/PKCS5Padding,data:CblF3k1ieNkFJzlJ51qAAA==,iv:dnZwEAm1rpLyf48pvy/T6w==,type:str]

Trust but verify

That’s cool, but does it work? Try it out yourself. Run Kafka and start the modified Connect worker with the encrypted value of config.storage.topic=newTopicName:

# Start ZooKeeper and a Kafka broker
$ confluent local start kafka

# Run the modified connect worker
$ connect-distributed connect-avro-distributed.properties > connect.stdout 2>&1 &

# List the topics
$ kafka-topics --bootstrap-server localhost:9092 --list
__confluent.support.metrics
__consumer_offsets
_confluent-metrics
connect-offsets
connect-statuses
newTopicName   <<<<<<<

Going to production

So far, we have covered how to create the master encryption key and encrypt secrets in the configuration files. We recommend that you operationalize this workflow by augmenting your orchestration tooling to enable Secret Protection on the destination hosts. There are four required tasks to do this:

  1. Export the master encryption key into the environment on every host that will have a configuration file with secret protection
  2. Distribute the secrets file: copy the secrets file /path/to/secrets.txt from the local host on which you have been working to /path/to/secrets-remote.txt on the destination hosts
  3. Propagate the necessary configuration file changes: update the configuration file on all hosts so that the configuration parameter now has the tuple for secrets
  4. Restart the services if they were already running

These hosts may include Kafka brokers, Connect workers, Schema Registry instances, KSQL servers, Confluent Control Center, etc.—any service using password encryption. You can either do the secret generation and configuration modification on each destination host directly, or do it all on a single host and then distribute the encrypted secrets to the destination hosts. The CLI is flexible to accommodate either way.

You may also have a requirement to rotate the master encryption key or data encryption key on a regular basis. You can do either of these with the CLI, and the example below is for rotating just the data encryption key:

$ confluent secret file rotate --data-key --local-secrets-file /path/to/secrets.txt --passphrase @/path/to/passphrase.txt

Next steps

We think security is one of the top priorities for our enterprise customers, and if you’d like to learn more about it and talk with the experts, we would love to see you at Kafka Summit San Francisco. The conference schedule includes a talk on The Easiest Way to Configure Security for Clients AND Servers by Dani Traphagen and Brian Likosar, who have immense experience working with our top customers in taking Apache Kafka to production. They will talk about Kafka security best practices and how to leverage a variety of security features, including Secret Protection, to appropriately lock down a cluster. Register for Kafka Summit San Francisco using the code blog19 to get 30% off.

For more self-paced learning, feel free to explore our security tutorials as well:

  • Secret Protection tutorial: this up-to-date tutorial provides similar coverage to this blog post and adds an automated demo that programmatically runs through these steps
  • Security tutorial: this step-by-step example will help you enable SSL encryption, SASL authentication, and authorization on the Confluent Platform with monitoring via Confluent Control Center

Kafka Connect Improvements in Apache Kafka 2.3

$
0
0

With the release of Apache Kafka® 2.3 and Confluent Platform 5.3 came several substantial improvements to the already awesome Kafka Connect. Not sure what Kafka Connect is or need convincing of its awesomeness? Didn’t realise that it’s part of Apache Kafka and solves all your streaming integration needs? Check out my Kafka Summit London talk: From Zero to Hero with Kafka Connect—and if you want to hear more talks like this, be sure to come to Kafka Summit San Francisco.

So herewith are some of the enhancements to Kafka Connect that caught my eye. At the top of the list has to be the change in how Kafka Connect handles tasks when connectors are added and removed. Previously, this was somewhat of a “stop the world” activity, which caused much wailing and gnashing of teeth amongst developers and operators. Whilst this is the headline act, there are several other real gems that address frequent requests from the Kafka Connect community.

Incremental Cooperative Rebalancing in Kafka Connect

A Kafka Connect cluster is made up of one or more worker processes, and the cluster distributes the work of connectors as tasks. When a connector or worker is added or removed, Kafka Connect will attempt to rebalance these tasks. Before version 2.3 of Kafka, the cluster stopped all tasks, recomputed where to run all tasks, and then started everything again. Each rebalance halted all ingest and egress work for usually short periods of time, but also sometimes for a not insignificant duration of time.

Now with KIP-415, Apache Kafka 2.3 instead uses incremental cooperative rebalancing, which rebalances only those tasks that need to be started, stopped, or moved. For more details, there are available resources that you can read, listen, and watch, or you can hear the lead engineer on the work, Konstantine Karantasis, talk about it in person at the upcoming Kafka Summit.

To put it through its paces, I did a simple test with a handful of connectors. I’m using just a single distributed Kafka Connect worker. The source is using kafka-connect-datagen, which generates random data according to a given schema at defined intervals. The fact that it does so at defined intervals allows us to roughly determine the times during which the task was stopped due to rebalancing, since the generated messages have a timestamp as part of the Kafka message. These messages then get streamed to Elasticsearch—not just because it’s an easy sink to use but also because we can then visualise the timestamp of the source messages to look at any gaps in production.

To create the source, run the following:

curl -s -X PUT -H  "Content-Type:application/json" http://localhost:8083/connectors/source-datagen-01/config \
    -d '{
    "connector.class": "io.confluent.kafka.connect.datagen.DatagenConnector",
    "kafka.topic": "orders",
    "quickstart":"orders",
    "max.interval":200,
    "iterations":10000000,
    "tasks.max": "1"
  }'

To create the sink, run this:

curl -s -X PUT -H  "Content-Type:application/json" \
    http://localhost:8083/connectors/sink-elastic-orders-00/config \
    -d '{
        "connector.class": "io.confluent.connect.elasticsearch.ElasticsearchSinkConnector",
        "topics": "orders",
        "connection.url": "http://elasticsearch:9200",
        "type.name": "type.name=kafkaconnect",
        "key.ignore": "true",
        "schema.ignore": "false",
        "transforms": "addTS",
        "transforms.addTS.type": "org.apache.kafka.connect.transforms.InsertField$Value",
        "transforms.addTS.timestamp.field": "op_ts"
        }'

You’ll notice that I’m using a Single Message Transform to lift the timestamp of the Kafka message into a field of the message itself so that it can be exposed in Elasticsearch. From here, it’s plotted using Kibana to show where the number of records produced drops, in line with where the rebalances happen:

Rebalance: Apache Kafka <=2.2 vs. Rebalance: Apache Kafka >=2.3

In the Kafka Connect worker log, it’s possible to see the activity and timings, and compare the behaviour of Apache Kafka 2.2 with 2.3.

Apache Kafka <=2.2 | Apache Kafka >=2.3
Note: logs have been stripped of additional text to enable clearer illustration.

Logging improvements

Probably second in top frustrations with Kafka Connect behind the rebalance issue (which has greatly improved as shown above) is the difficulty in determining in the Kafka Connect worker log which message belongs to which connector.

Previously, you’d get messages in the log directly from a connector’s task, such as this:

INFO Using multi thread/connection supporting pooling connection manager (io.searchbox.client.JestClientFactory)
INFO Using default GSON instance (io.searchbox.client.JestClientFactory)
INFO Node Discovery disabled... (io.searchbox.client.JestClientFactory)
INFO Idle connection reaping disabled... (io.searchbox.client.JestClientFactory)

Which task are they for? Who knows. Maybe you figure out that JestClient has to do with Elasticsearch…maybe they’re from the Elasticsearch connector! But you’ve got five different Elasticsearch connectors running…so which instance are they from? And not to mention that connectors can have more than one task. Sounds like a troubleshooting nightmare!

With Apache Kafka 2.3, Mapped Diagnostic Context (MDC) logging is available, giving much more context in the logs:

INFO [sink-elastic-orders-00|task-0] Using multi thread/connection supporting pooling connection manager (io.searchbox.client.JestClientFactory:223)
INFO [sink-elastic-orders-00|task-0] Using default GSON instance (io.searchbox.client.JestClientFactory:69)
INFO [sink-elastic-orders-00|task-0] Node Discovery disabled... (io.searchbox.client.JestClientFactory:86)
INFO [sink-elastic-orders-00|task-0] Idle connection reaping disabled... (io.searchbox.client.JestClientFactory:98)

This change in logging format is disabled by default to maintain backward compatibility. To enable this improved logging, you need to edit etc/kafka/connect-log4j.properties and set the log4j.appender.stdout.layout.ConversionPattern as shown here:

log4j.appender.stdout.layout.ConversionPattern=[%d] %p %X{connector.context}%m (%c:%L)%n

Support for this has also been added to the Kafka Connect Docker images through the environment variable CONNECT_LOG4J_APPENDER_STDOUT_LAYOUT_CONVERSIONPATTERN.

For more details, see KIP-449.

REST improvements

KIP-465 adds some handy functionality to the /connectors REST endpoint. By passing additional parameters, you can get back more information about each connector instead of having to iterate over the results and make additional REST calls.

For example, to find out the state of all tasks before Apache Kafka 2.3, you’d have to do something like this, using xargs to iterate over the output and call the status endpoint repeatedly:

$ curl -s "http://localhost:8083/connectors"| \
    jq '.[]'| \
    xargs -I{connector_name} curl -s "http://localhost:8083/connectors/"{connector_name}"/status"| \
    jq -c -M '[.name,.connector.state,.tasks[].state]|join(":|:")'| \
    column -s : -t| sed 's/\"//g'| sort
sink-elastic-orders-00  |  RUNNING  |  RUNNING
source-datagen-01       |  RUNNING  |  RUNNING

Now with Apache Kafka 2.3, you can use /connectors?expand=status to make a single REST call with some jq magic to munge the results into the same structure as before:

$ curl -s "http://localhost:8083/connectors?expand=status" | \
     jq 'to_entries[] | [.key, .value.status.connector.state,.value.status.tasks[].state]|join(":|:")' | \
     column -s : -t| sed 's/\"//g'| sort
sink-elastic-orders-00  |  RUNNING  |  RUNNING
source-datagen-01       |  RUNNING  |  RUNNING

There’s also /connectors?expand=status, which will return for each connector information like the configuration, type of connector, and so on. You can combine them too:

$ curl -s "http://localhost:8083/connectors?expand=info&expand=status"|jq 'to_entries[] | [ .value.info.type, .key, .value.status.connector.state,.value.status.tasks[].state,.value.info.config."connector.class"]|join(":|:")' | \
       column -s : -t| sed 's/\"//g'| sort
sink    |  sink-elastic-orders-00  |  RUNNING  |  RUNNING  |  io.confluent.connect.elasticsearch.ElasticsearchSinkConnector
source  |  source-datagen-01       |  RUNNING  |  RUNNING  |  io.confluent.kafka.connect.datagen.DatagenConnector

Kafka Connect now sets client.id

Thanks to KIP-411, Kafka Connect now sets client.id in a more helpful way per task. Whereas before you could only see that consumer-25 was consuming from a given partition as part of the connector’s consumer group, now you can tie it directly back to the specific task, making troubleshooting and diagnostics much easier.

Kafka Connect `client.id`: Apache Kafka <=2.2 | Apache Kafka >=2.3

Connector-level producer/consumer configuration overrides

A common request over the years is the ability to override the consumer settings or producer settings used by Kafka Connect sinks and sources, respectively. Until now, they have taken the values specified in the worker configuration, making granular refinement of things, such as security principals, impossible to do without simply spawning more workers.

The implementation of KIP-458 in Apache Kafka 2.3 enables a worker to permit overrides to configuration. connector.client.config.override.policy is a new setting with three permitted values that needs to be set at the worker level:

Value Description
None Default policy. Disallows any configuration overrides.
Principal Allows override of security.protocol, sasl.jaas.config, and sasl.mechanism for the producer, consumer, and admin prefixes.
All Allows override of all configurations for the produce, consumer, and admin prefixes.

With the above configuration set in the worker configuration, you can now override settings on a per-connector basis. Simply supply the required parameter with a prefix of consumer.override (Sinks) or producer.override (Sources). You can also use admin.override for dead letter queues.

In this example, when the connector is created, it will consume data from the latest point in the topic rather than reading all of the available data in the topic, which is the default behaviour for Kafka Connect. This is done by overriding the auto.offset.reset configuration using
"consumer.override.auto.offset.reset": "latest".

curl -i -X PUT -H  "Content-Type:application/json" \
      http://localhost:8083/connectors/sink-elastic-orders-01-latest/config \
      -d '{
  "connector.class": "io.confluent.connect.elasticsearch.ElasticsearchSinkConnector",
  "topics": "orders",
  "consumer.override.auto.offset.reset": "latest",
  "tasks.max": 1,
  "connection.url": "http://elasticsearch:9200",  "type.name": "type.name=kafkaconnect",
  "key.ignore": "true",   "schema.ignore": "false",
  "transforms": "renameTopic",
  "transforms.renameTopic.type": "org.apache.kafka.connect.transforms.RegexRouter",
  "transforms.renameTopic.regex": "orders",
  "transforms.renameTopic.replacement": "orders-latest"
}'

By examining the worker log, we can see that the override is picked up:

[2019-07-17 13:57:27,532] INFO [sink-elastic-orders-01-latest|task-0] ConsumerConfig values:
        allow.auto.create.topics = true
        auto.commit.interval.ms = 5000
        auto.offset.reset = latest
[…]

We can see that this ConsumerConfig log entry specifically relates to the connector we’ve created, demonstrating the usefulness of the MDC logging described above.

A second connector is running from the same topic but with no consumer.override, thus inheriting the default worker value of earliest:

[2019-07-17 13:57:27,487] INFO [sink-elastic-orders-01-earliest|task-0] ConsumerConfig values:
        allow.auto.create.topics = true
        auto.commit.interval.ms = 5000
        auto.offset.reset = earliest
[…]

The impact of this difference can be examined in the work that we’ve configured it to do by streaming data from the topic to Elasticsearch.

$ curl -s "localhost:9200/_cat/indices?h=idx,docsCount"
orders-latest     2369
orders-earliest 144932

There are two indices: one clearly with fewer records despite being populated from the same topic, as the orders-latest index is populated by the connector only streaming records from the topic that arrive after the connector was created; the orders-earliest index, on the other hand, is populated by a separate connector that uses the Kafka Connect default of streaming all new messages, along with all the messages that were in the topic already.

Summary

I think you will agree that this is a fine set of useful improvements to Kafka Connect. If you’ve got data to get into Kafka, or data to stream from Kafka to somewhere else, you should almost certainly be using Kafka Connect—made easier and faster with this release.

To learn more about the rebalance improvements, come to Kafka Summit in San Francisco next month to hear the lead engineer on the work, Konstantine Karantasis, talk about it in depth. You can register using the code blog19 for a 30% discount.

Robin Moffatt is a developer advocate at Confluent, as well as an Oracle Groundbreaker Ambassador and ACE Director (alumnus). His career has always involved data, from the old worlds of COBOL and DB2, through the worlds of Oracle and Hadoop and into the current world with Kafka. His particular interests are analytics, systems architecture, performance testing, and optimization. You can follow him on Twitter.

A Guide to the Confluent Verified Integrations Program

$
0
0

When it comes to writing a connector, there are two things you need to know how to do: how to write the code itself, and helping the world know about your new connector. This post specifically outlines the process by which we verify partner integrations, and is a means of letting the world know about our partner’s contributions to our connector ecosystem. It points to best practices for anyone writing Kafka Connect connectors.

Recently, Confluent introduced a revised Verified Integrations Program to support the goal of supplementing connectors provided by Confluent with high-quality and well-vetted integrations from partners. As part of this initiative, we’ve simplified our verification requirements, streamlined our verification process, and updated our partner-facing documentation, making it easier and faster for software vendors and partners to build connectors. Because our partners know how to interface with their products best, we actually prefer it when partners offer connectors to our platform and will always prioritize partner-sourced connectors.

Simplified verification requirements

The verification program still has two tiers: Gold and Standard. Gold verifications indicate the tightest integration with Confluent Platform, whereas Standard verifications are functional and practical.

The Verification Guide for Confluent Platform Integrations describes the requirements that must be met for verification under the earlier vision of the program. In a nutshell, the document states that sources and sinks are verified as Gold if they’re functionally equivalent to Kafka Connect connectors. They’re granted Standard verification as long as the integration can produce or consume Avro in conjunction with Confluent Schema Registry. The idea here was to motivate partners to write their sources and sinks with the Kafka Connect API instead of the consumer/producer APIs, while still making room for developers building consumers and producers to meet the Gold status.

Over the years, we’ve since seen wide adoption of Kafka Connect. We’ve also observed that every partner integration not using Kafka Connect did not meet the criteria for Gold verification, while every partner integration using Kafka Connect did. Partner interest in integrating with other aspects of the Confluent Platform besides sources and sinks has grown as well. Thus, we’ve simplified our verification requirements and added a simple classification model. The classification model is as follows:

  • Sources and sinks: integrations that read or write data to Kafka topics
  • Stream processors: integrations that process data in Kafka via KSQL, Kafka Streams, or something else
  • Platforms: deployment environments, storage infrastructure, hardware appliances, and so on
  • Complementary: Systems that might not directly touch the Confluent Platform but interact with it in some way, such as application performance monitoring solutions, visualization engines commonly used with Kafka, and so on

For each classification, there could be integrations that qualify as both Standard and Gold with respect to the Confluent Platform. Currently, our priority is sources and sinks, but partners will integrate with Confluent in other ways in the future.

In line with our commitment to fostering a broad catalog of sources and sinks, we’ve greatly simplified the criteria. Partners who build sources and sinks using the Kafka Connect API qualify for Gold verification, and any other integrations are granted Standard for now. While it’s still possible to obtain Gold verification by following the practices detailed in the Verification Guide for Confluent Integrations, no partners actually do this since it’s so much easier to just go with Kafka Connect. The tight integration with Confluent Platform almost comes by default with Kafka Connect. Connectors provide integration with Confluent Schema Registry, Single Message Transforms, Confluent Control Center, and soon Confluent Cloud.

Building a connector with Kafka Connect

Kafka Connect Connectors

By encouraging partners to standardize on Kafka Connect for sources and sinks, we’re offering our customers the following benefits:

  • Reusability: With a robust ecosystem of connectors to choose from, developers don’t need to concern themselves with reimplementing access to third party systems
  • Standardization of data in Kafka regardless of source and target: Data that comes in via Kafka Connect can leverage converters and transforms in order to uniformly serialize data and enforce schema
  • Easier integration with Confluent Platform
  • Established best practices for development and deployment, as articulated in the new verification guide, described below
  • A configuration-based turnkey deployment framework for loading data into Apache Kafka
  • A single marketplace of supported connectors for the entire ecosystem: Confluent Hub

In addition, many helpful resources on Kafka Connect exist today.

This classic blog series provides a great end-to-end example of using Kafka Connect for those who are new to it. Once you’re convinced, you can have a look at the Kafka Connect development guide for an overview on how to get started, as well as see completed open source connectors for Amazon S3, HDFS, or Elasticsearch for examples of completed connectors.

Verification process for integrations

Making the process easy and straightforward for partners while at the same time ensuring that customers receive quality at completion is extremely important. This is why we’ve developed the following process:

  1. Initiated: A simple discussion with Confluent where we identify the integration and discuss the development process
  2. Guided: The development effort itself, where Confluent resources are made available to the partner for Q&A, process support, testing/development, and so on
  3. Submitted: The integration has been submitted to Confluent for review
  4. Verified: Confluent has concluded verification and produces a verification document which details the results of Confluent’s testing and the degree to which the connector adheres to the best practices detailed in the Verification Guide.
  5. Published: The integration has been uploaded to the Confluent Hub

Updated development and verification documentation

If you’re building a Kafka Connect connector, you can refer to the verification guide and checklist to get started with the program. The verification guide goes into detail about what’s absolutely required for verification and covers common practices around the development and testing of connectors. This documentation is brand new and represents some of the most informative, developer-centric documentation on writing a connector to date. The checklist shows how to put together a verification package for Confluent and provides a template for how it will be evaluated. Since the program is still young, these guides are subject to revision over time.

Showcase partners

A number of partners have already verified their work through this program and shared end-to-end examples of how to use them.

For example, you can load data from Kafka into Snowflake using their Snowflake Connector for Kafka (sink) and directly access the connector itself. The Snowflake connector will be available on the Confluent Hub once it’s generally available.

The list goes on:

MongoDB also announced adoption of Kafka Connect via officially supported releases of connectors previously offered by the community. Feel free to read more about it in their blog post, check out the source code, and obtain the connector from the Confluent Hub. Once these source and sink connectors are generally available, we’ll be deprecating the Confluent-supported, Debezium, and community connectors currently hosted there.

Longtime partner Neo4J wrote a blog post about their connector (also on GitHub) and will be working closely with us to make sure their integration evolves in tandem with their solution.

Neo4j and Confluent share a customer base that is determined to push the boundaries of detecting data connections as interactions and events occur. Driven by customer need to realize more value from their streaming data, we have integrated Neo4j and Kafka both as a sink and source in a Confluent setup. As a result, Confluent and Neo4j customers will be able to power their financial fraud investigations, social media analyses, network & IT management use cases, and more with real-time graph analysis.
Philip Rathle, VP of Products, Neo4j

Couchbase developed a source and sink Gold connector to operationalize dataflows with Kafka, available on the Confluent Hub.

A verified Gold connector with Confluent Platform is important to our customers who want a validated and optimized way to enable operational dataflows to and from Couchbase, an enterprise-class NoSQL database, and Kafka. With the Kafka Connect API, we have a deeper level of integration with the Confluent Platform so together, our joint solution is truly enterprise ready for any application modernization or cloud-native application initiatives.
Anthony Farinha, Senior Director, Business Development, Couchbase

Kinetica develops an in-memory database accelerated by GPUs that can simultaneously ingest, analyze, and visualize event streaming data. There is a GitHub repo, and their connector is available on the Confluent Hub.

Customers want to ingest data streams in real time from Apache Kafka into Kinetica for immediate action and analysis. Because the Confluent Platform adds significant value for enterprises, we built out the Kinetica connector using Connect APIs, offering a deeper level of integration with the Confluent Platform.
Irina Farooq, CPO, Kinetica

The DataStax Apache Kafka Connector offers customers high-throughput rates to their database products built on Cassandra.

In collaboration with Confluent, we developed a verified Gold connector that enables our customers to achieve the highest throughput rates possible. It also enables highly secure, resilient, and flexible connections between DataStax database products built on Apache Cassandra™ and Confluent’s event streaming platform. We promised our joint enterprise customers a fully supported microservices-based application stack, and this partnership delivers on that promise.
Kathryn Erickson, Senior Director of Strategic Partnerships, DataStax

Furthermore, we’re looking forward to working more with Humio, which now offers a Kafka Connect interface that can be used to consume events directly into their platform via the HTTP Event Collector Endpoint (HEC). You can also obtain the Humio HEC sink from the Confluent Hub.

For a complete list of partner and Confluent supported connectors, see the Confluent Hub.

Join the Verified Integrations Program

Whether you’re using Kafka Connect or not, we can find a place for your integrations in our program. Once a partner achieves verified status with us, they become a part of an active and robust ecosystem, reassuring customers with full confidence that the joint integration is sound, supported, and backed by both Confluent and the partner. To get started on your connector, we invite you to reach out and ask questions, or join the program.

Learn more

A great place to learn more about the business and technical benefits of building a connector, as well as how to build a connector, is during our online talks on Aug. 22 and Aug. 29 at 10:00 a.m. Pacific Time.

If you like jumping right in, you can also visit the Confluent Hub and start trying out a variety of connectors for free. We’ll also be at the Confluent booth at Kafka Summit San Francisco to answer any questions you might have about building a connector. Register for the event using the code blog19 to get 30% off!

Jeff Bean is a partner solutions architect and runs the Verified Integrations Program for Confluent. Previously, he did stream processing evangelism for Ververica and was a partner engineer in charge of a similar program at Cloudera.


Building Transactional Systems Using Apache Kafka

$
0
0

Traditional relational database systems are ubiquitous in software systems. They are surrounded by a strong ecosystem of tools, such as object-relational mappers and schema migration helpers. Relational databases also provide strong guarantees in the form of ACID transactions, which are loved by developers for their all-or-nothing semantics.

Today’s businesses, however, want to process ever-increasing amounts of data. Write-heavy loads in particular may run into scalability issues in traditional relational databases and therefore need alternative architectures that scale to their needs. This article presents an event-based architecture that retains most transactional properties as provided by an RDBMS, while leveraging Apache Kafka® as a scalable and highly available single source of truth.

ACID? Say again?

ACID refers to Atomicity, Consistency, Isolation, and Durability. What do these mean, exactly?

  • Atomicity in relational databases ensures that a transaction either succeeds or fails as a whole. This is especially relevant if the transaction consists of multiple SQL statements.
  • Consistency expresses the idea that the database is in a valid state. Martin Kleppmann argues in his book Designing Data-Intensive Applications that consistency is an application-specific notion. The database can only provide support by enforcing constraints, such as referential integrity. Defining the correct constraints and transactions is still up to the application.
  • Isolation refers to transactions that can be processed without interfering with other transactions, for example, during concurrent processing. The database system guarantees that multiple concurrent transactions will appear to the user to be executed one after the other. If two conflicting transactions modify the same entity, one of them will be successful and the other will fail.
  • Durability guarantees that the results are persisted after a successful commit. All of these are enforced by relational databases. Upholding each property in a system based on Kafka is tricky but not impossible, as you are about to find out.

A simple multi-tenant system

Let’s assume we want to build a multi-tenant system. Each tenant has a unique fixed identifier as well as other miscellaneous data, such as contact details or billing address. In order to add, modify, or delete a tenant, an administrator can interact with the system via an HTTP API. The event streaming model lends itself to an event-based architecture, so Kafka serves as a central event hub. All API calls are transformed into events and written to a Kafka topic using the tenant identifier as key and the remaining data as value.

If an event consumer encounters a new tenant identifier, it will create a new tenant. Subsequent events with the same key are considered modifications to the tenant, and tombstones represent tenant deletions. Since an event contains all tenant data, the newest event on the stream always represents the current state of a tenant.

Multi-Tenant System

A naive implementation of this system will have several issues: Kafka consumers will automatically commit event offsets every five seconds by default. If the event processor goes down while creating a new tenant, the event still might have been committed although no tenant was created. In effect, the event is considered to be successfully processed when in reality it failed. Much in the same way, the producer can fail to submit an event to Kafka, although the user has already been notified that the operation was successful. So what are the nitty-gritty details required to make our example system transactional?

Infusing transactional properties

In our system, a transaction is represented by a single event only. This means that an event is the most fine-grained unit we read from or write to Kafka. At the same time, events contain all the information necessary for manipulating a tenant. Reading and writing events is therefore inherently atomic, just like transactions in a relational database. That is straightforward, but what about consistency?

In an RDBMS, the database engine is responsible for enforcing constraints and referential integrity. However, Kafka does not know the exact data model. It concerns itself only with binary key-value pairs and cannot enforce any constraints on your data. In order to achieve consistency, the event producer must take care of everything before submitting an event to a Kafka topic. Verifying incoming data is something that needs to be performed anyway, as is the case with our event producer that receives input values via the HTTP API.

When events are sent from one or more producers to Kafka, Kafka will preserve the order of events. This is not a global ordering across partitions but rather a total ordering within each partition. Luckily, Kafka ensures that all of a partition’s events will be read by the same consumer so no event will be processed by two conflicting consumers. Each event is processed in isolation from other events, regardless of the number of partitions and consumers, as long as all processors of a specific event type are in the same consumer group.

Lastly, in order to achieve durability in our system, the event producer and processor must pay special attention to acknowledgements and commits. If a user requests the creation of a new tenant via the API, the producer needs to delay the response to the user until the tenant event is acknowledged by the Kafka cluster. Kafka’s durability guarantees now prevent the event from being lost if the API service goes down. Note that you can tune the level of durability based on the requested type of acknowledgement (ack): producers may request no ack at all, an ack by the leader, or an ack from the cluster as soon as the minimum number of replicas are in sync.

Once the event is persisted, it needs to be consumed by an appropriate event processor, though the processor may go down before it has finished. If auto-commit is enabled for the Kafka consumer, the event processor might already have commited the event offset and fail before finishing the event. The consumer must commit the event manually after all relevant sub-processes have completed. For example, if a new tenant was created and that tenant had to be registered with a third-party payment provider, the consumer delays committing the event until the tenant is successfully registered with the payment service. Only the synergy between the event producer, processor, and Kafka allows for proper durability.

Prerequisites and limitations of the architecture

At this point, our system has most of the benefits that come with ACID transactions in relational databases: a user’s actions are atomic, consistency is handled by event producers, events are isolated by design, and durability is guaranteed by smart acks and commits. But to continue on this path, there are more considerations.

Modeling events and transactions

The system was initially presented as “event based.” Yet, there are different ways to design events, and this term does not enforce any particular style. In our context, events should be self-contained. A tenant event, for example, should encapsulate all information about that tenant so that no dependencies on other events exist. This is referred to as event-carried state transfer. A transaction may in turn consist of one or more events. The following image depicts a producer that sends two events representing a single transaction to a Kafka topic and two event processors in the same consumer group that read events from the topic.HTTP API | Event Producer ➝ Kafka ➝ *Processor A* | Processor B

There may be cases where the first part of a transaction is processed by the consumer and a rebalance kicks in. The partition to which both events were sent are now processed by a different consumer that might lack the context of the previous events.

HTTP API | Event Producer ➝ Kafka ➝ Processor A | *Processor B*

This problem can be tackled in several different ways. One possibility is to require Processor B to reprocess the partition, which would require careful attention to avoid side effects. It is also worth noting that rebalances occur infrequently, whereas events occur frequently. If the partition grows quickly and event processing is slow in comparison, reprocessing the partition may take a long time.

Kafka Streams takes care of the issue in a different way. Each Kafka Streams task contains a state store that is required for functionality involving multiple dependent messages like windowing. The tasks are aware of rebalances and migrate the state accordingly between event processors. Therefore, Processor B knows about the event processed by Processor A.

The most robust way to represent a transaction is to model a transaction as a single event. We previously established that events are atomic. If an event always corresponds to a single transaction, this transaction will also be processed atomically.

API consistency

Even though event producers are responsible for maintaining referential integrity and other constraints on the data model, the API itself will only be eventually consistent for clients. The event producers and consumers are asynchronously decoupled through Kafka. If the client creates a new tenant and immediately reads it, chances are that the tenant was not yet created and the request fails. This is a fundamental design decision, but alleviating the issue is possible. There is no need for clients to query the API if it always returns newly created entities in its response. The following image shows a user who creates a new tenant. The event producer awaits the commit and returns the contents of the committed event back to the user.

A user creates a new tenant. The event producer awaits the commit and returns the contents of the committed event back to the user.

The returned data may be filtered, of course, in order to prevent internal information from leaking to the user. Paired with a client-side library, this approach can hide the eventually consistent behavior from the client.

Idempotent event processing

Many things can go wrong in a distributed system. Requests to the HTTP API could be received twice due to network issues. Furthermore, since event producers, consumers, and Kafka reside on different hosts, a consumer may crash halfway through processing an event. Consequently, it is important to make sure that duplicate requests or events do not modify our system state twice. We need to make the system idempotent. Although this property is very specific to the individual application, we can take measures in two different areas: communication between the user, and the HTTP API or communication between event producer and the event processor.

Our example client uses HTTP to communicate with the event producer. HTTP verbs, such as PUT or DELETE, are idempotent by definition, but operations like POST require special treatment. One possibility is to add an additional HTTP header to requests by which the HTTP server can identify whether a request was sent twice. This unique ID can also be part of the request data. Anything goes, as long as the client and the server agree.

If we do not want to impose constraints on the client, we still have ways to make the event producers and consumers idempotent. For example, a producer can derive the tenant key from unique properties of the tenant, such as email address. Duplicate POST requests will then lead to two events with the same keys and values. From there, event processors ensure that only a tenant with a specific key is created, if it does not yet exist.

Adding more services

The discussed system is just a toy example, but the architecture can be extended to more than a single entity, following the principles of domain-driven design or self-contained systems. Adding producers and consumers for each entity results in a number of “verticals” that are highly decoupled through Kafka.

Tenant App | User App [...] Job Processing App

The event producers and processors need not be separate deployment units. In fact, they might just be two asynchronous subroutines within an application. Even a monolithic deployment works.

The example system assumes that duplicate messages will occur and is designed to handle them gracefully. If you cannot have duplicates, you might want to look into Kafka transactions, which provide exactly once delivery semantics. Together with Kafka Streams, they can be used as a building block for connecting a landscape of services with exactly once semantics.

Final thoughts

The presented example system supports atomic, isolated, and durable operations for creating, modifying, and deleting single tenants, in which event producers handle consistency. The system can be scaled horizontally by adding additional partitions to the tenant topic as long as all tenant events are written to the same topic.

There are other approaches to modeling transactions in a stream processing application. This includes promoting events through a chain of topics based on event state. Following this approach, our tenant events might be submitted to the topic tenant-pending. There, they are picked up by an event processor that sets up the integration for the third-party payment provider and submits events to either the tenant-created or the tenant-failed topic.

There are many different ways to build systems around Apache Kafka and this article presented just one. If you would like to dive deeper into the surrounding software ecosystem, don’t miss out on the Kafka Summit 2019 in San Francisco. You can register and get 30% off with the code blog19.

My thanks go to Thomas Bayer who provided the initial architectural sketch, to the reviewers, Stefan Seifert and Ben Stopford, and to Victoria Yu for copyediting.

Michael Seifert is an experienced freelancing IT consultant and engineer who focuses on distributed systems. He supports his clients, which include leading German technology and media companies, in all stages of the software lifecycle. Michael is passionate about high-quality software systems and is constantly looking for new ways to build robust, low-maintenance architectures.

Confluent Cloud Schema Registry is Now Generally Available

$
0
0

We are excited to announce the release of Confluent Cloud Schema Registry in general availability (GA), available in Confluent Cloud, our fully managed event streaming service based on Apache Kafka®. Before we dive into Confluent Cloud Schema Registry, let’s recap what Confluent Schema Registry is and does.

Confluent Schema Registry provides a serving layer for your metadata and a RESTful interface for storing and retrieving Avro schemas. It stores a versioned history of all schemas based on a specified subject name strategy, offers multiple compatibility settings, and allows schemas to evolve according to the configured compatibility settings and expanded Avro support. Schema Registry provides serializers that plug into Apache Kafka clients, which handle schema storage and retrieval of Kafka messages sent in Avro format.

Version history
Up until now, you need to manage your own Confluent Schema Registry in order to get the benefits mentioned above. This is no longer the case. Confluent Cloud Schema Registry in GA comes with production-level support and SLA to ensure that enterprises run mission-critical applications with proper data governance. It also gives you the option to run Schema Registry in AWS or GCP with your selection of the U.S., Europe, and APAC regions.

Confluent Cloud Schema Registry | GCP

Since it was launched in March 2019, a lot of customers have used Confluent Cloud Schema Registry to manage schemas for upstream applications. More specifically, we have seen a 7x increase of schema versions over the last three months.

Because of the benefits of schemas, contracts between services, and compatibility checking for schema evolution while using Kafka, it is highly recommended that any Kafka user should set up and use Schema Registry from the get-go. However, setting up Schema Registry instances properly can be challenging, as Yeva Byzek explained in a previous blog post outlining 17 common mistakes made by operators.

Confluent Cloud Schema Registry addresses each of these mistakes and removes the operational burden. One distinctive difference between a self-managed Schema Registry and Confluent Cloud Schema Registry is whether schemas are stored. When you run self-managed Schema Registry instances, an internal Kafka topic (kafkastore.topic=_schema) stores the schemas in your Kafka cluster. In contrast, Confluent Cloud Schema Registry is backed by Confluent-managed Kafka clusters, where schemas are stored. This difference helps address mistake #5 specifically.

As mistake #5 mentions, all Schema Registry instances must have the same configuration (kafkastore.topic=) to prevent the creation of different schemas with the same ID. Time to time, we have heard customers accidentally delete this internal topic, stopping producers from producing data with new schemas since Schema Registry would not be able to register new schemas. Confluent Cloud Schema Registry prevents this accident as you cannot delete schema topic unless you explicitly remove an environment where Confluent Cloud Schema Registry is enabled. The common mistakes you could make with self-managed Schema Registry will become a “back in the day when I managed Schema Registry instances” story.

Get started in four steps

Perhaps you’re wondering, “OK, I’m convinced, but how can I start using Confluent Cloud Schema Registry?” It is very simple and free. When you select an environment, you will see “Schema Registry” below “Cluster.” Once you click on “Schemas,” you can select a cloud provider and a region. Now you have Confluent Cloud Schema Registry!

Confluent Cloud Schema Registry | AWS

Confluent Cloud Schema Registry

You can create your first schema in Confluent Cloud Schema Registry by using the Confluent CLI on your local machine. You can also follow Example 2: Avro And Confluent Cloud Schema Registry on GitHub as well.

Step 1

Initialize a properties file at $HOME/.ccloud/config with configuration to your Confluent Cloud cluster:

$ cat $HOME/.ccloud/config
bootstrap.servers=<BROKER ENDPOINT>
ssl.endpoint.identification.algorithm=https
security.protocol=SASL_SSL
sasl.mechanism=PLAIN
sasl.jaas.config=org.apache.kafka.common.security.plain.PlainLoginModule required username\="<API KEY>" password\="<API SECRET>";

Step 2

Add the following parameters to your local Confluent Cloud configuration file ($HOME/.ccloud/config). In the output below, substitute values for <SR API KEY>, <SR API SECRET>, AND <SR ENDPOINT>:

$ cat $HOME/.ccloud/config
...
basic.auth.credentials.source=USER_INFO
schema.registry.basic.auth.user.info=<SR API KEY>:<SR API SECRET>
schema.registry.url=https://<SR ENDPOINT>
...

Step 3

Create a topic called test2 in your Kafka cluster running on Confluent Cloud with the following CLI command:

$ kafka-topics --bootstrap-server `grep "^\s*bootstrap.server" $HOME/.ccloud/config | tail -1` --command-config $HOME/.ccloud/config --topic test2 --create --replication-factor 3 --partitions 6

Step 4

Create a schema called myrecord for the test2 topic with the following CLI command.

$ confluent local produce test2 -- --cloud --value-format avro --property value.schema='"type":"record","name":"myrecord","fields":[{"name":"count","type":"int"}]}' --property schema.registry.url=https://<SR ENDPOINT> --property basic.auth.credentials.source=USER_INFO --property schema.registry.basic.auth.user.info='<SR API KEY>:<SR API SECRET>'

After you complete these four steps, you will be able to see the following schema for test2 topic in the “Topics” menu.

test2

And there you have it. You have a new schema (test2-value) for the test2 topic in Confluent Cloud Schema Registry.

Learn more

If you haven’t tried it yet, check out Confluent Cloud, a fully managed event streaming service based on Apache Kafka, and Confluent Cloud Schema Registry. You can enjoy benefits of schemas, contracts between services, and compatibility checking for schema evolution while using Kafka without any operational burdens.

Other articles in this series

Nathan Nam is product manager for Kafka Connect, connectors, and Schema Registry at Confluent. Previously, he worked at MuleSoft as a product manager and held various roles at Samsung Electronics. He holds an MBA from Tuck School of Business at Dartmouth and an MIDS from UC Berkeley.

Using Graph Processing for Kafka Stream Visualizations

$
0
0

We know that Apache Kafka® is great when you’re dealing with streams, allowing you to conveniently look at streams as tables. Stream processing engines like KSQL furthermore give you the ability to manipulate all of this fluently.

But what about when the relationships between items dominate your application? For example, in a social network, understanding the network means we need to look at the friend relationships between people. In a financial fraud application, we need to understand flows of money between accounts. In an identity/access management application, it’s the relationships between roles and their privileges that matters most.

If you’ve found yourself needing to write very large JOIN statements or dealing with long paths through your data, then you are probably facing a graph problem. Looking at your data as a graph pays off tremendously when the connections between individual data items are as valuable as the items themselves. Many domains, such as social relationships, company ownership structures, and even how web pages link to one another on the web are very naturally a graph.

Kafka already allows you to look at data as streams or tables; graphs are a third option, a more natural representation with a lot of grounding in theory for some use cases. So we can improve a portion of just about any event streaming application by adding graph abilities to it. Just as we use streams and tables for the portions that best benefit from those ways of thinking about our data, we can use graph abilities where they make sense to more easily approach our use case.

Confluent Cloud | Kafka | Neo4j | Link Prediction

If you’re looking for the basics on how you can turn streams into graphs with Neo4j and the Neo4j-Streams plugin, you’ve come to the right place. We will cover how you can use them to enrich and visualize your data, add value to it with powerful graph algorithms, and then send the result right back to Kafka. You can use this as an example of how to add graph abilities to any event streaming application.

We will also be using Confluent Cloud, which provides a fully managed event streaming service based on Apache Kafka. I like Confluent Cloud because it lets me focus on getting the value of Kafka without the management and maintenance overhead of extra infrastructure. I get to spin up Kafka in a few minutes, scaling is taken care of for me, and there’s never any patching or restarting to worry about. The approach we’ll use works with any Kafka run though.

All of the code and setup discussed in this blog post can be found in this GitHub repository, so you can try it yourself!

A stream of friend relationships

Suppose we’re operating a social network site, and we have a stream of simple records that let us know who is friending who on the platform. We’ll strip down the data example to something very simple so we can focus on the concepts:

{"initiated": "Cory", "accepted": "Levi", "friends": true, "date": "2019-08-08T16:13:11.774754"}
{"initiated": "Shana", "accepted": "Avi", "friends": true, "date": "2019-08-08T16:13:11.996435"}
{"initiated": "Tsika", "accepted": "Maura", "friends": true, "date": "2019-08-08T16:13:12.217716"}

Here, we have three sample records moving over the “friends” topic in Kafka. “Corey” initiated a friend request to “Levi”, which was accepted on Aug. 8, and so on.

Corey ➝ Friends ➝ Levi

A stream of these records is going to create a natural graph of individuals and their friendships. Each time we add a friend record, we simply create the person if they don’t already exist and link them up. Repeating this over and over with simple pairwise relationships, like what you see above, results in what you see below.

Friendships Graph

Suppose we had a few million of these “friendships,” and we wanted to know who was a friend of a friend of David’s. That would take at least a three-way table join. If we wanted to know how many people were between four and six degrees of separation away from David…well, you can try to write that in SQL if you like—good luck!

It’s time to call upon the graph hero for this event streaming application. Here we go!

Graph Hero

Step 1: Graph the network with Neo4j

We’ll be using Neo4j, which is a native graph database. Instead of storing tables and columns, Neo4j represents all data as a graph, meaning that the data is a set of nodes with labels and relationships. Nodes are like our data entities (in this example, we use Person). Relationships act like verbs in your graph. For example, Cory FRIENDED Levi. This approach to structuring data is called the property graph model.

To query a property graph, we’ll be using the Cypher language, which is a declarative query language similar to SQL, but for graphs. With Cypher, you can describe patterns in graphs as a sort of ascii art; for example in this query:

MATCH (p1:Person)-[:FRIENDS]->(p2:Person)
RETURN *;

Neo4j would find sets of two Person nodes that are related by a FRIENDS relationship, and return everything that it found. Nodes are always enclosed in round brackets, with relationships in square brackets.

When you start a Neo4j instance, it comes with Neo4j Browser, an application that runs on port 7474 of the host, and provides an interactive Cypher query shell, along with visualization of the results. In this blog post when you see pictures of graphs or Cypher queries, we are using Neo4j Browser to enter those queries and see the result, as seen below.

Neo4j Browser

In the code repo that accompanies this post, the setup has mostly been done for you in the form of a Docker Compose file. This will work right out of the box if you’re familiar with Docker—just clone the repo, and execute docker-compose up to get running. These instructions generally follow what you’ll find in the documentation quick start instructions. Neo4j Streams lets Neo4j act as either a source or sink of data from Kafka. Extensive documentation is available, but let’s just skip to the good parts and make this work.

Note: users also have the option of using the Kafka Connect Neo4j Sink instead of the plugin we’re using in this article. We use the plugin to keep the deployed stack as simple to understand as possible, and also because it supports producing data back to Kafka in addition to sinking data.

The code repo we are using for this example includes:

  1. Docker Compose information that lets us create the necessary Neo4j infrastructure
  2. Configuration that attaches it to a Confluent Cloud instance
  3. A submodule which allows us to generate synthetic JSON objects and send them to Kafka (called “fakestream”)
  4. Scripts that allow us to prime our use case with some sample data

Configuring Neo4j to interact with Kafka

Open up the docker-compose.yml file, and you will see the following:

     NEO4J_kafka_group_id: p2
     NEO4J_streams_sink_topic_cypher_friends: "
       MERGE (p1:Person { name: event.initiated })
       MERGE (p2:Person { name: event.accepted })
       CREATE (p1)-[:FRIENDS { when: event.date }]->(p2)
     "
     NEO4J_streams_sink_enabled: "true"
     NEO4J_streams_procedures_enabled: "true"
     NEO4J_streams_source_enabled: "false"
     NEO4J_kafka_ssl_endpoint_identification_algorithm: https
     NEO4J_kafka_sasl_mechanism: PLAIN
     NEO4J_kafka_request_timeout_ms: 20000
     NEO4J_kafka_bootstrap_servers: ${KAFKA_BOOTSTRAP_SERVERS}
     NEO4J_kafka_retry_backoff_ms: 500
     NEO4J_kafka_sasl_jaas_config: org.apache.kafka.common.security.plain.PlainLoginModule required username="${CONFLUENT_API_KEY}" password="${CONFLUENT_API_SECRET}";
     NEO4J_kafka_security_protocol: SASL_SSL

This configuration is doing several things worth breaking down. We’re enabling the plugin to work as both a source and a sink. In the NEO4J_streams_sink_topic_cypher_friends item, we’re writing a Cypher query. In this query, we’re MERGE-ing two Person nodes. The plugin gives us a variable named event, which we can use to pull out the properties we need. When we MERGE nodes, it creates them only if they do not already exist. Finally, it creates a relationship between the two nodes (p1) and (p2).

This sink configuration is how we’ll turn a stream of records from Kafka into an ever-growing and changing graph. The rest of the configuration handles our connection to a Confluent Cloud instance, where all of our event streaming will be managed for us. If you’re trying this out for yourself, make sure to replace KAFKA_BOOTSTRAP_SERVERS, API_SECRET, and API_KEY with the values that Confluent Cloud gives you when you generate an API access key.

After starting Neo4j and allowing some of our records to be consumed from the Kafka topic, we gradually build a bigger and bigger graph that looks like this, when viewed in Neo4j Browser, which will be running on http://localhost:7474/ and can be accessed by the username and password specified in the docker-compose.yml file (neo4j/admin):

Neo4j Browser Graph

As with most social networks, there are some heavily connected people in this graph who know a lot of people, and others around the periphery with fewer friends in the network. By making this data a graph and visualizing it, we can immediately see patterns of relationships that would have been invisible in a list of records.

Step 2: Using graph algorithms to recommend potential friends

The Neo4j Graph Algorithms package that comes with Neo4j allows us to do some really interesting things with our graph. To grow our social network site, we want to encourage users to connect by suggesting potential friends. But how do we produce the most relevant results? We need a way to generate a recommendation and inject it back into a different Kafka topic so that we can drive things like emails to our users and more recommendations on the site.

Link prediction algorithms

In graph algorithms, we have a family of approaches called link prediction algorithms. They help determine the closeness of two nodes and how likely those nodes will connect to one another in the future. Using our social network example, these might be your real life friends who you already know but haven’t yet connected with. Those would make great friend recommendations!

Common Neighbors algorithm

Specifically, we’ll use an approach called the Common Neighbors algorithm. Two strangers who have a lot of friends in common are good targets to introduce to one another.

In Cypher, we’ll simply run the algorithm like so, which we can do in Neo4j Browser:

MATCH (p1:Person)-[:FRIENDS*2]-(p2:Person)
WHERE NOT (p1)-[:FRIENDS]-(p2) AND
id(p1) < id(p2)
WITH distinct(p1), p2
RETURN p1.name, p2.name, algo.linkprediction.commonNeighbors(p1, p2, {}) as score
ORDER BY score DESC;

The first line finds all pairs of people who are separated by two degrees (by some path) but who are also not directly connected to one another. (We don’t want to suggest that two people friend one another when they’re already friends!)

We then call algo.linkprediction.commonNeighbors on those two nodes, return that as a score, and get a list of people and their common neighbor scores, again shown in Neo4j Browser.

Common Neighbors algorithm

Step 3: Publishing back to Kafka

OK, so far, so good. We know how to determine how many common neighbors people have, which is a good way of identifying who might friend who. But we haven’t gotten that data back into Kafka yet. Let’s look at two quick options we might consider.

Publishing ad hoc

By using the streams.publish Cypher function, we can always publish the results of any Cypher query back to Kafka. This is a key part of tying graphs and streams together easily. Anything done in Cypher can be piped back to a topic with little effort, by executing this in Neo4j Browser.

MATCH (p1:Person)-[:FRIENDS*2..3]-(p2:Person) 
WHERE NOT (p1)-[:FRIENDS]-(p2) AND
id(p1) < id(p2) WITH distinct(p1), p2, algo.linkprediction.commonNeighbors(p1, p2, {}) as score WHERE score >= 2 
CALL streams.publish('recommendations', { a: p1.name, b: p2.name, score: score }) RETURN null;

This is the same query we ran previously The only difference is that at the bottom, we limit the results to a score of two or higher and add the streams.publish call, sending it a tiny payload consisting of a, b, and score.

Meanwhile, in Confluent Cloud, our records arrive pretty much as you’d expect.

recommendations

Publishing nodes and edges as they’re created

The weakness of the last approach is that it requires manual notification to Kafka, either scheduled or based on some type of a trigger mechanism. Sometimes though, we might want to have a separate microservice that generates recommendations. It might, for example, use the Common Neighbors approach, but also other approaches as well to make more nuanced and higher quality recommendations. A great way to decouple these concerns is to just have your recommendation engine focus on making recommendations and not worry about the Kafka bits.

As with other databases, you can also just use Neo4j as a source of data. So if your recommendation service can put new nodes into the graph, the plugin can get them to Kafka as needed. This can be done by adding a little bit of configuration to your neo4j.conf:

streams.source.enabled=true
streams.source.topic.nodes.recommendations=Recommendation{*}

The streams.source.topic.nodes.recommendations item says that we’re going to take all of the Recommendation nodes in our graph and publish them to the recommendations Kafka topic. The {*} bit says we want to publish all properties of the recommendation; you can read more about those patterns in the documentation.

To show you how that works, we’ll adjust our recommendations code one more time. Instead of publishing to Kafka, we’ll just create a recommendation node. The underlying database handles the rest.

MATCH (p1:Person)-[:FRIENDS*2..3]-(p2:Person)
WHERE NOT (p1)-[:FRIENDS]-(p2) AND
id(p1) < id(p2) WITH distinct(p1), p2, algo.linkprediction.commonNeighbors(p1, p2, {}) as score WHERE score >= 2
MERGE (r:Recommendation {
   a: p1.name,
   b: p2.name,
   score: score
})
MERGE (p1)<-[:SHOULD_FRIEND]-(r)-[:SHOULD_FRIEND]->(p2)
RETURN count(r);

Once it is run, below is a picture of the resulting recommendation graph showing how people in the social network are connected by scores. For instance, “Mark” in the center and “Matthew” at the bottom seem like they have multiple different paths that would lead them to recommend they connect!

Recommendation Graph

In a production scenario, a microservice would likely be responsible for generating these “recommendations,” tracking recommendations over time as data in Neo4j and letting the data publishing to Kafka take care of the rest.

Meanwhile, in Kafka, the data shows up as we expect but with some extra metadata published by the producer.

recommendations

Summary

Through the simple example of a social media network and adding friends, you can take any data, turn it into a graph, leverage graph processing, and pipe the result back to Kafka. The sky’s the limit!

Whether you’re detecting Russian manipulation of elections on Twitter, looking into bank and financial fraud scenarios, pulling related transactions out of the Bitcoin blockchain, or trying to feed the world by improving crop yields, graphs are pretty much everywhere, just like streams.

When you zoom out from your architecture, this effectively allows you to add graph superpowers to just about any event streaming application. The architecture diagram in the beginning of this post shows how the process of data moving into Neo4j and back out of it again can be abstracted to just another step in a processing pipeline, enabling you to add graph analytics as necessary. If Kafka is persisting your log of messages over time, just like with any other event streaming application, you can reconstitute datasets when needed.

I will be sharing more on this during my session at Kafka Summit San Francisco on October 1st at 11:25 a.m. PT, Extending the Stream/Table Duality into a Trinity, with Graphs, for anyone who might be interested in learning more. If you haven’t gotten your ticket yet, you can register for Kafka Summit San Francisco using the code blog30 to get 30% off.

Happy stream → graph → stream hacking!

David Allen is a technologist who loves to learn and figure out how to do things that haven’t been done before. At Neo4j, he works with Neo4j’s technology partners as a partner solution architect. Prior to Neo4j, he held various roles in consulting, government, and full stack software development, and was also a CTO of a technology startup. Outside of work, you’d usually find him playing guitar or cycling. He loves meeting new people, has a very keen interest in language and culture, and enjoys finding common ground with other people through travel and music.

How to Use Schema Registry and Avro in Spring Boot Applications

$
0
0

TL;DR

Following on from How to Work with Apache Kafka in Your Spring Boot Application, which shows how to get started with Spring Boot and Apache Kafka®, here I will demonstrate how to enable usage of Confluent Schema Registry and Avro serialization format in your Spring Boot applications.

Using Avro schemas, you can establish a data contract between your microservices applications.
The full source code is available for download on GitHub.

Version Date Date
v1.0 7/31/19 Initial revision

Prerequisities

Let’s start writing

As always, we’ll begin by generating a project starter. In this starter, you should enable “Spring for Apache Kafka” and “Spring Web Starter.”

Starter

Figure 1. Generate a new project with Spring Initializer.

<project>
    <dependencies>
        <!-- other dependencies -->
        <dependency>
            <groupId>io.confluent</groupId>
            
<artifactId>kafka-schema-registry-client</artifactId>   (1)
            <version>5.3.0</version>
        </dependency>
        <dependency>
            <groupId>org.apache.avro</groupId>
            <artifactId>avro</artifactId>   (2)
            <version>1.8.2</version>
        </dependency>
        <dependency>
            <groupId>io.confluent</groupId>
            <artifactId>kafka-avro-serializer</artifactId>   (3)
            <version>5.2.1</version>
        </dependency>
        <dependency>
            <groupId>io.confluent</groupId>
            <artifactId>kafka-streams-avro-serde</artifactId>
            <version>5.3.0</version>
            <exclusions>
                <exclusion>
                    <groupId>org.slf4j</groupId>
                    <artifactId>slf4j-log4j12</artifactId>
                </exclusion>
            </exclusions>
        </dependency>
    </dependencies>
    <repositories>
        <!-- other maven repositories the project -->
        <repository>
            <id>confluent</id>   (4)   
            <url>https://packages.confluent.io/maven/</url>
        </repository>
    </repositories>
    <plugins>
        <!-- other maven plugins in the project -->
        <plugin>
            <groupId>org.apache.avro</groupId>
            <artifactId>avro-maven-plugin</artifactId>
            <version>1.8.2</version>
            <executions>
                <execution>
                    <phase>generate-sources</phase>
                    <goals>
                        <goal>schema</goal>
                    </goals>
                    <configuration>
<sourceDirectory>src/main/resources/avro</sourceDirectory>   (5)

<outputDirectory>${project.build.directory}/generated-sources</outputDirectory>
                        <stringType>String</stringType>
                    </configuration>
                </execution>
            </executions>
        </plugin>
    </plugins>
</project>
  1. Confluent Schema Registry client
  2. Avro dependency
  3. Avro SerDes
  4. Confluent Maven repository
  5. Source directory where you put your Avro files and store generated Java POJOs

The architecture of a Spring Boot application

Your application will include the following components:

  • use.avsc: an Avro file
  • SpringAvroApplication.java: the starting point of your application. This class also includes configuration for the new topic that your application is using.
  • Producer.java: a component that encapsulates the Kafka producer
  • Consumer.java: a listener of messages from the Kafka topic
  • KafkaController.java: a RESTful controller that accepts HTTP commands in order to publish a message in the Kafka topic

Creating a user Avro file

{
  "namespace": "io.confluent.developer",   (1)
  "type": "record",
  "name": "User",
  "fields": [
    {
      "name": "name",
      "type": "string",
      "avro.java.string": "String"
    },
    {
      "name": "age",
      "type": "int"
    }
  ]
}
  1. An avro-maven-plugin will generate the User POJO in the io.confluent.developer package. This POJO has name and age properties.

Creating a Spring Boot application class

@SpringBootApplication
public class SpringAvroApplication {

  
  @Value("${topic.name}")   (1)
  private String topicName;

  @Value("${topic.partitions-num}")
  private Integer partitions;

  @Value("${topic.replication-factor}")
  private short replicationFactor;

  
  @Bean
  NewTopic moviesTopic() {   (2)
    return new NewTopic(topicName, partitions, replicationFactor);
  }

  
  public static void main(String[] args) {
    SpringApplication.run(SpringAvroApplication.class, args);
  }

}
  1. These are the topic parameters injected by Spring from application.yaml file.
  2. Spring Boot creates a new Kafka topic based on the provided configurations. As an application developer, you’re responsible for creating your topic instead of relying on auto-topic creation, which should be false in production environments.

Creating a producer component

@Service
@CommonsLog(topic = "Producer Logger")
public class Producer {

  @Value("${topic.name}")   (1) 
  private String TOPIC;

  private final KafkaTemplate<String, User> kafkaTemplate;

  @Autowired
  public Producer(KafkaTemplate<String, User> kafkaTemplate) {   (2) 
    this.kafkaTemplate = kafkaTemplate;
  }

  void sendMessage(User user) {
    this.kafkaTemplate.send(this.TOPIC, user.getName(), user);   (3)
    log.info(String.format("Produced user -> %s", user));
  }
}
  1. A topic name will be injected from application.yaml.
  2. Spring will initialize KafkaTemplate with properties provided in application.yaml.
  3. We will send messages to the topic using User as the key.

Spring instantiates all these components during the application startup, and the application becomes ready to receive messages via the REST endpoint. The default HTTP port is 9080 and can be changed in the application.yaml configuration file.

@Service
@CommonsLog(topic = "Consumer Logger")
public class Consumer {

  
  @Value("${topic.name}")   (1) 
  private String topicName;

  @KafkaListener(topics = "users", groupId = "group_id")   (2)
  public void consume(ConsumerRecord<String, User> record) {
    log.info(String.format("Consumed message -> %s", record.value()));
  }
}
  1. The topic name will be injected from the application.yaml.
  2. With the @KafkaListener annotation, a new consumer will be instantiated by the spring-kafka framework.

Creating the KafkaController component

@RestController
@RequestMapping(value = "/user")   (1)
public class KafkaController {

  private final Producer producer;

  @Autowired
  KafkaController(Producer producer) {   (2)
    this.producer = producer;
  }

  @PostMapping(value = "/publish")
  public void sendMessageToKafkaTopic(@RequestParam("name") String name, @RequestParam("age") Integer age) {
    this.producer.sendMessage(new User(name, age));   (3)
  }
}
  1. KafkaController is mapped to the /user HTTP endpoint.
  2. Spring injects the producer component.
  3. When a new request comes to the /user/publish endpoint, the producer sends it to Kafka.

Running the example

Prerequisites

Tip: In this guide, I assume that you have the Java Development Kit (JDK) installed. If you don’t, I highly recommend using SDKMAN! to install it.

You’ll also need Confluent Platform 5.3 or newer installed locally. If you don’t already have it, follow the Confluent Platform Quick Start. Be sure to install the Confluent CLI as well (see step 4 in this section of the quick start).

Start Kafka and Schema Registry

confluent local start schema-registry

The Confluent CLI provides local mode for managing your local Confluent Platform installation. The Confluent CLI starts each component in the correct order.Confluent CLI

You should see a similar output in your terminal.

Building and running your Spring Boot application

In the examples directory, run ./mvnw clean package to compile and produce a runnable JAR. After that, you can run the following command:

java -jar target/kafka-avro-0.0.1-SNAPSHOT.jar

Testing the producer/consumer REST service

For simplicity, I like to use the curl command, but you can use any REST client (like Postman or the REST client in IntelliJ IDEA to):

curl -X POST -d 'name=vik&age=33' http://localhost:9080/user/publish

REST Client

2019-06-06 22:52:59.485  INFO 28910 --- [nio-9080-exec-1] Producer Logger                          : Produced user -> {"name": "vik", "age": 33}
2019-06-06 22:52:59.559  INFO 28910 --- [ntainer#0-0-C-1] Consumer Logger                          : Consumed message -> {"name": "vik", "age": 33}

Running the application using Confluent Cloud

To use this demo application with Confluent Cloud, you are going to need the endpoint of your managed Schema Registry and an API key/secret. Both can be easily retrieved from the Confluent Cloud UI once you select an environment.

Clusters

At least one Kafka cluster must be created to access your managed Schema Registry. Once you select the Schema Registry option, you can retrieve the endpoint and create a new API/secret.

Schema Registry

An example Confluent Cloud configuration can find in application-cloud.yaml:

topic:
  name: users
  partitions-num: 6
  replication-factor: 3
server:
  port: 9080
spring:
  kafka:
    bootstrap-servers:
      - mybootstrap.confluent.cloud:9092   (1)  
    properties:
      # CCloud broker connection parameters
      ssl.endpoint.identification.algorithm: https
      sasl.mechanism: PLAIN
      request.timeout.ms: 20000
      retry.backoff.ms: 500
      sasl.jaas.config: org.apache.kafka.common.security.plain.PlainLoginModule required username="ccloud_key" password="ccloud_secret";   (2) 
      security.protocol: SASL_SSL

      # CCloud Schema Registry Connection parameter
      schema.registry.url: https://schema-registry.aws.confluent.cloud   (3)  
      basic.auth.credentials.source: USER_INFO   (4)  
      schema.registry.basic.auth.user.info: sr_ccloud_key:sr_ccloud_key   (5) 
    consumer:
      group-id: group_id
      auto-offset-reset: earliest
      key-deserializer: org.apache.kafka.common.serialization.StringDeserializer
      value-deserializer: io.confluent.kafka.serializers.KafkaAvroDeserializer
    producer:
      key-serializer: org.apache.kafka.common.serialization.StringSerializer
      value-serializer: io.confluent.kafka.serializers.KafkaAvroSerializer
    template:
      default-topic:
logging:
  level:
    root: info
  1. Cloud bootstrap server
  2. Broker key and secret
  3. Confluent Cloud Schema Registry URL
  4. Schema Registry authentication configuration
  5. Cloud Schema Registry key and secret
    • Note: Make sure to replace the dummy login and password information with actual values from your Confluent Cloud account.

To run this application in cloud mode, activate the cloud Spring profile. In this case, Spring Boot will pick up application-cloud.yaml configuration file that contains the connection to data in Confluent Cloud.

java -jar -Dspring.profiles.active=cloud target/kafka-avro-0.0.1-SNAPSHOT.jar

Interested in more?

If this tutorial was helpful and you’re on the hunt for more on stream processing using Kafka Streams, KSQL, and Kafka, don’t forget to check out Kafka Tutorials. Feel free to reach out or ping me on Twitter should any questions come up along the way.

Viktor Gamov is a developer advocate at Confluent, the company that makes an event streaming platform based on Apache Kafka. Working in the field, Viktor Gamov has developed comprehensive expertise in building enterprise application architectures using open source technologies. Back in his consultancy days, he co-authored O’Reilly’s “Enterprise Web Development.” He is a professional conference speaker on distributed systems, Java and JavaScript topics. Follow Viktor on Twitter @gAmUssA, where he posts there about gym life, food, open source and, of course, Kafka and Confluent!

Introducing Derivative Event Sourcing

$
0
0

First, what is event sourcing? Here’s an example.

Consider your bank account: viewing it online, the first thing you notice is often the current balance. How many of us drill down to see how we got there? We probably all ask similar questions such as: What payments have cleared? Did my direct deposit hit yet? Why am I spending so much money at Sephora?

We can answer all those questions because the individual events that make up our balance are stored. In fact, it’s the summation of these events that result in our current account balance. This, in a nutshell, is event sourcing.

Event sourcing: primary vs. derivative

Now imagine event sourcing in the context of an online order system: you place an order and are able to get status updates when your order is confirmed, fulfilled, and shipped. Just like a bank balance, current order status is calculated by consulting the individual events for a given order. The diagram below depicts the event flow for a single order service.Event SourcingIf you happen to be the proud owner of a single order service, then you are all set to begin.

But what if you have more than one order service?

Something that tends to happen at companies that have been around for more than a sprint is the accumulation of technical debt. Sometimes that debt takes the form of duplicate applications. Mergers happen and you adopt other applications that, for reasons beyond your control, cannot be retired or rewritten right away. In other words, sometimes you end up with more than one order service—enter derivative event sourcing!

An observational approach to the event sourcing pattern

Try to picture implementing event sourcing for the following company: the Cabot Cove Detective Agency has been in business for over 20 years. They began as a small agency with primarily walk-in business before growing into the leading supplier of online background checks worldwide. In order to comply with international laws and facilitate growth, they acquired several companies that were already active overseas, resulting in a diverse mix of technical assets.

Today, their online order space is broken down into five different services written in a variety of programming languages. Each service handles a different geographic region, and all were written or acquired at different times. Their oldest order service is nine years old, lives in CVS, and requires an interpretive dance about Angela Lansbury in order to compile. It is also the only order service that is certified to do business in Portugal.Order Services

Let’s use the order created event as an example. In the above scenario, we would have to update all five services to connect to Apache Kafka®, create the event in all the appropriate places inside each service, and then produce that event to a Kafka topic. If you have experience maintaining legacy applications, feel free to start sweating now.

The first point to consider is if connecting to Kafka from all services is even possible. The older services may not be compatible with any of the available APIs. Upgrading that service to be compatible is an enormous amount of effort for a service you’re hoping to retire. Furthermore, even if you do manage to produce events from all five services, what happens when you need to add to or change the schemas? Having to incorporate legacy applications in the current world of CI/CD can be a nightmare for change management, especially when that change requires a coordinated multi-service push.

Maintaining a mixed environment like this can be a huge impediment to implementing event sourcing. This situation is what the derivative event approach is designed for and where you get the largest return on investment.

Complex environments can be simplified using derivative event sourcing

Derivative event sourcing is quite literally deriving events from something that has been observed. This differs from the more common practice of emitting events directly from the service where the event took place. Change data capture (CDC) is currently the most prevalent source to derive events, though user and application logs are also valid options.

If you are interested in more details about change data capture, see this excellent blog post by Robin Moffatt: No More Silos: How to Integrate Your Databases with Apache Kafka and CDC.

Let’s see how to handle multiple order services using derivative event sourcing.

Derivative event sourcing can be modeled by the following flow:Observe ➝ Transform ➝ Emit

Observe

Create a source and define what to look for

  • Find/create a durable event source to observe; this can be change data produced from the database that the application writes to, an application log, or any other source that contains the event profile you need to observe
  • Define an event profile: create a unique set of conditions that can be applied to identify the event you want to observe

As an example, create a durable event source for orders:
Event Source

Take a look at the backend stores for our order services. We find that Order Service 1 and Order Service 5 write to the same Oracle database, while the remaining services use MySQL. Oracle GoldenGate is a product that will allow us to produce messages to Kafka for every single activity that happens in the database—updates, inserts, deletions—we’ll get them all. Debezium is a similar offering that works with MySQL as well as many other datastores.

Using Oracle for our example, we set up GoldenGate, and now have access to every single event happening in the database. The primary developer tasked with supporting the oldest service stares at the change data messages flowing into Kafka, free from the tyranny of supporting an age-old application she jams out to the Hamilton soundtrack, alarming several bystanders and her UPS lady.

The same process would be followed to set up Debezium for MySQL, though we will continue to focus on the Oracle services for brevity.

Next, define the order created event profile.

Order Service 1 and Order Service 5 both use the same Oracle table to store their orders. This table, oddly enough, is named ORDERS. Now that GoldenGate is set up to produce all database changes to Kafka, we can look at the DB.ORDERS topic and see every insert, update, and delete that happens to the ORDERS table.

Even though both services write to the same table, they do so in different ways. In other words, the profile we need to look for to know that a new order has been created is different for Order Service 1 and Order Service 5. This happens for a number of reasons, the simplest being technology differences—one service may use the Java Persistence API and commit all changes at once, while another might insert a new row and then perform updates.

For our target services, the above is indeed true. The following event profiles for detecting when a new order has been created are defined as such:

Order Service 1:
Any Message received on the DB.ORDERS topic that has an insert operation type where ORDER_NUMBER is not null.

GoldenGate Message:

{"table":"DB.ORDERS","op_type":"I","op_ts":"2019-10-16 17:34:20.000534","current_ts":"2019-10-16 17:34:21.000000","pos":"00000001490000018018","after":{"ORDER_NUM":8675309,..."MORE_COLUMNS":""}}

Order Service 5:
Any message received on the DB.ORDERS topic that has an update operation type and ORDER_NUMBER is null before the update and not null after the update.

GoldenGate Message:

{"table":"DB.ORDERS","op_type":"U","op_ts":"2019-10-16 17:34:20.000534","current_ts":"2019-10-16 17:34:21.000000","pos":"00000001490000018023","before":{"ORDER_NUM":null,..."MORE_COLUMNS":""},"after":{"ORDER_NUM":42,..."MORE_COLUMNS":""}}

For all the remaining services, we can create event profiles such that all services are defined.

Now the sources are ready to observe, and we know what we’re looking for. The next step is to transform the observed events into the events we need.

Transform

Transformation is simply taking the message that has been observed and transforming that into the event you need with the relevant details

There are a number of frameworks that lend themselves for use in the transformation step. My personal favorite is Kafka Streams. Using Kafka Streams as the transformation vehicle gives you the ability to rekey events, manipulate time, and most importantly, create complex event aggregates. You also get exactly once semantics in a lightweight Java library, which should alone be enough to tip the scales for many use cases.

Returning to our example we use Kafka Streams to create a new central event service that consumes from the DB.ORDERS topic. Since we don’t have any dependencies between our order services, we can use the following flow. Again, using the two Oracle services:

  1. Create a KStream named baseOrderStream from the DB.ORDERS topic
  2. Using baseOrderStream as the source, create an orderService1 KStream, apply the filters determined for the Order Service 1 event profile, and map the source message to create the derived event
  3. Using baseOrderStream as the source, create an orderService5 KStream, apply the filters determined for the Order Service 5 event profile, and map the source message to create the derived event

The flow ends up looking like the glorious example shown below:

KStream<String,JsonNode> baseOrderStream = builder
                .stream(DB.ORDERS, Consumed.with(stringSerde, jsonSerde));

KStream<String, JsonNode> orderService1 = baseOrderStream
                .filter(isInsert)
                .filter(hasNonNullOrderNumber)
                .map((key,value) ->                    
KeyValue.pair(value.path("after").path("ORDER_NUMBER").asText(), 
createOrderCreatedEvent(value, ORDER_SERVICE_1)));

KStream<String, JsonNode> orderService5 = baseOrderStream
                .filter(isUpdate)
                .filter(hasNewNonNullOrderNumber)
                .map((key,value) ->                      
KeyValue.pair(value.path("after").path("ORDER_NUMBER").asText(), 
createOrderCreatedEvent(value, ORDER_SERVICE_5)));

The central event service consumes a message that matches the event profile for Order Service 1: a row that is inserted into the orders table with a value that is not null in the ORDER_NUMBER field. Next, compose an order created event message that contains the relevant details about the new order, possibly including which service the event originated from. We do the same when consuming a message that matches the event profile for Order Service 5.

For the MySQL services, we would create a similar flow and end up with a KStream representing each order service.

Emit

Produce the transformed event message to a Kafka topic

For this use case we want to combine the order created events from all services into a single topic. This means that we need to merge all of the individual KStreams and output them to a Kafka topic. In a reveal that will surprise no one, the merge function from the Kafka Streams API allows us to do just that. Merging several streams can have offset order implications that may or may not be desirable. I recommend following the golden rule of, “When in doubt, ask Matthias J. Sax on Stack Overflow.”

Regarding JSON, when dealing with a legacy application, you may find that Avro fits easily into your stack; you may also find it does not. When it comes to legacy applications, I use JSON, the Swiss Armesque format for transforming even the worst data structures. Again, this choice comes down to effort—why spend time modeling a legacy data structure you no longer want to exist? If using Avro for your change data provides advantages, then by all means use it, but if not, JSON is a perfectly valid choice for your durable event source. As you are most likely aware, this choice does not preclude you from using Avro for the emitted events. In fact, handling incoming messages as JSON while outputting transformed events as Avro allows you to move forward with the concept of schemas as an API, while still minimizing the amount of effort spent on legacy services.

Going back to our example, create a new Kafka topic called event-order-placed and produce all messages that match the event profiles for the OrderCreatedEvent to this new topic. We will see messages for orders placed in all five order services in the same topic.

Note: it is important to design your event schema to include the right information. If you designed your schema to include the service the order originated from, it may be of use to downstream consumers who only need a portion of the orders or wish to vary behavior based on region.

The code to emit derived events from all five order services is:

orderService1.merge(orderService2)
	     .merge(orderService3)
	     .merge(orderService4)
	     .merge(orderService5)
	     .to(event-order-created,Produced.with(stringSerde,avroSerde));

Conclusion

Derivative event sourcing is awesome.

The diagram below contains the finished design for our order services example and illustrates all three steps in the derivative event sourcing approach.Derivative Event Sourcing ApproachNote the extra benefits of decoupling. Let’s say there’s a critical issue with order fulfillment, resulting in the need to temporarily pause order events. We can pause or stop the central event service, and orders can continue to be placed in the customer-facing Order Services. The change data messages will continue to be produced to Kafka and upon resolution of the fulfillment issue, the central event service is able to pick up right where it left off. This decoupling is a direct benefit of having durable event sources and using Kafka Streams for our centralized event service.

The multiple order service scenario is a simple, straightforward example of the derivative event sourcing pattern. However, it is not relegated to simplistic use cases. Derivative event sourcing can also be applied in highly complex environments that require multi-table or even multi-source event aggregates.

At Kafka Summit San Francisco, I will dive into some of the more complex scenarios. If you are interested in more information about derivative event sourcing, including how to define event profiles, best practices for event schemas, event transformation tips, and handling complex event aggregates, come to my session on September 30th at 11:15 a.m. PT: Using Kafka to Discover Events Hidden in Your Database. You can also register using the code blog19 to get 30% off!

Anna McDonald is a principal software developer for SAS Institute. She specializes in integration architecture, and her love of all things technical is matched only by her love of math puns.

Reflections on Event Streaming as Confluent Turns Five – Part 1

$
0
0

For me, and I think for you, technology is cool by itself. When you first learn how consistent hashing works, it’s fun. When you finally understand log-structured merge trees, it’s a rewarding feeling. When Apache Kafka® consumer group rebalancing clicks, you feel good.

But the thing that really gets me going isn’t mastering a specific new technical chop, but seeing how new technologies have an impact on the way we think. And I don’t mean in the Nick Carr, internet-is-making-us-stupid sense—that’s a different blog post entirely—but I mean how a new piece of infrastructure changes the kinds of software architectures we’re willing and able to consider, well beyond the details of how any part of that infrastructure actually works. This is one of those intellectual influences that sometimes passes beyond notice, but it’s something that’s definitely happening with event streaming.

Now that there’s a ubiquitous open source Apache Kafka, an enterprise-ready Confluent Platform, and a robust and increasingly featureful Confluent Cloud, the way we build systems is changing. I love being able to witness this kind of transition.

Why think about this kind of thing now? Well, it’s Confluent’s fifth birthday, and birthdays are always a good time for looking back and looking forward. As we get ready to turn five, and on the cusp of what should be a very exciting Kafka Summit in San Francisco, I wanted to reflect a little bit on the things that get me most excited about being in the Kafka community.

It was my understanding we would be able to scale

When Amazon EC2 launched 13 years ago, we told ourselves a story. Suddenly, deployments could be totally elastic. We could now just spin up instances in the cloud at Christmastime when the load on our ecommerce system was peaking, and we’d have all the extra compute and storage we’d ever need; then in January when traffic tapered off, we’d scale down and magically reduce our costs. It was a powerful story, and it was not entirely untrue—there really was an API you could use to create and destroy cloud instances—but apart from that new infrastructure capability, who was building systems that could scale like that? Nobody I knew. Certainly not me.

But we as an industry turn out to be decent debtors. Not-entirely-related things like deployment automation, containers, and microservices seem to have snuck around the back and put us in the position to pay the promissory note of scalability that we’ve been holding since before Katy Perry was all that much on the radio.

And those things are indispensable, but what’s really putting us over the top is the ability we have now to build our systems on top of an event streaming platform like Kafka. Once we take our perfectly useful monoliths and break them into little programs that run on separate computers, those little programs still need to communicate. And a strongly emerging consensus is that the best way to get that done is to connect them through messaging, and to store the messages they exchange in an immutable commit log that can serve as a replayable history of those communications going forward.

I like it when I can see a mature company that’s been riding technology wave after wave for decades transition to Kafka and start making good on the scalability stories we’ve been telling ourselves for a long time. And it’s just as cool when I hear the director of engineering for a new startup in the retail space drop a quotable quote like, “Confluent Cloud is the central nervous system that runs our business.” People with real money on the table are trusting Kafka and its ability to help them grow complex software stacks that power their businesses.

No longer missing out on microservices

I have long noticed that many enterprise developers share a certain sheepish feeling, like there’s some trend that they know they are supposed to be following but they’re not; or maybe they are following it a little, but they feel like they are doing it poorly. It almost doesn’t matter what the trend is—it changes over time, but what remains constant is the feeling of behindness. Right now one of those trends is microservices, which developers at big companies have been talking about for years. And for many of those years, all of the various ways they’ve tried to jump on the microservices train have not led to satisfactory outcomes, to put it mildly. So they know that microservices are the path forward, but they are stuck asking “how?” I love to see lightbulbs go off when people realize that Kafka is the answer to that question.

For example: Ticketmaster. After 40 years of innovating in the ticket sales and distribution business (they were certainly how one bought concert tickets by phone in my own pre-internet youth), Ticketmaster recognized that they had to deal with the all-too-familiar problem of untamed complexity in the system they were building. They had developed hundreds of independent services that all interacted with one another in different ways, and the complexity of these interactions made it hard for a developer of one service to reason about (or for that matter, modify) a service with a different set of interfaces. This had potentially set up the stack to be as resistant to change as a monolith without actually being one, which would have put the team on the wrong side of all of the monolith/microservices tradeoffs. Nobody wants to live like that—least of all Ticketmaster, which is why they refactored to an event streaming architecture, now with hundreds of microservices exchanging inputs and outputs in real time through Kafka topics. Just as one should.

If you’ve ever bought tickets online, you have probably seen that event ticketing is fundamentally a real-time problem. Buyers need literally up-to-the-second information on seat availability and pricing, and things can change fast for highly contended events. Ticketmaster relies heavily on KSQL and Kafka Streams to build the systems that get this done. I’ll spare you the details of how they do it, since their VP of Engineering, Chris Smith, talked it over with Confluent’s own Dani Traphagen in this recent online talk. And if you want to know where things are headed from here, Ticketmaster’s Derek Cline will be speaking at the upcoming Kafka Summit I mentioned about his team’s success in reusing business logic from existing services that use the Kafka Streams API.

In a use case like online ticketing, it may seem obvious that the transactional side of the system is well suited to an event processing architecture, but certain of the analytical requirements demand the same architecture. A previous-generation ETL system would have a hard time running the machine learning models that help shut down scalpers, fraudsters, and other scammers. Fraud detection applications like this are properly a part of the analytics pipeline, yet operate under real-time requirements—something Kafka makes it possible to do.

This wasn’t an architecture that was practical to build just 10 years ago. We were clued into the idea that building systems by composing services was a good idea, but very few people were pulling it off. And Ticketmaster is still a thought leader, but they are showing that this architecture can now become commonplace.

As it does, Kafka not only helps us make good on our long-term promise to build scalable, composable systems, but it slowly transforms the way we think about those systems. A business is no longer operated by a large program that babysits its state in a single do-or-die database, but instead by any number of evolvable services that maintain their own state and communicate through scalable logs. This is a significant change in an architect’s frame of mind, and it’s an example of the kind of change I love seeing. On the occasion of Confluent’s fifth birthday, it’s a thing I can sit back and enjoy.

Tim is a teacher, author and technology leader with Confluent, where he serves as the senior director of developer experience. He can frequently be found at speaking at conferences in the U.S. and all over the world. He is the co-presenter of various O’Reilly training videos on topics ranging from Git to distributed systems, and is the author of Gradle Beyond the Basics. He tweets as @tlberglund and lives in Littleton, CO, U.S., with the wife of his youth and their youngest child, the other two having mostly grown up.

Apache Kafka Rebalance Protocol for the Cloud: Static Membership

$
0
0

Static Membership is an enhancement to the current rebalance protocol that aims to reduce the downtime caused by excessive and unnecessary rebalances for general Apache Kafka® client implementations. This applies to Kafka consumers, Kafka Connect, and Kafka Streams. To get a better grasp on the rebalance protocol, we’ll examine this concept in depth and explain what it means. If you already know what a Kafka rebalance is, feel free to jump directly to the following section to save time: When do we trigger an unnecessary rebalance?

What does “rebalance” mean when it comes to Kafka?

A Kafka rebalance is a distributed protocol for client-side applications to process a common set of resources in a dynamic group. Two primary goals for this protocol are:

  1. Group resource assignment
  2. Membership change capture

Take a Kafka consumer, for example. A group of Kafka consumers read input data from Kafka through subscriptions, and topic partitions are their shared unit of tasks. Three consumers (C1, C2, and C3), two topics (T1 and T2) with three partitions each, and subscriptions would appear as follows:

C1: T1, T2
C2: T2
C3: T1

The rebalance protocol ensures that C1 and C2 take non-overlapping assignments from topic T2*, and the same goes for C1 and C3 from T1. A valid assignment looks like this:

C1: t1-p1, t2-p1
C2: t2-p2, t2-p3
C3: t1-p2, t1-p3

*Note that the consumer does not check if the assignment returned from the assignor respects these rules. If your customized assignor assigns partitions to multiple owners, it would still be silently accepted and cause double fetching. Strictly speaking, only built-in rebalance assignors obey this rule for resource isolation

However, the assignment below is not allowed, as it introduces overlapping assignments:

C1: t1-p1, t2-p1
C2: t2-p1, t2-p2, t2-p3
C3: t1-p2, t1-p3

The rebalance protocol also needs to properly handle membership changes. For the above case, if a new member C4 subscribing to T2 joins, the rebalance protocol will try to adjust the load within the group:

C1: t1-p1, t2-p1
C2: t2-p3
C3: t1-p2, t1-p3
C4: t2-p2

In summary, the rebalance protocol needs to “balance” the load within a client group as it scales, while making the task ownership safe at the same time. Similar to most distributed consensus algorithms, Kafka takes a two-phase approach. For simplicity, we’ll stick to the Kafka consumer for now.

Consumer rebalance demo

The endpoint that consumers commit progress to is called a group coordinator, which is hosted on a designated broker. It also serves as the centralized manager of group rebalances. When the group starts rebalancing, the group coordinator first switches its state to rebalance so that all interacting consumers are notified to rejoin the group. Until all the members rejoin or the coordinator waits long enough and reaches the rebalance timeout, the group proceeds to another stage called sync, which officially announces the formation of a valid consumer group. To distinguish members who fall out of the group during this process, each successful rebalance increments a counter called generation ID and propagates its value to all the joined members, so that out-of-generation members can be fenced.

In the sync stage, the group coordinator replies to all members with the latest generation information. Specifically, it nominates one of the members as the leader and replies to the leader with encoded membership and subscription metadata.

The leader shall complete the assignment based on membership and topic metadata information, and reply to the coordinator with the assignment information. During this period, all the followers are required to send a sync group request to get their actual assignments and go into a wait pool until the leader finishes transmitting the assignment to the coordinator. Upon receiving the assignment, the coordinator transitions the group from sync to stable. All pending and upcoming follower sync requests will be answered with individual assignment.

Here, we describe two demo cases: one is an actual rebalance walkthrough, and the other is the high-level state machine. Note that in the sync stage, we can always fall back to rebalance mode if rebalance conditions are triggered, such as adding a new member, topic partition expansion, etc.

Rebalance Demo

State Machine View: Two-Phase Protocol

The rebalance protocol is very effective at balancing task processing load in real time and letting users freely scale their applications, but it is a rather heavy operation as well, requiring the entire consumer group to stop working temporarily. Members are expected to revoke ongoing assignments and initialize new assignments at the start and end of each rebalance. Such operations take overhead, especially for stateful operations where the task needs to first restore a local state from its backup topic before serving.

Essentially, a rebalance kicks in when following conditions are met:

  1. Group membership changes, such as a new member joining
  2. Member subscription changes, such as one consumer changing the subscribed topics
  3. Resource changes, such as adding more partitions to the subscribed topic

When do we trigger an unnecessary rebalance?

In the real world, there are many scenarios where a group coordinator triggers unnecessary rebalances that are detrimental to application performance. The first case is transient member timeout. To understand this, we need to first introduce two concepts: consumer heartbeat and session timeout.

Consumer heartbeat and session timeout

A Kafka consumer maintains a background thread to periodically send heartbeat requests to the coordinator to indicate its liveness. The consumer configuration called session.timeout.ms defines how long the coordinator waits after the member’s last heartbeat before it assuming the member failed. When this value is set too low, a network jitter or a long garbage collection (GC) might fail the liveness check, causing the group coordinator to remove this member and begin rebalancing. The solution is simple: instead of using the default 10-second session timeout, set it to a larger value to greatly reduce transient failure-caused rebalances.

Note that the longer you set the session timeout to, the longer partial unavailability you will have when a consumer actually fails. We will explain how to choose this value in a later section on how to opt into Static Membership.

Rolling bounce procedure

From time to time, we need to restart our application, deploy new code, or perform a rollback, etc. These operations in the worst case may cause a lot of rebalances. When a consumer instance shuts down, it sends a leave group request to the group coordinator, letting itself be removed from the group and triggering another rebalance afterwards. When that consumer resumes after a bounce, it sends a join group request to the group coordinator, triggering another rebalance.

During a rolling bounce procedure, consecutive rebalances are triggered as instances that are shut down and resumed, and partitions are reassigned back and forth. The final assignment result is purely random and incurs a large cost to pay for task shuffling and reinitialization.

How about letting members choose not to leave the group? Not an option either. To understand why, we need to talk about the member ID for a moment.

Consumer member ID

When a new member joins the group, the request contains no membership information. The group coordinator will assign a universally unique identifier (UUID) to this member as its member ID, put the ID in the cache, and embed this information in its response to the member. Within this consumer’s lifecycle, it could reuse the same member ID without the coordinator triggering a rebalance when it rejoins, except in edge cases such as leader rejoining.

Going back to the rolling bounce scenario, a restarted member will erase in-memory membership information and rejoin the group without member ID or generation ID. Since the rejoining consumer would be recognized as a completely new member of the group, the group coordinator does not guarantee that its old assignment will be assigned back. As you can see, a member leaving the group is not the root cause for unnecessary task shuffling—the loss of identity is.

What is Static Membership?

Static Membership, unlike Dynamic Membership, aims to persist member identity across multiple generations of the group. The goal here is to reuse the same subscription information and make the old members “recognizable” to the coordinator. Static Membership introduces a new consumer configuration called group.instance.id, which is configured by users to uniquely identify their consumer instances. Although the coordinator-assigned member ID gets lost during restart, the coordinator will still recognize this member based on the provided group instance ID in the join request. Therefore, the same assignment is guaranteed.

Static Membership is extremely friendly with cloud application setups, because nowadays deployment technologies such as Kubernetes are very self-contained for managing the health of applications. To heal a dead or ill-performing consumer, Kubernetes could easily bring down the relevant instance and spin up a new one using the same instance ID. With a cloud management framework, the group coordinator’s client health check is ongoing.

Below is a quick demo of how Static Membership works.

Static Membership Demo

How to opt into Static Membership

Since the Apache Kafka 2.3 release, Static Membership has become generally available for the community. Here are the instructions if you want to be an alpha user:

  1. Upgrade your broker to 2.3 or higher. Specifically, you need to upgrade inter.broker.protocol to 2.3 or higher in order to enable this feature.
  2. On the client side:
    • Upgrade your client library to 2.3 or higher.
    • Define a longer and reasonable session timeout. As stated before, a tight session timeout value could make the group unstable as members are kicked out of it spuriously due to missing a single heartbeat. You should set the session timeout to a reasonable value based on the business tolerance of partial unavailability. For example, setting a session timeout to 10 minutes for a business that could tolerate 15 minutes of unavailability is reasonable, whereas setting it to five seconds is not.
    • Set the group.instance.id configuration to a unique ID for your consumer. If you are a Kafka Streams user, use the same configuration for your stream instance.
  3. Deploy the new code to your application. Static Membership will take effect in your next rolling bounce.

Static Membership only works as expected if these instructions are followed. We have nonetheless made some preventative efforts to reduce the potential risk of human error.

Error handling

Sometimes a user can forget to upgrade a broker. When the consumer first gets started, it acquires the API version of the designated broker. If the client is configured with group instance ID and the broker is on older version, the application will crash immediately as the broker has no support for Static Membership yet.

If a user fails to configure the group instance ID uniquely, meaning that there are two or more members configured with the same instance ID, a fencing logic comes into play. When a known static member rejoins without a member ID, the coordinator generates a new UUID to reply to this member as its new member ID. At the same time, the group coordinator maintains a mapping from the instance ID to the latest assigned member ID. If a known static member rejoins with a valid member ID that doesn’t match with the cached ID, it immediately gets fenced by the coordinator response. This eliminates the risk of concurrent processing for duplicate static members.

In this very first version, we expect bugs that may invalidate the processing semantics or hinder the fencing logic. Some of them have been addressed in the trunk, such as KAFKA-8715, and we are still actively working on finding more issues.

Feedback is really appreciated! If you detect any issues with Static Membership, please file a JIRA or put a question on the dev mailing list to get our attention.

Want to know more? Come to Kafka Summit!

There are still many details we haven’t covered in this blog post, like how this effort compares with incremental rebalancing, how Static Membership helps with a non-sticky assignment strategy, and tooling support around the new protocol. We will be covering all this and more in our upcoming Kafka Summit talk, Static Membership: Rebalance Strategy Designed for the Cloud, on October 1st at 4:55 pm. PT, so hurry if you haven’t registered yet! As a bonus, you can register with the code blog19 to get 30% off.

This work has been ongoing for over a year, with many iterations and huge support from my colleagues, past colleagues, and community friends. I owe a big thank you to all of you, especially Guozhang Wang, Jason Gustafson, Liquan Pei, Yu Yang, Shawn Nguyen, Matthias J. Sax, John Roesler, Mayuresh Gharat, Dong Lin, and Mike Freyberger.

Boyang Chen is an infrastructure engineer at Confluent, where he works on the Kafka Streams Team to build the next-generation event streaming platform on top of Apache Kafka. Previously, Boyang worked at Pinterest as a software engineer on the Ads Infrastructure Team, where he tackled various ads real-time challenges and rebuilt the whole budgeting and pacing pipeline, making it fast and robust with concrete revenue gain and business impact.


Built-In Multi-Region Replication with Confluent Platform 5.4-preview

$
0
0

Running a single Apache Kafka® cluster across multiple datacenters (DCs) is a common, yet somewhat taboo architecture. This architecture, referred to as a stretch cluster, provides several operational benefits and unlocks the door to many uses cases. Stretch clusters provide better durability guarantees and make disaster recovery much easier by avoiding the problem of offset translation and restarting clients. However, in order to operate a reliable stretch cluster, datacenters must be relatively close to each other and have a very stable, low latency, and high-bandwidth connection among the DCs.

This changes with the preview release of Confluent Platform 5.4, which includes multi-region replication built directly into Confluent Server. Now operators can choose to replicate data on a per-region basis, synchronously or asynchronously, per topic. This functionality allows operators to increase data durability and automate client failover in the event of a disaster.

To achieve built-in multi-region replication, three distinct features are necessary: Follower Fetching, Observers, and Replica Placement.Built-In Multi-Region Replication

Follower Fetching

Follower Fetching, also known as KIP-392, is a feature of the Kafka consumer that allows consumers to read from a replica other than the leader. The motivation for this KIP was to allow consumers to reduce expensive cross-WAN traffic in a multi-datacenter environment. The Kafka broker has long had rack awareness for balancing partition assignment across multiple logical “racks,” but that’s as far as the “awareness” went. With KIP-392, consumers can read from local brokers by supplying their own rack identifier when first talking to the leader.

Follower Fetching

The algorithm follows this sequence:

  1. Brokers configure broker.rack and replica.selector.class
  2. Consumers configure client.rack
  3. One consumer makes a fetch request to the leader
  4. If the partition is rack aware and the replica selector is set, pick a “preferred read replica”
  5. The consumer starts reading from the preferred read replica
  6. Periodically, the consumer checks back with the leader for a refreshed replica selection

For now, Apache Kafka has a single implementation of the replica.selector.class, which is a rack-aware selector. This class was intentionally made into a pluggable interfaces so users can supply their own implementation depending on their needs.

In a multi-datacenter cluster, network ingress and egress can be very costly—certainly more costly than network traffic within a datacenter. Cost here can mean dollars of course, but it also means latency and throughput. Even if a cluster is contained within a single datacenter, the traffic within a single rack will have lower latency than it would between racks. Certainly, a Kafka cluster spanning multiple datacenters will have significantly higher costs for network traffic between datacenters than within a given datacenter. By allowing consumers to read from the closest replica, we are able to leverage data locality. This means better performance and lower cost.

Observers

Observers in Confluent Platform are effectively asynchronous replicas. They replicate partitions from the leader like followers, but an observer can never participate in the in-sync replica (ISR) list or become a partition leader. What makes them asynchronous is that, since they never join the ISR, they are never considered when we increment the high watermark. Let’s explore that for a moment.

When writing data to a partition in Apache Kafka, the preferred configuration is to set the acks producer configuration property to all. This causes the producer to wait until all members of the current ISR acknowledge the written record(s). Essentially, this is how Apache Kafka provides durability.

Previously, any replica not belonging to the ISR was considered out of sync. As long as the number of replicas in the ISR is at or above the min.isr value for that partition, the partition is considered healthy and the durability requirement is satisfied. Now with the introduction of Observers, there is a replica type which could be in sync but will never join the ISR. This provides us with a replica type that replicates data like normal, but does not affect durability semantics and cannot become a leader. Observers give us these benefits:

  • Improved durability without sacrificing write throughput
  • Replicates across slower/higher-latency links without falling in and out of sync (also known as ISR thrashing)
  • Complements Follower Fetching (described above)

Even though an Observer may lag behind the leader replica, all of its records are valid, and it knows which records should be visible according the partition’s replication semantics. This means we can safely read from an Observer using Follower Fetching as described above.

Observers are also useful for disaster recovery, specifically in cases where an Observer is located in a secondary datacenter and the rest of the replicas are in a primary datacenter. Potential leaders in a disaster recovery scenario do not affect replication during normal operation.

Replica Placement

Replica assignment in Apache Kafka has so far been limited to three strategies: round robin, rack-aware (KIP-36), and manual assignment. In order to complement the new Observers feature, and to further enable practical multi-datacenter deployments, we have created a new replica placement strategy for Confluent Platform. This JSON-based specification allows you to specify replica assignment as a set of matching constraints. Each placement also has a minimum count associated with it that allows users to guarantee a certain spread of replicas throughout the cluster.

For example, two replicas in region-a and one observer in region-b would be specified as:

{
    "version": 1,
    "replicas": [
        {
            "count": 2,
            "constraints": {
                "rack": "region-a"
            }
        }
    ],
    "observers": [
        {
            "count": 1,
            "constraints": {
                "rack": "region-b"
            }
        }
    ]
}

In this case, by keeping the regular replicas in a single region and putting an observer in a different region, the partitions will have synchronous replication semantics within region-a but also asynchronously replicate to an observer in region-b.

An example of synchronous replication between region-a and region-b:

{
    "version": 1,
    "replicas": [
        {
            "count": 2,
            "constraints": {
                "rack": "region-a"
            }
        },
  	 {
            "count": 2,
            "constraints": {
                "rack": "region-b"
            }
        }
    ]
}

This is very similar to using rack-aware replica assignment except more precise counts of replicas in each rack can be given.

For this preview of Confluent Platform 5.4, the only included constraint type is matching on the broker’s broker.rack attribute (shown as the rack property in the above examples). Note that the “rack” here does not have to represent a physical datacenter rack, but rather it is a generic label used to represent the location of a node. Since multi-region and multi-zone Kafka clusters are likely to use the rack-aware partition assignment, we chose to reuse this broker configuration for our replica placement constraints. More robust node-to-replica matching is on our roadmap for future releases.

Multi-region ZooKeeper

No multi-datacenter conversation would be complete without mentioning ZooKeeper. For the “two datacenters” use case (one primary datacenter with a remote, standby datacenter), the current best practice is to deploy ZooKeeper nodes to each of these datacenters as well as a third “tie-breaker” datacenter. This is sometimes referred to as a 2.5 datacenter topology. The Kafka brokers are deployed to the two datacenters of interest, and a third datacenter is used only for the third ZooKeeper node. With this deployment, the cluster can lose a single datacenter without becoming unavailable.

The primary concern when deploying ZooKeeper across multiple regions is increased latency. In Kafka, the data being written to ZooKeeper is generally quite small, so there is not much concern about the throughput of data. The concern is that the system incurs additional fixed overhead as ZooKeeper nodes negotiate consistency on whatever metadata changes might happen in the cluster. Particularly, the write performance of ZooKeeper decreases rapidly as latency between the members of the quorum increases.

However, when Kafka is in a steady state of producing and consuming records without metadata changes, broker failovers, or deploying new consumers, there is not much interaction with ZooKeeper. This means that overall throughput should not be strongly affected by ZooKeeper latency, although any reduced bandwidth across a inter-datacenter link can affect replication performance depending on the partition’s configuration.

Where the additional ZooKeeper latency does come into play is for cluster operations like creating and deleting topics, leader election, reassigning partitions, or joining a consumer group. In particular, we have observed long delays when deleting a large number of partitions in a multi-datacenter cluster, so proceed with caution there.

Somewhat related to this is the proposal to remove ZooKeeper from Apache Kafka altogether. As of the time of this writing, the long-awaited KIP-500 is under discussion on the Kafka mailing list. It is just in the planning phases now, but it will be a boon to multi-datacenter Kafka clusters once it has been adopted and implemented.

Putting it all together

Running a single Kafka cluster across multiple regions has long been a desired architecture because it significantly streamlines disaster recovery and infrastructure operations. However, this architecture was only viable if data centers were very close to one another because of the cost to throughput, the operational overhead of dealing with replica placement, and the volume of cross-DC traffic the architecture creates. Confluent Platform 5.4, now in preview, changes all of that.

By using observers and replica placements, partitions can failover to a secondary datacenter without requiring a human operator to issue more than a few CLI commands. This means that there are no networking changes, client restarts, or offset translations to worry about, and no one needs to write any custom code to make it work.

Follower fetching with observers allows users to benefit from read locality without losing write performance. This helps cut down on expensive inter-datacenter WAN traffic from consumers and in turn reduces latency between the clients and the observer replicas.

Want to learn more?

See the Confluent Platform 5.4-preview documentation to get started with built-in multi-region replication, and register for Kafka Summit to learn more about what you can do with event streaming. You can use the code blog19 to get 30% off!

David Arthur is a software engineer on the Core Kafka Team at Confluent. He has 10 years of experience designing and developing software for a wide variety of industries. David was an early user of Kafka and became a committer around the time Kafka became a top-level project at the Apache Software Foundation. He also authored a popular Python client for Kafka which received wide adoption, although he now recommends Confluent’s client 😊. Apart from software and open source, David enjoys spending time in his gardening, operating amateur radio, and spending time with his wife and three children.

Reflections on Event Streaming as Confluent Turns Five – Part 2

$
0
0

When people ask me the very top-level question “why do people use Kafka,” I usually lead with the story in my last post, where I talked about how Apache Kafka® is helping us deliver on the promises the cloud made to us a decade ago. But I follow it up quickly with a second and potentially unrelated pattern: real-time data pipelines. These provide a different set of motivations for using an event streaming platform than scaling and microservices: specifically, the need to produce analytics results and business insights faster than the next day, which has been the tradition most of us have received since early on in our careers.

If it’s not real-time data, it’s old data

When I was a younger developer (well, when I was a younger developer, I was writing firmware on small microcontrollers whose “database” consisted of 200 bytes of RAM, but stick with me here)—relational databases had only recently become mature and stable data infrastructure platforms. Around that same time, the disciplines, tooling, and consulting companies that would come to define business analytics were just being formed. The pattern was that every night, your ETL process would dump that day’s transactional activity into your newfangled analytic data warehouse.

It wasn’t just the best we could do; it was a revolutionary achievement that brought powerful new insights into the hands of business leaders faster than they had ever had them before. This was in the days in which “please allow four to six weeks for delivery” was still a recent echo in the air, and next-day analytics sounded really fast. Batch was good enough.

Until it wasn’t. Business is much more globalized than it was 30 years ago, and a nightly cadence doesn’t make as much sense when it’s not clear when “night” is for a global enterprise. Consumer expectations have also shifted dramatically from the era of four-to-six-weeks to “wait, that’s not on Prime?” In other words, working with yesterday’s data just might not be possible. You are probably being asked to deliver more than that.

You see signs of this tension in shrinking ETL batch times: overnight was the original gold standard, then data architects figured out how to run batches hourly, then they started trying 15-minute batches, and so on. This is a nice evolutionary trajectory, but eventually it shows signs of a strained paradigm. And the last thing you want is to be responsible for delivering on executives’ demands when the tools you have available to you are under stress.

Batch vs. real-time streams of data

So, businesses need data-driven insights based on things that are happening right now, and that’s where real-time data pipelines come in. Whereas it’s practically impossible to pull data from a database and cut your batch times down to minutes, once you have an event streaming platform in place, it is relatively trivial to get those results in seconds.

Perhaps the easiest-to-understand use case here is fraud detection. It’s just not valuable to know that fraud took place in a transaction you cleared yesterday; maybe you can provide the DA with evidence months down the line, but your money is gone. Instead, you need to know that it’s happening right now, inside the loop of the transaction clearing process itself, so you can refuse the transaction in real time. This has to be real time. Why? Because on the other end of this transaction, there is a human who needs immediate confirmation of a trade being made or that a transaction has successfully gone through. Industry heavyweights like Capital One use event streaming on Kafka for this very task.

Of course, there are countless uses for real-time data pipelines beyond fraud detection in the finance and retail industries. For example, the software stack of prescription benefits provider Express Scripts was originally built around a mainframe. And hey, plenty of things are, and sometimes they work just fine. However, mainframes can be costly, and often do not lend themselves to architectures that are later on described as being “agile” or “low latency” or other things we normally like. Accordingly, Express Scripts has refactored its data architecture to a low-latency data pipeline based on the Confluent Platform. They’re a great example of a business that couldn’t easily remain competitive using technology paradigms of decades past. They responded appropriately, and are reaping the benefits.

Many more examples are coming to light every day, and if you’d like to learn more about how to build this kind of thing and how real-time pipelines fit into broader business concerns, I can’t think of a better use of your time—if you will pardon a moment of promotion—than attending Kafka Summit, where Capital One and Express Scripts shared their stories last year, and where many more developers are set to share their experiences in a few weeks. You can even use the code blog19 to get 30% off.

If you’re convinced but your boss isn’t, I’ve got you covered. I hope to see you there.

Other articles in this series

Tim is a teacher, author and technology leader with Confluent, where he serves as the senior director of developer experience. He can frequently be found at speaking at conferences in the U.S. and all over the world. He is the co-presenter of various O’Reilly training videos on topics ranging from Git to distributed systems, and is the author of Gradle Beyond the Basics. He tweets as @tlberglund and lives in Littleton, CO, U.S., with the wife of his youth and their youngest child, the other two having mostly grown up.

The Rise of Managed Services for Apache Kafka

$
0
0

As a distributed system for collecting, storing, and processing data at scale, Apache Kafka® comes with its own deployment complexities. Luckily for on-premises scenarios, a myriad of deployment options are available, such as the Confluent Platform which can be deployed on bare metal, virtual machines, containers, etc. But deployment is just the tip of the iceberg.

When it comes to Apache Kafka in the cloud, a number of considerations come into play: picking which compute instance is appropriate for the brokers, sizing the non-ephemeral storage accordingly, applying end-to-end security measures, ensuring high availability through availability zones, figuring out effective recoverability strategies to ensure SLAs, applying continuous observability practices, upholding data regulations, onboarding developers, etc. To simplify all of this, different providers have emerged to offer Apache Kafka as a managed service.

Although the concept of managed services is fairly common in databases (e.g., BigQuery, Amazon Redshift, and MongoDB Atlas) and caches (e.g., Cloud Memorystore, Amazon ElastiCache, and Azure Cache), applying this concept to a distributed streaming platform is fairly new. Before Confluent Cloud was announced, a managed service for Apache Kafka did not exist. This has changed over time, and we’d like to share some tips on how you can go about choosing the best option. This blog post goes over:

  • The complexities that users will run into when self-managing Apache Kafka on the cloud and how users can benefit from building event streaming applications with a fully managed service for Apache Kafka
  • How to differentiate a managed service from a purely hosted solution and also differentiate between a fully managed service and a partially managed service
  • Key characteristics of a fully managed service that you can trust for production and mission-critical applications

How do you spot a true fully managed service for Apache Kafka?

In order to answer this question, let’s start by understanding what Apache Kafka in fact is. Contrary to popular belief, it is not just another messaging technology but rather a distributed streaming platform.

Apache Kafka Website

Figure 1. Description from the Apache Software Foundation about what Kafka is

A distributed streaming platform combines reliable and scalable messaging, storage, and processing capabilities into a single, unified platform that unlocks use cases other technologies individually can’t. For example, traditional databases offer storage and data retrieval capabilities of past data, but they don’t help much if we need to asynchronously process future events, which is commonly in the arena of messaging technologies. In the same way, messaging technologies don’t have storage, thus they cannot handle past data.

By combining messaging and storage, Apache Kafka is able to handle both future and past data using the same underlying storage known as distributed commit log. This significantly reduces the number of network roundtrips often required to process both when they are being handled by different technologies. With stream processing capabilities that allow you to handle events as they happen (i.e., present data that is still in transit), Apache Kafka is the only technology capable of handling data from every point in time—past, present, and future—opening up the door for event streaming applications.Why combine past, present, and future data?

Figure 2. Event streaming applications are more common than you think.

Event streaming applications are changing the way people interact with services, hence the explosion of Kafka usage in recent years. To fully harness the power of Apache Kafka, developers should not rely only on messaging but leverage storage and stream processing capabilities as well. However, doing so can be a huge lift.

Managed service vs. hosted solution

Fortunately, there are managed services that provide the experience of using Apache Kafka without requiring knowledge on how to operate it. This is a characteristic of true managed services, because they must keep developers focused on what really matters, which is coding.

Hosted solutions are different. Some products may automatically create Kafka clusters in a dedicated compute instance and provide a way to connect to it, but eventually, users might need to scale the cluster, patch it, upgrade it, create backups, etc. In this case, it is not a managed solution but instead a hosted solution. The key distinction is that the user still has the responsibility of managing Apache Kafka as if it were running on-premises. Using hosted solutions to develop event streaming applications is just as hard as self-managing Kafka.

Most hosted solutions ask the user to provide a VPC. A VPC is an isolated network that allows resources to be launched. This is a cloud building block that belongs to the IaaS (infrastructure as a service) domain and involves many important design decisions. To provide a VPC, it must be created first, and therefore the user is manually making design decisions. Moreover, to create a VPC, the user must own the compute and network resources (another aspect of a hosted solution) and ultimately prove that the service doesn’t follow serverless computing model principles.

Hosted solutions may also ask users to specify how much storage per broker will be required. This delegates the responsibility of sizing to the user, which is an extremely complicated task that often leads to over-provisioning as a way to compensate for the lack of precision. Over-provisioning means that users will pay for resources that are not being used.Is the service offered a managed service for Kafka?

Figure 3. Managed services should not request the user to make hard design decisions.

A managed service should never put the user’s hand on the wheel to make hard decisions, such as:

  • Deciding details about how much hardware (e.g., CPU, memory, and disk) to use
  • Exposing details about the underlying network and compute infrastructure
  • Asking about the number of servers for a given component (aka sizing)
  • Asking the user to update the Kafka bits when a new release is made available
  • Installing the bits to enable stream processing separately

If a company needs to have control over all technical decisions around their Kafka deployment, note that it doesn’t necessarily need a managed service. It can simply use the Confluent Platform, which offers a complete set of tools for production deployments, as well as Confluent Operator to deploy Confluent Platform on Kubernetes. You can read more about Confluent Operator in this blog post from Neha Narkhede, CPO of Confluent, where she explains the motivations behind the technology and what problems it solves.

Fully managed services vs. partially managed services

Another aspect to consider while evaluating managed services is simplicity. By simplicity, we mean that the experience of using Kafka is as fast and as painless as possible. This can be measured in various ways, but for the sake of this blog post, we will stick with two simple measures:

  1. How many steps until you start working with Apache Kafka
  2. How long each step takes to complete

Confluent Cloud for instance, allows the user to effectively start working with Apache Kafka in 90 seconds. Now from the application perspective, all the information required to start working with Apache Kafka is in the bootstrap servers endpoint, which is the cluster that your application will connect to, and the API key and secret used to identify your application. On GitHub, you can find an example of a Go program that connects to a cluster in Confluent Cloud, creates a topic, writes a single record, and creates a consumer to read records from the topic.

If a managed service involves many complicated steps before the application is able to connect to Kafka, it is a partially managed service. Partially managed services introduce co-responsibility between the user and the provider. In this context, the provider asks the user to perform certain tasks to offload its own responsibility, and oftentimes these tasks are the hard ones.

Is the service offered a managed service for Kafka?

Figure 4. Criteria that separates fully managed services from partially managed services

For instance, partially managed services may ask the user to set up network channels to allow connectivity from outside the cloud provider (i.e., the internet) since by default these services only allow ingress and egress connectivity from the VPC that holds the cluster. This can lead to provider lock-in because the applications have no other option other than being co-located with the cluster. Though setting up network channels is an option, that does not come for free.

Another characteristic of partially managed services is that they grant users access to the guts of the cluster. One might be able to SSH into the compute instance that runs the broker, or even change the encryption keys that persistent volumes (used by the brokers for persistence) require to implement security at rest. In this context, though the cluster might have been automatically created by the provider, the user can change the settings directly. For some, this might seem like a good thing, but in reality it increases co-responsibility.

Partially managed services can be easily spotted by the fact that they lack a good story about users, groups, and permissions. If you look at this Go program, the program connects to the cluster in Confluent Cloud using an API key and secret instead of a username and password. This is a best practice for managed services that are accessed from thousands of applications and minimizes the burden from the user when it comes to maintaining databases for credentials.

Most partially managed services offer Apache Kafka as is so that the user is responsible for setting up authentication at a broker level. This significantly increases the complexity of having a managed service, because the user has to implement details that should be transparent to them. Once again, this falls into the co-responsibility model that we discussed before.

Finally, partially managed services ask users to manage all aspects of the distributed streaming platform beyond the Kafka cluster and what is included natively. Users must install, manage, and operate technologies from the Kafka ecosystem, such as Confluent Schema Registry, Kafka Connect, Kafka Streams, KSQL, etc. Although they say that their service is fully compatible with these technologies, the reality is that it’s another example of partially managed services relying on the co-responsibility model.

At this point, you should be fully equipped to spot a truly managed service by simply eliminating all options that may look like a hosted solution or a partially managed service.

Top five characteristics of a fully managed service

If you have reached this part of the blog, perhaps you have a few managed services for Apache Kafka in mind and you want to know which one you should choose. This section provides the top five characteristics that every fully managed service for Apache Kafka must have, so you can more confidently evaluate which ones are worth your time and money.

1. Serverless computing model

If you’ve read about any strategies on how to succeed with cloud, then you know that the ability to scale up and down computing resources harmonically as needed is by far the key to keeping costs low. In this context, harmonically refers to scaling up and down each resource in respect to their unique usage of computing resources. Furthermore, the user resources don’t need to be available by the time they are requested, and when there is no usage of the managed service, the resources are disposed of accordingly. Inability to do so results in a fixed cost for those resources and causes waste.

To better understand this, it is important to know which resources are necessary while deploying Kafka clusters in a given cloud provider. At a very minimum, you will need:

  • Compute: the instances that host your Kafka brokers and ZooKeeper
  • Storage: each instance will likely have non-ephemeral disks attached to it
  • Network: though you usually don’t pay for VPCs, there are bandwidth costs

Besides the minimum, other resources that may be necessary for your deployment include load balancers, SSL certificates, metrics and logs, NAT gateways (if each compute instance requires superior egress throughput), and encryption keys. Failure to plan ahead about how much you will use each of these resources will end up in oversizing to ensure that your deployment never runs out of capacity. Even if you plan ahead, sizing is a moving target. It often changes as your deployment encounters new requirements, or because quality attributes change, such as the need for more resiliency, fault-tolerance, security, etc.

Sizing is the art of measuring each component of architecture and understanding what the ratio of growth and shrinkage of that component is when there is a need to scale up and down. The scaling process can’t be the same for each component, because that would cause even more waste. Doubling the capacity of a Kafka cluster to handle write throughput is not just multiplying each individual component of its architecture by “n” (“n” being the representation of some empirical unit of scale), because each component behaves differently in regard to computing resources.

Hence, all the resources need to scale up and down harmonically. A deep understanding of how the cloud provider works, as well as how the software architecture (in this case, Apache Kafka) works in terms of computing resources consumption is necessary for accomplishing this.

Understanding cloud provider limits also ensures that seasonal workloads will not create situations that prevent you from spinning up a new cluster, for example, because the number of VPCs created exceed what is permitted by default. When limits have to be increased in the cloud provider, billing costs may also increase and the time taken to scale out the service may take longer as well. Limits make planning sizing ahead even more important.

Confluent Cloud addresses elasticity with a pricing model that is usage based, in which the user pays only for the data that is actually streamed. If there is no traffic in any of the created clusters, then there are no charges (excluding data storage costs). Usage is calculated solely based on ingress data, egress data, and storage. Confluent Cloud scales out and in and up and down automatically based on the load. It can scale from zero to 100 MBps at any time in a fraction of a second.

Another nice thing about Confluent Cloud is that it owns the resources used for clusters, freeing users from having to know (or more accurately, to guess) how to create and scale resources harmonically. In other words, Confluent Cloud is a truly serverless service for Apache Kafka.

New cluster

Figure 5. Users can benefit from serverless Apache Kafka with Confluent Cloud.

Note: A throughput of 100 MBps and data retention of 5 TB are the default limits for this service, but if you need more, Confluent Cloud Enterprise allows for much higher throughput measured in GBps, predictable latency under 30 ms, and unlimited data retention.

Elasticity is required not only for clusters but also for all the technologies that developers need to implement event streaming applications, such as Kafka Connect, Schema Registry, and Kafka Streams. A managed service ought to support these technologies without asking the user to take care of them individually.

2. One-stop shop for event streaming applications

As discussed before, Apache Kafka is a distributed streaming platform comprised of messaging, storage, and stream processing. By translating this into concrete technologies, you will find that Apache Kafka is made up of:

  • Core Kafka: brokers that implement messaging and storage capabilities
  • Clients API: framework for creating producers (writers) and consumers (readers)
  • Kafka Connect: framework for scalably moving data into and out of Apache Kafka
  • Schema Registry: repository service for metadata and schemas using the REST API
  • Kafka Streams: framework for implementing stream processing applications

Although this is an organized way of breaking down the technologies that make up Kafka, handling each of them as part of a distributed streaming platform is hard. Oftentimes, developers create multiple deployment silos for each one, requiring different implementation efforts. But a good managed service for Apache Kafka provides a consistent, integrated, and easy-to-use way for developers to use these technologies—they should not be managed separately. Any time a provider tells the user to take care of any one of those technologies on their own is a strong indication that the service is partially managed.

To better understand this, let’s walk through a scenario that shows a common implementation of Apache Kafka in the cloud. Imagine that a developer needs to send records from a topic to an S3 bucket in AWS. The appropriate implementation would be to use a connector running on Kafka Connect. The connector then periodically fetches records from topic partitions and writes them into the S3 bucket. Here are the tasks for this implementation:Write > Deploy > Tweak

Figure 6. Implementation effort to send records from a topic to an AWS S3 bucket

As you can see in Figure 6, there are at least three moving parts, each of which has a cost associated with it. When we refine the diagram to display that element, here is what we get:Write > Deploy > Tweak (Shown with Cost)

Figure 7. Implementation effort refined to include the element of cost

As you can see, not only is there a significant amount of dollars needed to build this, but there are also other costs involved like time. This includes learning how the APIs works for both the Kafka Connect and AWS S3 APIs, writing the actual code for the connector, and maintaining the connector as the APIs for Kafka Connect and AWS S3 change (i.e., updating, testing, and redeploying it).

That’s just part of the cost. Developers also need to work on the other moving parts like managing the Kafka Connect cluster where the connector is deployed. This is no easy task. Creating and maintaining clusters for Kafka Connect includes tedious, error-prone tasks like downloading the bits of Kafka Connect, creating compute instances and storage to install the bits, setting up the connector, configuring Kafka Connect for scalability and fault-tolerance using the distributed mode, and tweaking the VPC to enable connectivity to the Kafka cluster.This last task may be as simple as setting up route-tables, firewalls, and subnets if Kafka Connect is co-located in the same VPC that the Kafka cluster also runs—but it may require a more complex setup like VPC peering if they belong to different VPCs.

Even if you automate the lifecycle of Kafka Connect and the connector deployment through infrastructure-as-code technologies (e.g., Terraform, Ansible, or Puppet), the cost of cloud resources still applies. For this scenario, you would pay for compute instances and storage, likely more than needed in order to ensure a minimum level of reliability.

Note: automation of resources using infrastructure as code, as the name implies, is still coding, and therefore should not be treated as if there was no coding at all. Infrastructure as code typically leads to a development effort that is just as hard as performing tasks manually since it requires a deep understanding of what is being created in the given cloud provider.

Fortunately, scenarios like the one described above can be implemented in an easy way. Confluent Cloud, for example, provides out-of-the-box connectors so developers don’t need to spend time creating and maintaining their own. There are different connectors available, such as ActiveMQ, HDFS, JDBC, Salesforce, cloud storage (GCP, Azure, and AWS), IBM MQ, and RabbitMQ, to name a few.

More importantly, Confluent Cloud provides Kafka Connect as a service, which means that there is no need for users to maintain Kafka Connect clusters on their own. By using a truly serverless approach, you can be more agile and focused on your work.

Kafka Connect as a service in Confluent Cloud

Figure 8. Native support for Kafka Connect and the Amazon S3 Data Sink connector in Confluent Cloud

In addition to the Kafka bits, a managed service should also provide tools that make your life easier during implementation. For example, instead of simply asking you to use the Kafka Streams API in your own Java applications, a managed service should provide a way to implement streaming processing in a much faster runtime with KSQL. Confluent Cloud provides built-in support for KSQL, where you can deploy continuous queries using the same serverless experience offered for Kafka clusters and Kafka Connect.

KSQL in Confluent Cloud

Figure 9. Native support for KSQL in Confluent Cloud

Thanks to the SQL-like syntax of KSQL, there is no need to write Java code, and because the code will execute in the managed service, there is no extra cost with compute instances and storage.

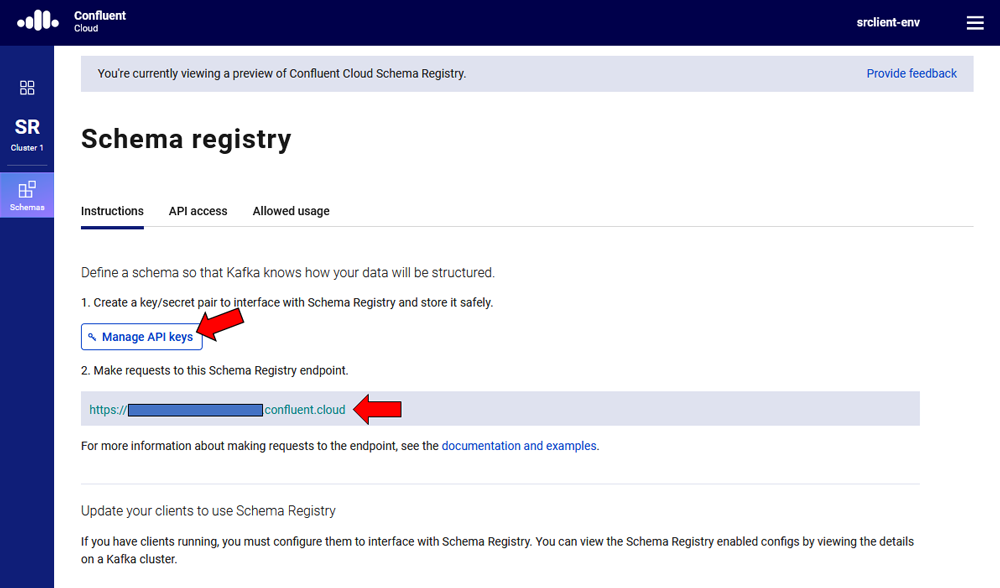
Also, there is built-in support for Schema Registry in Confluent Cloud, so event pipelines that require schema management, evolution, and enforcement can be easily implemented as well.

Schema Discovery

Figure 10. Native support for Schema Registry in Confluent Cloud

In summary, the managed service should be a one-stop shop for event streaming applications. It should provide all the tools needed to build event streaming applications with no need to look anywhere else.

3. Support provided by Apache Kafka experts

There’s no question that Apache Kafka is a popular open source project with an extremely bright and vibrant community worldwide that makes it what it is. With the technology changing very fast, however, it is hard to become an expert if you are not directly involved with the project as a committer or member of the community who actively attends conferences, joins meetups, and participates in social media.

Most managed services are based on the last official release of Apache Kafka. This seems reasonable because it will contain the latest features and bug fixes, but it does not guarantee that the managed service will be stable, since running the software in the cloud brings unique challenges as previously discussed. Stability comes when the source code is battle tested against production-like environments, which in turn shapes technical decisions around changing the source code if limitations are found. Applying these changes in the codebase used by a managed service in production requires a deep understanding of Apache Kafka and, therefore, experts from the engineering team.

Continuing with our previous example, Confluent Cloud is based on a codebase that is ahead of the last official release of Apache Kafka. The bits running in production come from a branch that contains the source code from the master branch of Apache Kafka, merged with stable snapshots upstream, as well as plugins and add-ons that Confluent builds to operate Confluent Cloud flawlessly. Moreover, the bits include any changes made in the source code that were the result of the battle-proven tests mentioned earlier. By using this strategy, we solve different problems related to stability that would not be possible if we had to wait for the next stable release of Kafka.

The first problem solved with this strategy is performing rolling upgrades to a new Apache Kafka version quickly. If you run a codebase that is ahead of the last official release, then the time necessary to upgrade your clusters is minimal, since any issues found during the normal upgrade process have been solved already. The second improvement is a faster bug fix cycle. You don’t have to wait for the next official release of Kafka and avoid getting stuck due to bugs in the software.Confluent Cloud vs. Other Managed Services

Figure 11. Confluent Cloud runs with a codebase that is more stable than the last official release.

Using managed services that are backed by experts also means a superior support experience. Per usual, you can file support tickets about issues with the operation of the service, but there also might be situations where you want to ask advanced questions related to the core technology and how it can be tuned to optimize application performance. While arguably all managed services might provide a channel for things like this, the ones with Apache Kafka experts are more qualified to provide detailed and effective answers in a timely manner.

Confluent provides the best support service for Apache Kafka on the planet, but what few people know is that you can have this for Confluent Cloud too.

Confluent Cloud Support Plans: Basic | Developer | Business

Figure 12. Users can upgrade their account to obtain support from Confluent.

The interesting part about this approach is that Confluent doesn’t force you into a paid support plan. You are absolutely free to remain on the basic plan which is included by default. Users that are interested in having Confluent back their event streaming applications can optionally select a plan that suits their needs. To upgrade, simply click on the button found in the top right part of the UI (the button known as hamburger menu) and select “Support plans.”

Another benefit of using managed services backed by Kafka experts is the ability to use technologies beyond Apache Kafka. Perhaps you need to implement a feature in your Go program that depends on the idempotent producer. This feature is available for Java clients because it is part of the reference implementation for Apache Kafka, but you would have to introduce this functionality to your Go client. You would miss project deadlines due to technical difficulties.

The scenario presented could be easily addressed with a managed service that provides native clients for different programming languages, beyond what is provided by Apache Kafka. This would require real Apache Kafka experts developing these native clients, keeping them up to date with new features in Apache Kafka, as well as collaborating with support teams when asked technical questions about these clients. Just like before, this goes beyond merely offering Kafka clusters as a service.

Confluent Cloud provides native clients for programming languages like Java, C/C++, Go, .NET, Python, and Scala. All these clients are developed and supported by Confluent, which has an engineering team dedicated to this.

4. Apache Kafka interoperability

It should be unnecessary to say that all managed services must provide full interoperability with Apache Kafka, but unfortunately, it isn’t. Interoperability refers to full support for common tools and frameworks used by developers working with Apache Kafka and all its features.

When building applications, implementing code that relies on specific features of Apache Kafka is inevitable. To prevent duplication of records during transmission from the client to the broker, you will likely enable the idempotent producer feature. You might also enable support for transactions by writing code that performs writes to multiple topics and partitions atomically, as well as writing code to ensure that consumers will only read records that have been committed.

For the written code to leverage all these features, the application must connect to a full-fledged Kafka cluster. For managed services that are not based on Apache Kafka, any application connecting to them will not be able to leverage the features. As much as possible, explore a managed service’s support options for Kafka before the project starts to avoid refactoring your code to overcome the limitation.

Certain providers that have proprietary messaging technologies provide proxies for Kafka clients to enable client connectivity. While this may seem shiny from the outside, their interoperability with Apache Kafka is deficient. Developers are sometimes are told to stick with the managed services offered natively by the company’s chosen provider and therefore must comply.

However, decisions like this should be revisited if the team feels that what the provider has to offer is not enough and might cause future technical debts of refactoring the code. The team should then prove to the company that it will be less expensive than using another managed service because it ensures that no code will have to be refactored. Though this sounds simple in theory, proving it often requires building prototypes that lack interoperability.

To speed things up, ask the provider for a code example that demonstrates the usage of a required feature. They may formally notify you that their managed service does not support that feature because what they provide is simply a proxy that translates client requests made to their messaging platform using the Kafka client API. It’s your best resource to prove that using another managed service is the solution.Client Applications ➝ Confluent Cloud | Other Managed Services

Figure 13. Managed services that are not based on Apache Kafka lack important features.

Having to use different tools and frameworks is another aspect to watch out for. Some providers include the Apache Kafka APIs with their proprietary SDK as an attempt to create lock-in. In their minds, if you use their SDK while building applications, then you will be so tightly coupled with the provider and leaving them will be harder.

This is effective, because some developers blindly believe that using the provider’s SDK will save them the hassle of thinking about code optimization, code performance, and development best practices. Although sometimes the SDK might actually provide all of this, it still leads to tight coupling with the provider. As a best practice, you should use the tools and frameworks provided by Apache Kafka to avoid provider lock-in and ensure more productivity by reusing the same tools and frameworks on premises. There are many resources out there that help you do this, including this post on how to use Kafka tools to connect to clusters running on Confluent Cloud.

Confluent Cloud provides full-fledged Kafka clusters so that client applications can leverage all the features from the technology. Moreover, the code written by developers is the same one written for Kafka clusters running on premises; thus, there is no requirement to learn different tools and frameworks.

Besides the problems discussed thus far, certain providers may have other subtle limitations, such as handling throttling rules related to how often a consumer can commit offsets for a given partition. In this context, the provider throttles commit offset attempts that extrapolate the minimum of “x” commits per second, queueing them so they don’t overflow the managed service. The consequence is having to change the code to bring the throttling logic to the application—or even worse—having to change the code to commit the offsets asynchronously, which could in turn lead into other collateral problems if the code has to ensure consistency while consuming the records.

5. No cloud provider lock-in

The problem of vendor lock-in predates cloud computing, and people are generally aware of its consequences. But the issue is worse than it seems due to the nature of cloud. Providing a way for developers to implement applications without having to worry about infrastructure and platform details diminishes their ability to fully understand how locked in they actually are. It becomes impossible to evaluate how much time it will take to migrate your applications from one provider to another because there is no clear understanding of which parts are deeply tied to the provider.

Users nowadays are even more concerned and may avoid a specific cloud provider altogether if there are any red flags around leaving one provider for another. For this reason, it’s important that managed services for Apache Kafka offer support for different cloud providers. More importantly, it should be possible to move away from one cloud provider without any technical barriers.

For example, imagine that there’s a team of developers who need to build a cloud-based application. This application relies on Apache Kafka to deliver certain event streaming capabilities, so they decide to use the managed service that their chosen provider offers in its portfolio, instead of looking for one that avoids provider lock-in. This managed service implements authentication using certificates, which means that any client connecting to the Kafka cluster will have to import the client credentials from the certificate. Now, imagine that the team is then told to migrate the application to another provider because of some new corporate directive, such as an acquisition, merger, or because the costs with this other provider are lower.

They start the migration process to the other provider, which should be smooth since it is all Apache Kafka, right? First, they use the same approach of using what the new provider offers in its portfolio. Secondly, they migrate the data from the topics, a task that they will likely accomplish by using MirrorMaker or Confluent Replicator to replicate the data while the source and target clusters run side by side. Third, they perform comprehensive tests in the application to make sure that nothing is broken due to the migration.

Now here comes the bummer. The new managed service doesn’t implement authentication with certificates but instead uses credential pairs. This impacts all clients that need to connect with the Kafka cluster, including the application itself. Unsurprisingly, this delays the team’s ability to migrate the application, and requires them to refactor their code to start leveraging the credential pairs provided by the new managed service.

Provider A ➝ Provider B fails

Figure 14. Managed services should promote a consistent developer experience across cloud providers.

Situations like this can be avoided by using managed services that treat Apache Kafka equally across different cloud providers. To do this, these managed services support multiple cloud providers, as well as ensure that the developer experience is the same across them. The latter is even more complicated to deliver than the former, because ensuring that the developer experience is the same across cloud providers requires many levels of abstraction to be in place, and this is hard to implement.

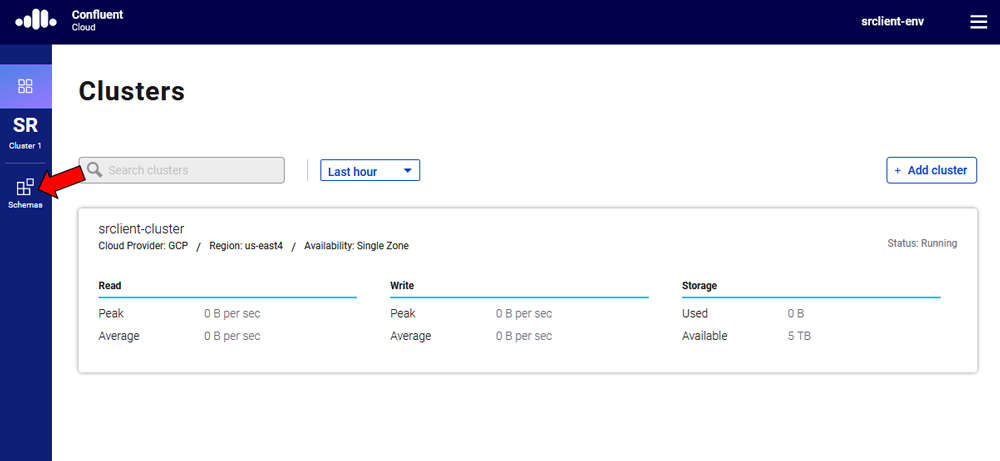
Confluent Cloud delivers this beautifully. It not only supports major cloud providers such as GCP, Azure, and AWS, but it also ensures that the developer’s experience is exactly the same in all of them. Users are welcome to choose from any of these cloud providers and at the same time can have multiple clusters, with each one running on a different cloud provider.

Clusters

Figure 15. Confluent Cloud supports clusters running on different cloud providers.

This fundamentally changes how Apache Kafka is used in the cloud because now users can choose which cloud provider to work with purely based on their cost, while the experience of how they will connect to clusters, build applications, migrate data, and monitor the managed service is exactly the same.

One thing to note is that some companies would like to use services like Confluent Cloud that support all major cloud providers, but as if they were a native service from one of the cloud providers. Supporting multiple cloud providers avoids the problem of lock-in, but it may incidentally create other operational problems like different bills, as well as dealing with different support teams. A good example would be a company that heavily uses GCP as their cloud provider, but wants to use Kafka from Confluent Cloud. If they follow the standard process of signing up directly with Confluent, they will end up having two bills: the existing one with Google Cloud and a new one with Confluent.

To avoid problems like this, Confluent announced its partnership with Google to make Confluent Cloud a native service on GCP. As a result, developers benefit from the best managed service via familiar tools, such as GCP Console and the gcloud command-line tool. But even cooler than this is the ability to have an integrated billing model and first-line support provided directly by Google.

Summary

The journey to unlocking the benefits of event streaming can be long and painful due to the infrastructure challenges that this architectural style may bring. This is true especially if the plan is to implement event streaming applications in the cloud. Luckily, services such as Confluent Cloud provide a complete, fully managed, serverless, and easy-to-use event streaming platform built on top of Apache Kafka that allows developers to be focused on what they do best: developing applications.

This blog post has provided the key points you need to identify and evaluate a true managed service for Kafka. As a next step, I invite you to experiment with Confluent Cloud and try out the examples from this GitHub repository. There are examples written in many programming languages, and they will give you the boost you need to start streaming without worrying about infrastructure details.

Ready to start?

To learn more, sign up for Confluent Cloud today and start streaming with the best managed service for Apache Kafka. I will also be giving a talk at Kafka Summit in San Francisco on September 30th at 4:45 p.m. called Being an Apache Kafka Developer Hero in the World of Cloud. The session will cover how to quickly build an event streaming application, in which attendees will get to play Pac-Man on their phones to generate events while Confluent Cloud handles the computation part. No experience is required to attend this session. Use the code blog19 to get 30% off, and I hope to see you there!

Ricardo Ferreira is a developer advocate at Confluent, the company founded by the original co-creators of Apache Kafka. He has over 21 years of experience in software engineering, where he specializes in different types of distributed systems such as integration, SOA, NoSQL, messaging, API management, and cloud computing. Prior to Confluent, he worked for other vendors, including Oracle, Red Hat, and IONA Technologies, as well as several consulting firms.

How to Make the Most of Kafka Summit San Francisco 2019

$
0
0

Kafka Summit San Francisco is just one week away. Conferences can be busy affairs, so here are some tips on getting the most out of your time there.

Expo Hall at Kafka Summit San Francisco

Plan

Go and check out the schedule. Spend a bit of time familiarising yourself with what sessions you want to get to, and mark them on your calendar. How do you pick which sessions to attend? My advice: diversify! If you eat and breathe Apache Kafka® internals, go to some of the Internals talks (because who wouldn’t want to know the gory details of Incremental Cooperative Rebalancing), but also broaden your awareness by going to some of the fantastic Use Case track talks, such as The Art of the Event Streaming Application: Streams, Stream Processors, and Scale or Using Kafka to Discover Events Hidden in your Database on the Event-Driven Development track. Can’t bear to miss out on talk X or Y? The great news is that they’re all recorded and available for your viewing pleasure online forever after.

  • Protip: go to the talks you want to go to, not the ones you feel you ought to go to—unless, you know, your boss who paid for your trip told you to go and find out about upgrading Kafka, in which case, you probably should. But in general, all the talks are going to be interesting, and you’re going to learn something wherever you go to.
  • Protip: by all means, block out a full day of sessions, but mark the ones that you really really want to go to. Why? Because there are actually five tracks at Kafka Summit, the fifth being the “hallway track.” Conversing about connectors? Discussing deduplication? Strategising about streams? Sometimes, you’ll find that those conversations just happen, and when you glance at your phone, you’ll want to be able to know whether to continue it whilst you’re in the zone, or if you’re about to miss that one session you flew all the way to San Francisco for. You know, like maybe this one. 😉

Don’t plan too much

As alluded to above, sometimes it’s best to just go with the flow. Conferences are one of the best places to chat with, interact with—dare I even say network with people using the same technologies you are. There are plenty of opportunities to do this, including the party on the first night, but oftentimes you’ll just want to have those conversations and follow your nose as to what’s going to be interesting and relevant to you. All sessions are recorded afterwards, so don’t worry about missing one—it’s the in-person chats and chance encounters that you won’t be able to recreate once you’re sitting back at your desk after the conference.

Say hello

Instead of getting your phone out, why not turn to the person next to you and say hello? Lots of people at conferences may be new to it or don’t know other people—so say hi, introduce yourself, and find out what’s brought them to Kafka Summit.

Remember that speakers are human, too

Go and say hello to the speakers. They generally won’t bite, and they will want to speak to you! Ask questions. Hopefully they like what they talk about so they’ll love to say some more about it. Don’t have a question but just want to say hi? Go and do it! Not sure what to say? Take a streaming selfie with them. Trust me, they will almost certainly not mind if you ask. 🙂

One of the great things about Kafka Summit is having a concentration of so many experts in one place, so make the most of it. Also, note that the best place to chat with the speakers is in the hallway, rather than at the end of a session when they’re trying to pack up their stuff before the next speaker, who is waiting to get on stage.

Know the logistics

The venue

Kafka Summit San Francisco 2019 is located at the Hilton San Francisco Union Square.

Coming and going

Kafka Summit starts with keynote talks at 9:30 a.m. that Monday morning, so you’ll probably want to arrive in San Francisco on the Sunday night before at the latest. There’s then two jam-packed days of talks, up until until 5:35 p.m. the following Tuesday, including this fascinating one from NASA’s Jet Propulsion Laboratory.

If you’re in town early, consider signing up for the half-day tutorial on September 29th, or make a week out of it by sticking around for the developer, KSQL & Kafka Streams, operations, and adv.Kafka optimization training courses.

Look after yourself

Conferences are intense. Drink plenty of water, and take time to step out into the daylight and fresh air once in a while. Don’t feel bad about skipping a session if you need to; just hang out in the hallway, chat to the vendors, grab some swag at the booths, or simply go outside and walk around the block to clear your head. There’s lots to learn and take in!

Tweet

#KafkaSummit is the hashtag to use, and you’ll find plenty of people posting #streamingselfies too. In fact, you’ll probably find a bunch of people at Summit whom you only recognise based on their Twitter handle or avatar, so consider writing your own Twitter handle on your conference badge as well.

Enjoy it!

You’re going to learn a lot, have a bunch of interesting conversations, and hopefully enjoy a great time at Kafka Summit!

Don’t miss the last week to register with the code blog19 to get 30% off. See you in San Francisco!

Robin Moffatt is a developer advocate at Confluent, as well as an Oracle Groundbreaker Ambassador and ACE Director (alumnus). His career has always involved data, from the old worlds of COBOL and DB2, through the worlds of Oracle and Hadoop and into the current world with Kafka. His particular interests are analytics, systems architecture, performance testing, and optimization. You can follow him on Twitter.

Incremental Cooperative Rebalancing in Apache Kafka: Why Stop the World When You Can Change It?

$
0
0

There is a coming and a going / A parting and often no—meeting again.
—Franz Kafka, 1897

Load balancing and scheduling are at the heart of every distributed system, and Apache Kafka® is no different. Kafka clients—specifically the Kafka consumer, Kafka Connect, and Kafka Streams, which are the focus in this post—have used a sophisticated, paradigmatic way of balancing resources since the very beginning. After reading this blog post, you will walk away with an understanding of how load balancing works in Kafka clients, the challenges of existing load balancing protocols, and how a new approach with Incremental Cooperative Rebalancing allows large-scale deployment of clients.

Following what’s common practice in distributed systems, Kafka clients use a group management API to form groups of cooperating client processes. The ability of these clients to form groups is facilitated by a Kafka broker that acts as coordinator for the clients participating in the group. But that’s where the Kafka broker’s involvement ends. By design, group membership is all the broker/coordinator knows about the group of clients.

The actual distribution of load between the clients happens amongst themselves without burdening the Kafka broker with extra responsibility. Load balancing of the clients depends on the election of a leader client process within the group and the definition of a protocol that only the clients know how to interpret. This protocol is piggybacked within the group management’s protocol and, thus, is called the embedded protocol.

The embedded protocols used so far by the consumer, Connect, and Streams applications are rebalance protocols, and their purpose is to distribute resources (Kafka partitions to consume records from, connector tasks, etc.) efficiently within the group. Defining an embedded protocol within Kafka’s group management API does not restrict its use to load balancing only. Such use of an embedded protocol is a universal way for any type of distributed processes to coordinate with each other and implement their custom logic without requiring the Kafka broker’s code to be aware of their existence.

Embedding the load balancing algorithm within the group management protocol itself offers some clear advantages:

  • Autonomy: clients can upgrade or customize their load balancing algorithms independently of Kafka brokers.
  • Isolation of concerns: Kafka brokers support a generic group membership API and the details of load balancing are left to the clients. This simplifies the broker’s code and enables clients to enrich their load balancing policies at will.
  • Easier multi-tenancy: for Kafka clients such as Kafka Connect, which balance heterogeneous resources among their instances and potentially belong to different users, abstracting and embedding this information to the rebalance protocol makes multi-tenancy easier to handle at the clients level. In this case, multi-tenancy is not yet another feature that the brokers have to worry about being aware of.

To keep things simple, all rebalancing protocols so far have been built around the same straightforward principle: a new round of rebalancing starts whenever a load needs to be distributed among clients, during which all the processes release their resources. By the end of this phase, which reaffirms group membership and elects the group’s leader, every client gets assigned a new set of resources. In short, this is also known as stop-the-world rebalancing, a phrase that can be traced back to garbage collection literature.

Challenges when stopping the world to rebalance

A load balancing algorithm that stops-the-world in every rebalance presents certain limitations, as seen through these increasingly notable cases:

  • Scaling up and down: Unsurprisingly, the impact of stopping the world while rebalancing is relative to the number of resources being balanced across participating processes. For example, starting 10 Connect tasks in an empty Connect cluster is different than starting the same number of tasks in a cluster running 100 existing Connect tasks.
  • Multi-tenancy under heterogeneous loads: The primary example here is Kafka Connect. When another connector, probably from another user, is added to the cluster, the side effect of stopping a connector’s tasks is not only undesirable but also disruptive at large scale.
  • Kubernetes process death: whether in the cloud or on-premises, failures are anything but unusual. When a node fails, another node quickly replaces it, especially when an orchestrator like Kubernetes is used. Ideally, a group of Kafka clients would be able to absorb this temporary loss in resources without performing a complete rebalance. Once a node returns, the previously allocated resources would be assigned to it immediately.
  • Rolling bounce: intermittent interruptions don’t only occur incidentally due to environmental factors. They can also be scheduled deliberately as part of planned upgrades. However, a complete redistribution of resources should be avoided because scaling down is only temporary.

Despite workarounds to accommodate these use cases, such as splitting clients into smaller groups or increasing rebalancing-related timeouts, which tend to be less flexible, it became clear that stop-the-world rebalancing needed to be replaced with a less disruptive approach.

Incremental Cooperative Rebalancing

The proposition that gained traction in the Kafka community and aimed to alleviate the impact of rebalancing that the current Eager Rebalancing protocol exhibits in large clusters of Kafka clients is Incremental Cooperative Rebalancing.

The key ideas to this new rebalancing algorithm are:

  • Complete and global load balancing does not need to be completed in a single round of rebalancing. Instead, it’s sufficient if the clients converge shortly to a state of balanced load after just a few consecutive rebalances.
  • The world should not be stopped. Resources that don’t need to change hands should not stop being utilized.

Naturally, these principles lend themselves to the name of the proposition behind the improved rebalance protocols in Kafka clients. The new rebalancing is:

  • Incremental because the final desired state of rebalancing is reached in stages. A globally balanced final state does not have to be reached at the end of each round of rebalancing. A small number of consecutive rebalancing rounds can be used in order for the group of Kafka clients to converge to the desired state of balanced resources. In addition, you can configure a grace period to allow a departing member to return and regain its previously assigned resources.
  • Cooperative because each process in the group is asked to voluntarily release resources that need to be redistributed. These resources are then made available for rescheduling given that the client that was asked to release them does so on time.

Implementation in Kafka Connect – Connect tasks are the new threads

The first Kafka client to provide an Incremental Cooperative Rebalancing protocol is Kafka Connect, added in Apache Kafka 2.3 and Confluent Platform 5.3 through KIP-415. In Kafka Connect, the resources that are balanced between workers are connectors and their tasks. A connector is a special component that mainly performs coordination and bookkeeping with the external data system, and acts either as a source or a sink of Kafka records. Connect tasks are the constructs that perform the actual data transfers.

Even though Connect tasks don’t usually store state locally and can stop and resume execution quickly after they restore their status from Kafka, stopping the world in every rebalance could lead to significant delays. In some cases—also known as rebalance storms—, it could bring the cluster into a state of consecutive rebalances and the Connect cluster could take several minutes to stabilize. Before Incremental Cooperative Rebalancing and due to rebalancing delays, the number of Connect tasks that a cluster could host was often capped below the actual capacity, giving the wrong impression that Connect tasks are out-of-the-box heavy weight entities.

With Incremental Cooperative Rebalancing, a Connect task can be what it was always intended for: a runtime thread of execution that is lightweight and can be quickly scheduled globally, anywhere in the Connect cluster.

Scheduling these lightweight entities (potentially based on information that is specific to Kafka Connect, such as the connector type, owner or task size, etc.) gives Connect a desirable degree of flexibility without overextending its responsibilities. Provisioning and deploying workers, which are the main vehicles of a Connect cluster, is still a responsibility of the orchestrator in use—that being Kubernetes or a similar infrastructure.

Let’s now take a look at what happens when we need to rebalance connectors and tasks in a Kafka Connect cluster of Apache Kafka 2.3 and beyond.

1. A new worker joins (Figure 1). During the first rebalance, a new global assignment is computed by the leader (Worker1) that results in the revocation of one task from each existing worker (Worker1 and Worker2). Because this first rebalance round included task revocations, the first rebalance is followed immediately by a second rebalance, during which the revoked tasks are assigned to the new member of the group (Worker3). During both rebalances, the unaffected tasks continue to run without interruption.

Figure 1. A new worker joins.

Figure 1. A new worker joins.

2. An existing worker bounces (Figure 2). In this scenario, a worker (Worker2) leaves the group. Its departure triggers a rebalance. During this rebalance round, the leader (Worker1) detects that one connector and three tasks are missing compared to the previous assignment. This enables a scheduled rebalance delay, controlled by the configuration property scheduled.rebalance.max.delay.ms (by default, it is equal to five minutes).

As long as this delay is active, the lost tasks remain unassigned. This gives the departing worker (or its replacement) some time to return to the group. Once that happens, a second rebalance is triggered, but the lost tasks remain unassigned until the scheduled rebalance delay expires. Then, all workers rejoin the group, triggering a third rebalance. At this time, the leader (Worker1) detects that there is a set of unassigned tasks, and a new worker keeps the group in a state of balanced load. As a result, the leader decides to assign the previous unaccounted tasks (one connector and three tasks) to the worker that bounced back in the group (Worker2).Figure 2. An existing worker bounces.

Figure 2. An existing worker bounces.

3. An existing worker leaves permanently (Figure 3). This scenario is identical to the previous one except that, here, the departing worker (Worker2) does not rejoin the group in time. In this case, its tasks (one connector and three tasks) remain unassigned for the time equal to scheduled.rebalance.max.delay.ms. After that, the two remaining workers (Worker1 and Worker3) rejoin the group, and the leader redistributes the tasks that were unaccounted for during the scheduled rebalance delay to the existing set of active workers (Worker1 and Worker3).Figure 3. An existing worker leaves permanently

Figure 3. An existing worker leaves permanently.

New rebalancing in action

What’s the quantifiable improvement when using the new load balancing? What is the actual effect on individual connectors running on the Connect cluster, and what are its scaling characteristics? The new rebalancing algorithm raises these questions and more.

To provide answers to these important questions, I conducted a number of tests. These results can help quantify the improvements that Incremental Cooperative Rebalancing is bringing to Kafka Connect and highlight what these improvements mean for Kafka Connect deployments.

The first set of tests evaluated rebalancing itself as a procedure in terms of cost and scaling. Figure 4 shows how Eager Rebalancing compares side by side with Incremental Cooperative Rebalancing when a large number of connectors and tasks is running on a Kafka Connect cluster consisting of three workers. All connectors are Kafka Connect S3 connectors. There are a total of 90 connectors, each running 10 tasks, with a total of 900 tasks. The test ran on AWS using m4.2xlarge instance types to run the workers. To reflect a more realistic scenario, data records were consumed from a Kafka cluster in Confluent Cloud, which was located in the same region as the Kafka Connect cluster.

Figure 4. The cost (y-axis) and timeline (x-axis) of startup and shutdown for 900 S3 sink connector tasks with Eager Rebalancing and Incremental Cooperative Rebalancing

Figure 4. The cost (y-axis) and timeline (x-axis) of startup and shutdown for 900 S3 sink connector tasks with Eager Rebalancing and Incremental Cooperative Rebalancing

The total number of rebalances (y-axis) and timeline of startup and shutdown (x-axis) for 900 S3 sink connector tasks with Eager Rebalancing and Incremental Cooperative Rebalancing

Figure 5. The total number of rebalances (y-axis) and timeline of startup and shutdown (x-axis) for 900 S3 sink connector tasks with Eager Rebalancing and Incremental Cooperative Rebalancing

Comparing Figure 4 and Figure 5 is telling. On the left-hand side of each of these graphs, Eager Rebalancing (which stops the world whenever a connector along with its tasks starts or stops) has a cost that is proportional to the number of tasks that currently run in the cluster. The cost is similar both when the connectors are started or stopped, resulting in periods of around 14 and 12 minutes, respectively, for the cluster to stabilize. In contrast, on the right-hand side, Incremental Cooperative Rebalancing balances 900 tasks within a minute and the cost for each individual rebalance remains evidently independent of the current number of tasks in the cluster. The bar charts in Figure 6 show this clearly by comparing how long it took to start and stop 90 connectors and 900 tasks.

Figure 6. Comparison of the time it takes to sequentially startup and shutdown 900 S3 sink connectors through Connect’s REST interface

Figure 6. Comparison of the time it takes to sequentially startup and shutdown 900 S3 sink connectors through Connect’s REST interface

The second round of tests revealed the impact of rebalancing on the overall throughput of tasks in a specific Connect cluster. Since rebalancing can happen at any time, measuring just the bytes that a connector transfers to the sink alone is not enough. In order to capture the real-world impact of rebalancing on a set of active connectors, throughput should be examined as the overall end-to-end process that includes record transfer and commission of consumed offsets back to Kafka. It’s the final step of committing offsets that tells us that the S3 sink connector has made actual progress under the presence of rebalances.

Because consumer offsets are not exposed for reset by the hosted Kafka service, this next test instead used a self-managed Kafka deployment with five Kafka brokers running on m4.2xlarge instance types in the same region as the Connect cluster. The Kafka Connect cluster consists of three workers here too. Throughput is measured based on the timestamp of the consumer offsets with millisecond granularity. The results of running 900 S3 sink connector tasks with Eager Rebalancing and Incremental Cooperative Rebalancing, respectively, are presented in Table 1:

90 S3 Connectors/900 Tasks Against a Self-Managed Kafka Cluster Eager Rebalancing Incremental Cooperative Rebalancing Improvement with Incremental Cooperative Rebalancing
Aggregate throughput (MB/s) 252.68 537.81 113%
Minimum throughput (MB/s) 0.23 0.42 83%
Maximum throughput (MB/s) 0.41 3.82 833%
Median throughput (MB/s) 0.27 0.54 101%

Table 1. Comparison of rebalancing protocols in terms of measured throughput when running 900 tasks on three Connect workers for (a) all tasks, (b) tasks that achieved the minimum throughput, (c) tasks that achieved the maximum throughput, and (d) tasks that achieved the median throughput

The rows in Table 1 show the aggregate throughput achieved by all 900 tasks, as well as what the throughputs of the slowest, fastest, and median tasks were. Throughput is improved in all cases with Incremental Cooperative Rebalancing. In most cases, throughput is at least doubled when Incremental Cooperative Rebalancing is used.

What these results show is that Incremental Cooperative Rebalancing allows workers to run tasks without disruptions, and this can dramatically increase their throughput compared with Eager Rebalancing. The ability to sustain performance across multiple rebalances is particularly evident when comparing the tasks that achieved maximum throughput with either of the two protocols. For Incremental Cooperative Rebalancing, the highest performing task is more than nine times faster than the task that achieved maximum throughput under Eager Rebalancing.

Finally, although it’s expected for throughput to converge in both cases after the Connect cluster stabilizes, it’s worth noting that long periods without a rebalance taking place are not guaranteed, especially at large scale. Therefore, this difference in overall throughput could be considered rather typical between the two protocols.

Conclusion

Kafka Connect has been used in production for many years as the platform of choice for businesses that want to integrate their data systems with Apache Kafka and create streams. With Incremental Cooperative Rebalancing, connectors are able to scale beyond current limits. Enabling Connect to run at large scale allows for more centralized and manageable connector deployments that are otherwise fragmented into smaller clusters that are difficult to operate. In Kafka consumers and Kafka Streams, Incremental Cooperative Rebalancing is coming soon with the changes proposed by KIP-429 and KIP-441, which will also allow consumer and Streams applications to scale out without stopping the world.

To learn and hear more about how Incremental Cooperative Rebalancing redefines resource load balancing in Kafka clients, come to Kafka Summit San Francisco and attend my deep dive talk on the topic. Register using the code blog19 for a 30% discount!

Konstantine Karantasis is a software engineer at Confluent. He’s a main contributor to Apache Kafka and its Connect API, and an author of widely used software, such as Confluent’s S3 and Replicator connectors, class loading isolation in Kafka Connect, Incremental Cooperative Rebalancing in Kafka, the Confluent CLI and more. Previously, he built scalable open source web services at Yahoo! and researched high-performance computing at the University of Illinois at Urbana-Champaign. Konstantine holds a Ph.D. from the University of Patras.

Viewing all 175 articles
Browse latest View live